DesKilo

User Guide

DesKilo — your space, working together.

I am

Open DesKilo

A coworking space run by the people who use it

Everyone

Picture a room where freelancers, makers and small teams share tables, a kettle and a Wi-Fi password — and the only things anyone has to ask are where can I sit today, what do I owe, and who needs to say yes? DesKilo answers those three questions for communities that run their own space.

  • Know where you can sit. A live floor plan, bookings by half-day or by the hour, check-in and check-out, a shared calendar.
  • Know what you owe. One honest account per member: subscription, extra days, shared expenses, payments, statements and invoices — the same figures for the member and for the person who runs the space.
  • Run it your way. Roles, approvals, opening hours, prices, wording and colours are yours to set, in a handful of screens, without a landlord platform in the middle.
  • Belong to a network. One personal account follows you across every space you join; spaces that want to be found publish a page, and people can talk privately.

DesKilo is free software (AGPL-3.0). It runs on phones, tablets, desktops and the web, speaks English, French, German, Spanish and Italian, and keeps your community's data portable: use the hosted service, or run the backend yourself.
Start a space of your own

Everyone

You do not need a building, a business plan or an IT team to begin. A few shared desks in a back room, an association's meeting room, two floors above a café: if people gather to work, DesKilo gives them a floor plan to book, rules they agree on, and a ledger that nobody has to keep in a spreadsheet.

In about twenty minutes you can have a space people can join: a name, a plan, opening times and someone to say yes. Money, invoices, a kiosk at the door and a look of your own come later — when you want them, in the order that suits you. Try everything first in the demo workspace, which belongs to nobody and costs nothing, then follow the Setup Guide from the first step to the first booking.

Tip Open the demo, switch between the owner, an administrator and a member, and book a desk. Ten minutes there will tell you more than any description.

Join the project

Everyone

DesKilo is built in the open by a small community, and there is room for you:

  • Try it and tell us. Install the app (the web app needs nothing; the Android closed test and the iPhone TestFlight beta are open on request) and report what surprises you.
  • Share what you know. Running a coworking space teaches things no developer knows. Tell us what your community needs and what got in your way.
  • Translate and improve the guides. This guide and the Setup Guide are plain text files in five languages, with screenshots that a single command re-shoots; a correction is a small change.
  • Build. The code, the roadmap and the open issues are public, with the conventions a new contributor needs.
  • Host. Run your own backend for your community, or ask to use the reference deployment.

The project on GitHub · Open the web app · Android closed test · iPhone beta

How to use this guide

Everyone

Every section answers one question — "how do I…?" — and opens with the people it is for, so you can skip what is not yours. The screenshots come from the demo workspace, Atelier du Marché, whose people and figures are invented.

Pick your path

You are… Start here
New to DesKilo Getting started
A member booking places Reserve · Money
An administrator Collaborate · Members & plans
An owner setting a space up Your space · Billing · Tax & invoicing
Running an installation Advanced

Good to know

  • In the app, every ? next to a field opens this guide at that field.
  • The audience line names the narrowest group the section is for: Member, Administrator, Owner, Co-owner, Billing administrator or Operator. What you see in the app depends on your role and on the features your owner switched on.
  • Blue text is a link: to another section, or to the screen itself.
Chapter 01

Getting started

What DesKilo is and who does what

Everyone

You want to know what the app is for and what you may do in it. DesKilo answers three everyday questions of a shared workspace: where can I work, what do I owe, and who needs to approve this. Around the spaces sits Me, your own account, which follows you into every space you belong to.

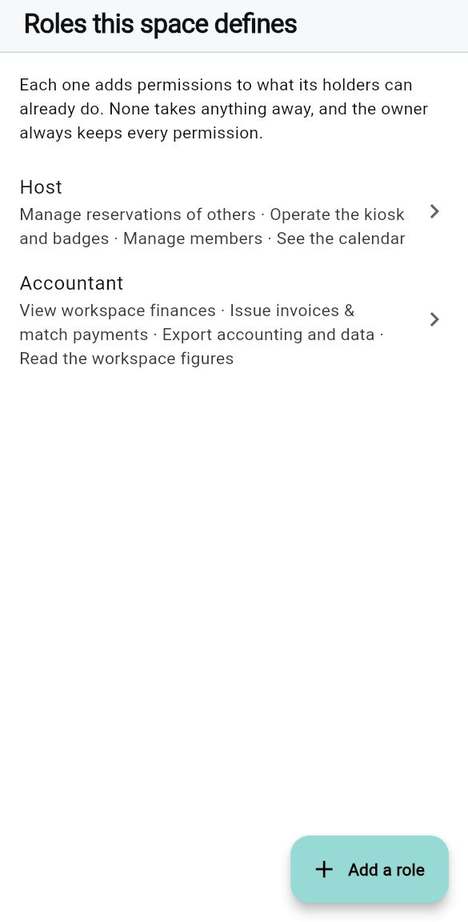
Inside a space, what you may do depends on your role. Roles add up: everyone is a member, and the others come on top.

Role What it is for
Member Book places, check in and out, write messages, follow your own money.
Administrator Everything a member does, plus acting for other members and approving requests, as far as the owner has allowed.
Owner Everything: the floor plan, prices, roles and the space's settings. A space always keeps at least one owner.
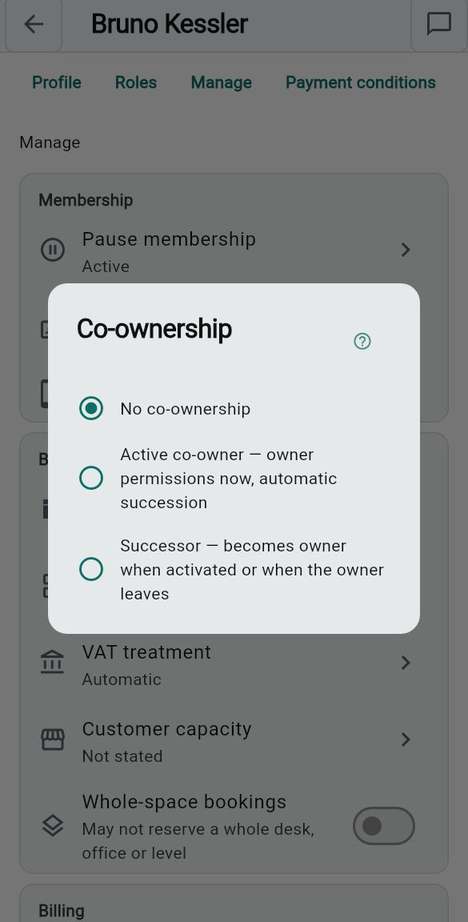
Co-owner An active co-owner holds the owner's permissions now. A successor, the passive kind, takes over when the owner leaves or promotes them.
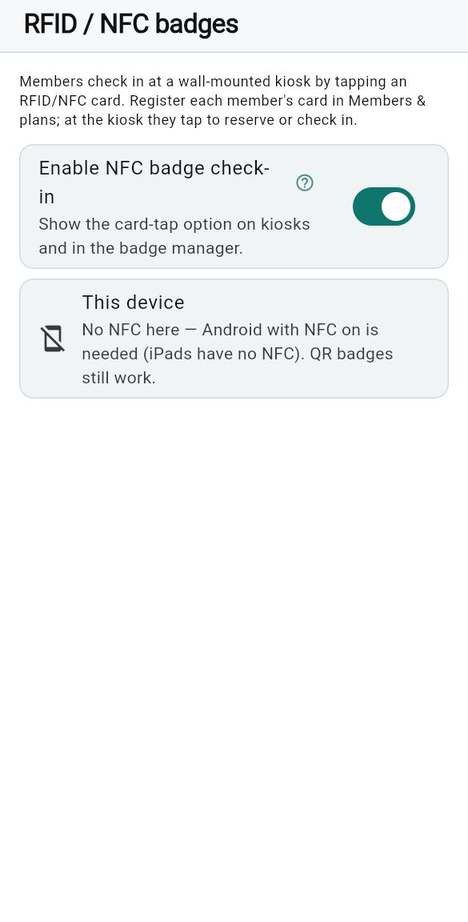
Kiosk device A tablet on the wall that shows the plan. Members act on it with their badge.

Steps

  1. Open Settings, named My account when you administer nothing.
  2. Choose What you can do here.
  3. Read which role gives you each ability. A member sees As every member; an administrator also sees From the Administrator role.

Good to know

  • The owner decides in the role matrix what administrators and other roles may do, so two spaces can differ.
  • A space can have other roles besides these, for example one for billing. They appear in the same list.
  • There is no invitation that makes someone an owner: only an existing owner grants ownership.

See also: The role matrix · Join a workspace

What DesKilo is and who does what

Three paths through this guide

Everyone

You do not need to read everything first. Pick the path that matches what you want to do now: each step is a section of this guide, in the order you need it.

Path Steps, in order Done when
First time as a member Create an account or sign in → Join a workspace → Book a place → Read your statement → Check in and check out You booked, you know what it costs, and you checked in and out.
Put a space into service A few shared places → Draw rooms, desks and seats → Working hours → Booking limits → Invite a member → The Calendar tab A member you invited has booked, and you see the booking.
First month-end Invoicing at a glance → What the app issues, and what stays with your accountant → The month-close wizard → Chase and settle open invoices → Accounting exports The month is invoiced within what the app supports, payments are matched, and the file is with your accountant.

Good to know

  • A small space needs only the first two paths. Invoicing, VAT and the advanced features can wait until the space needs them, and switching a feature off deletes nothing.
  • The setup guide explains the why and the order for a new space; this guide explains the clicks.

See also: What DesKilo is and who does what · The order to switch things on

Create an account or sign in

Everyone

You want to get in, whether this is your first time or your hundredth. One account works in every space you join on the same server.

Steps

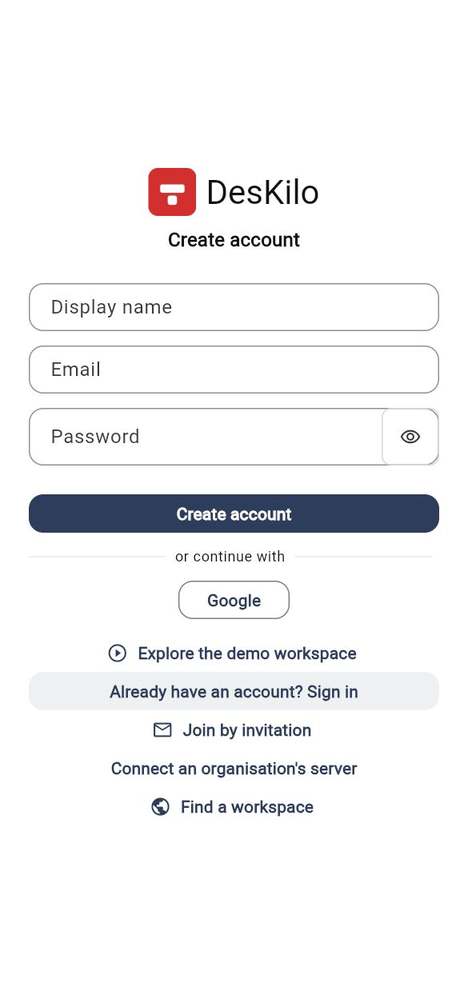
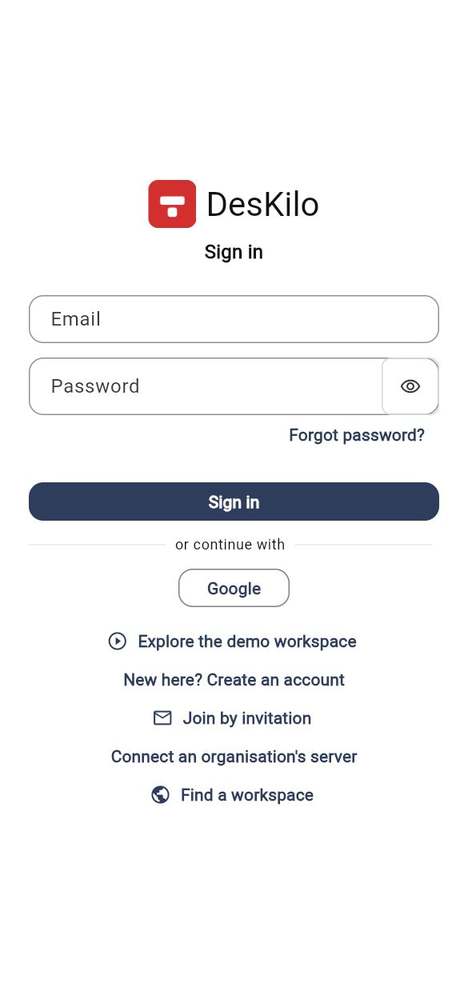
  1. Open the app. The sign-in screen asks for your Email and Password.
  2. To sign in, tap Sign in.
  3. To make a new account, tap New here? Create an account, add a Display name, and tap Create account. The password needs at least 8 characters.
  4. If the server offers it, tap Google under or continue with.
  5. Some servers ask you to confirm your address first. The screen Check your e-mail says a link was sent: open it on this device. If nothing arrives, look in the spam folder or tap Send the e-mail again.

Good to know

  • The eye button beside the password shows or hides what you type.
  • The first time you sign in, you are asked to read and accept the privacy terms before anything else opens.
  • A new account with no space lands on Me, where you can find, join or create a space.
  • Join by invitation on the sign-in screen keeps the errand in mind: you make your account, then paste your invitation.

See also: Reset a forgotten password · Join a workspace · Your data, your rights

Create an account or sign in

Your account, your spaces and your server

Everyone

You want to know what follows you from one space to the next, and why the app sometimes asks you to sign in again. This guide uses four words, always in the same sense:

Word The question it answers What it is
Account Who am I? Your e-mail, password, name and personal settings. It lives on one server.
Membership What may I do in this space? Your role, your plan, your bookings and your money in one space. Each space sets its own rules.
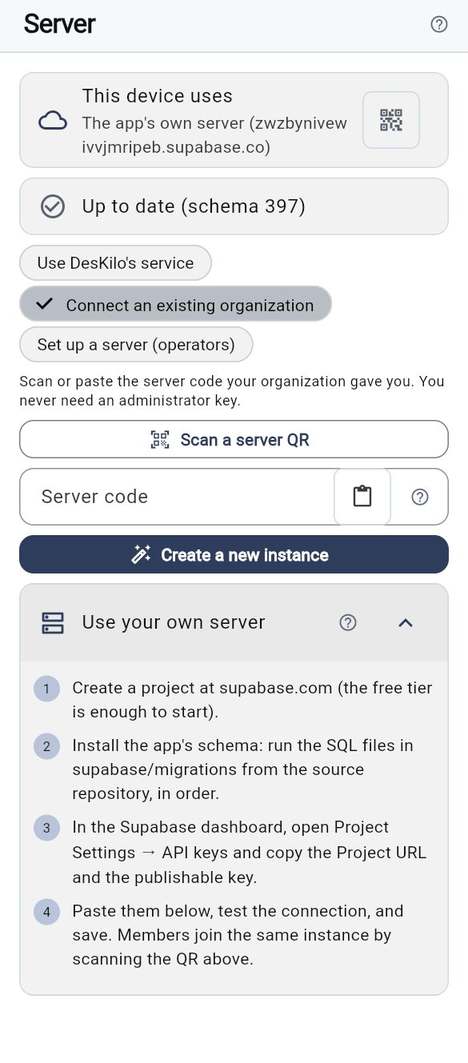
Server Where is this space kept? The installation that stores the space: the shared reference server, or one that an organisation runs itself.
Session Am I signed in here? Your sign-in on this device, to one server at a time.

Good to know

  • One account covers every space on the same server: joining another space there adds a membership, not an account.
  • A space kept on another server needs an account on that server. Opening it switches server and asks you to sign in there; your account on the first server stays as it is.
  • Changing server signs you out, because your account lives on the server you leave.

See also: Create an account or sign in · Me: your home and your spaces · Your own server

Reset a forgotten password

Everyone

You cannot remember your password. You get a one-time code by e-mail and use it to set a new one. There is no link to click, so it works even where links do not open the app.

Steps

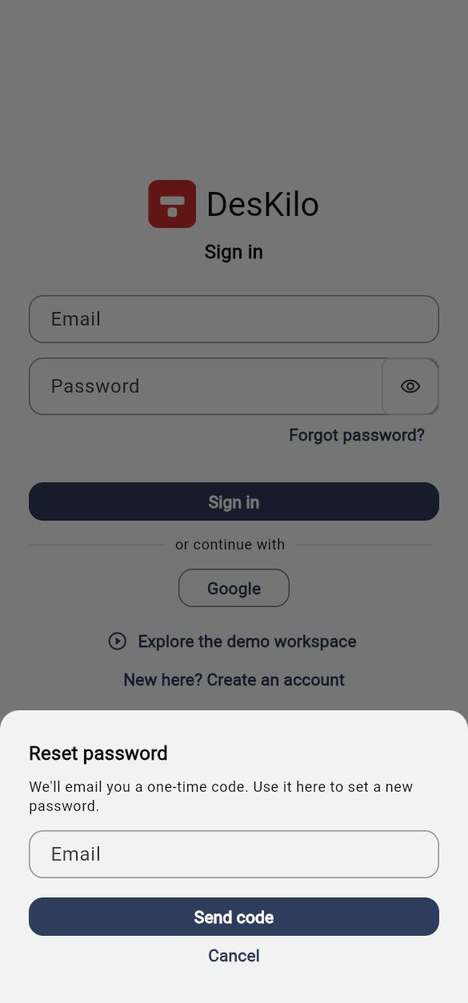
  1. On the sign-in screen, tap Forgot password?.
  2. Type your Email and tap Send code.
  3. Open the e-mail and copy the code.
  4. Type it into Code from the email, choose a New password and tap Set new password.

Good to know

  • The message Password updated — you are signed in. confirms that it worked; you do not sign in again.
  • A code that is invalid or has expired is refused: ask for a new one.
  • If the code is accepted but the password is not saved, tap Save the new password again.

See also: Create an account or sign in

Reset a forgotten password

Explore the demo workspace

Everyone

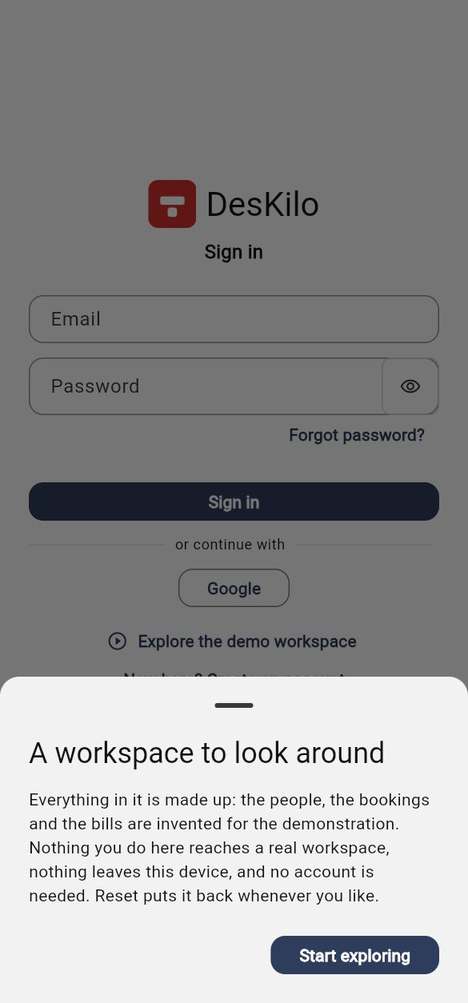
You want to look around before you commit to anything. The demo is a made-up space, Atelier du Marché: the people, bookings and bills are invented, nothing you do reaches a real space, and no account is needed.

Steps

  1. On the sign-in screen, tap Explore the demo workspace.
  2. Read the note, then tap Start exploring.
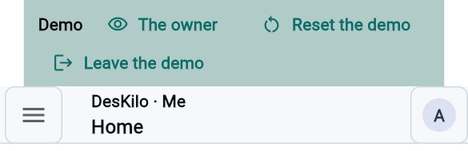
  3. Use the strip at the top to choose who you look through: The owner, A member or An administrator. Each tap on the name moves to the next one.
  4. Tap Reset the demo to put everything back as it started.
  5. Tap Leave the demo when you are done.

Good to know

  • The strip is marked Demo and stays above every screen, so you cannot mistake it for a real space.
  • Seeing the same screen as the owner, an administrator and a member is the quickest way to learn what each role can do.
  • The demo stays on this device. Leaving it does not create an account.
  • Discover in Me lists the demo space and two invented neighbours, Le Quai Numérique and La Fabrique des Halles. Read a page and its Plans and prices, ask to join or Write to the hosts: the demo answers, and nobody real receives anything. As the owner or an administrator, Messages holds a stranger's visit request to answer.

See also: What DesKilo is and who does what · Create an account or sign in

Explore the demo workspace

Join a workspace

Everyone

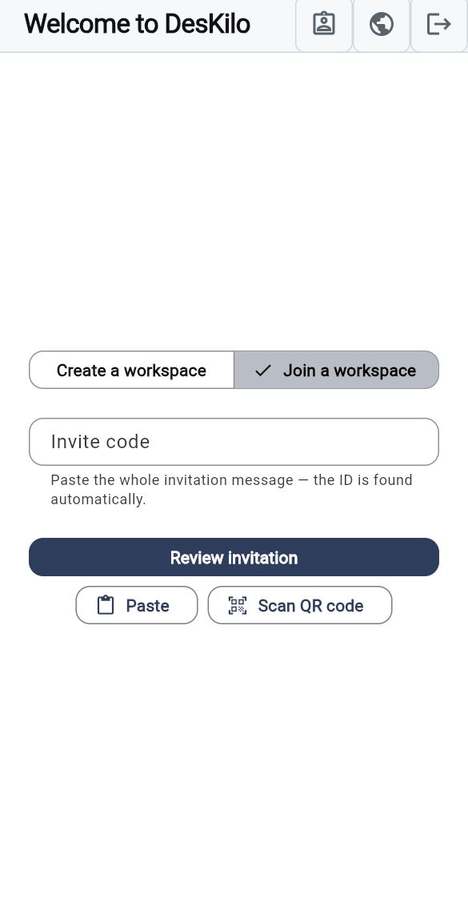
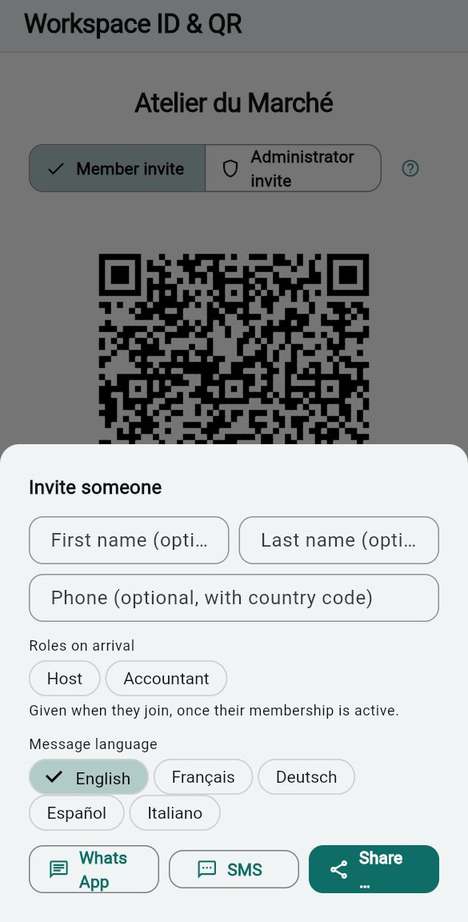
You were given a workspace ID, a QR code or an invitation message, and you want in. You ask to join as a member, and an administrator lets you in.

Steps

  1. Sign in, then tap Join with a code on Me. From the sign-in screen, Join by invitation takes you there once you have an account.
  2. On Welcome to DesKilo, keep Join a workspace selected.
  3. Type the workspace ID into Invite code, or paste the whole invitation message: the ID is found automatically. Paste reads it from the clipboard, and Scan QR code opens the camera on a printed code.
  4. Tap Review invitation. The card Check before you join names the workspace, its server, the role offered and whether an administrator must approve.
  5. Tap Join workspace.

Good to know

  • Until an administrator approves, you see Workspace membership awaiting approval. Check again refreshes it, and your other spaces and your account stay available.
  • You join with exactly the role the invitation carries. The workspace ID always joins as a member; a personal admin code joins once, as an administrator.
  • An expired or replaced code is explained on screen: ask the sender for a current one.
  • In a browser the camera cannot scan: type the ID or paste the message instead.
  • If the card names another server, Use this server switches this device to it.

See also: The workspace ID · Me: your home and your spaces

Join a workspace

Create a workspace

Everyone

You run a community and want a space of your own. You become its owner at once.

Steps

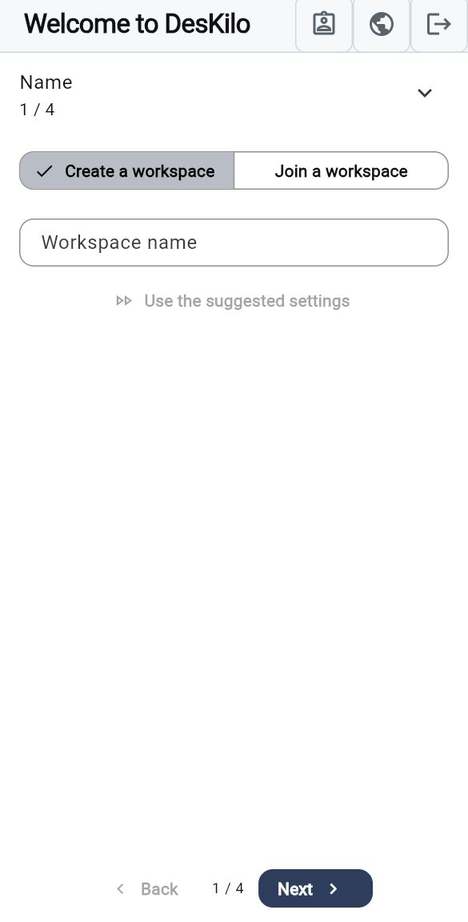
  1. Open Create a workspace from Create a space on Me.
  2. Type a Workspace name, then tap Next. Use the suggested settings skips straight to the last step.
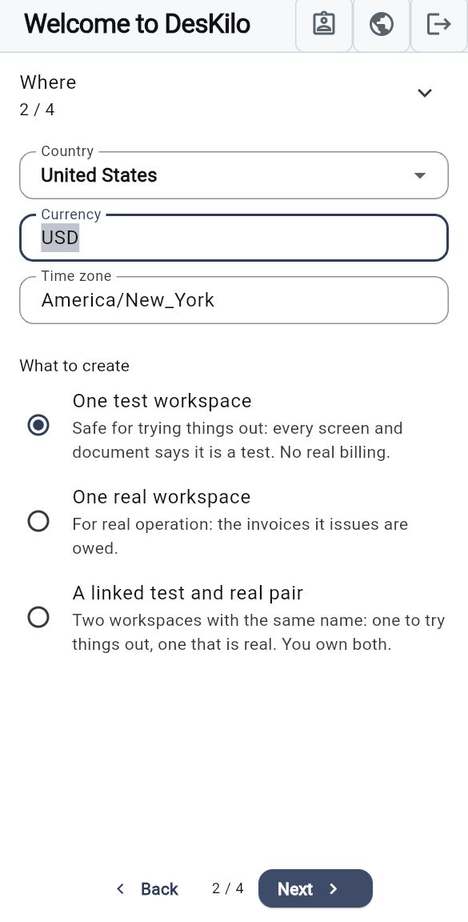
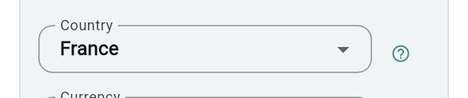
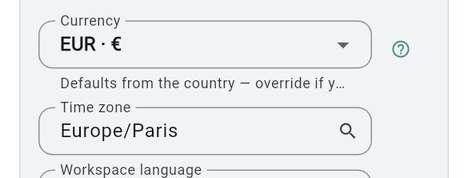
  3. On Where, choose the Country; the Currency and Time zone follow it, and you can change them.
  4. On the same screen, under What to create, pick One test workspace, One real workspace or A linked test and real pair.
  5. On Start from, choose Empty space to draw your own plan, or a ready-made template.
  6. On Confirm, read what will be created and tap Create workspace.

Good to know

  • The selector starts on One test workspace, which is safe for trying things: every screen and document says so, and there is no real billing. A real one issues invoices that are owed.
  • The pair gives you two spaces with the same name, one to try things in and one that is real. You own both.
  • If the answer is lost on the way, the app keeps your entries and offers Retry as sent, so you never create the space twice.
  • The new space opens as soon as it exists. Setting it up is covered in the owner chapters.

See also: Prepare a space with the setup questionnaire · The workspace ID

Create a workspace
Create a workspace

Find a workspace

Everyone

You do not have a code but you would like to find a space near you. Spaces that publish a page appear in a public directory.

Steps

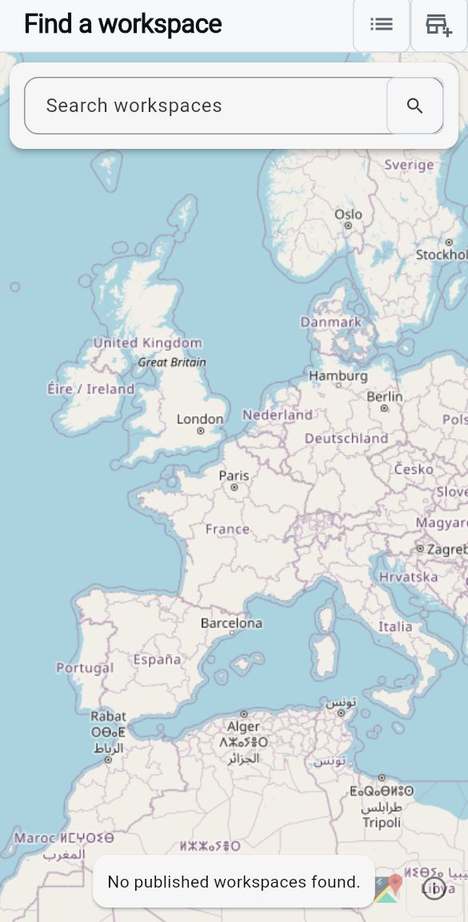
  1. Tap Find a workspace on the sign-in screen, or open Discover on Me.
  2. Type a name or a place into Search workspaces.
  3. Switch between the Map and the List with the button at the top.
  4. Open a result to read its public page. There, Request a workspace profile asks to join, and Enter opens a space you already belong to.

Good to know

  • Only spaces that chose to be visible are listed. In the demo, the map shows the demo space and two invented neighbours; their pages, a request to join and a message to their hosts all stay inside the demo.
  • You can look without an account; joining needs one.

See also: Join a workspace

Find a workspace

Me: your home and your spaces

Everyone

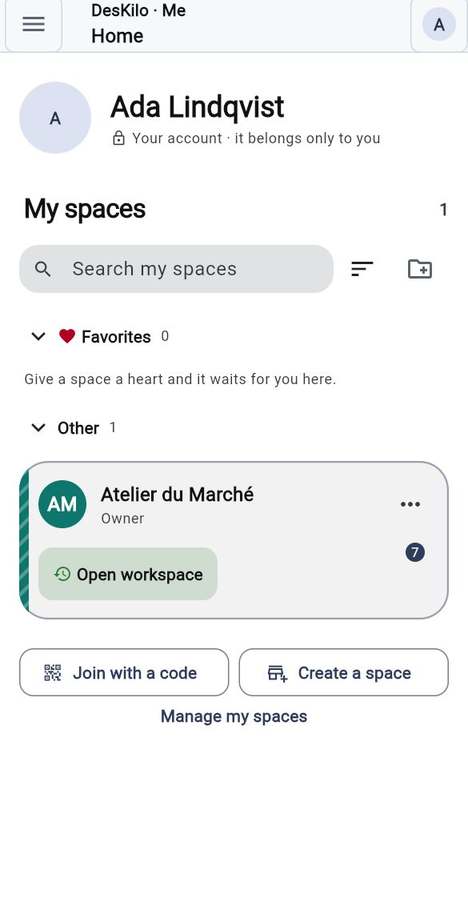
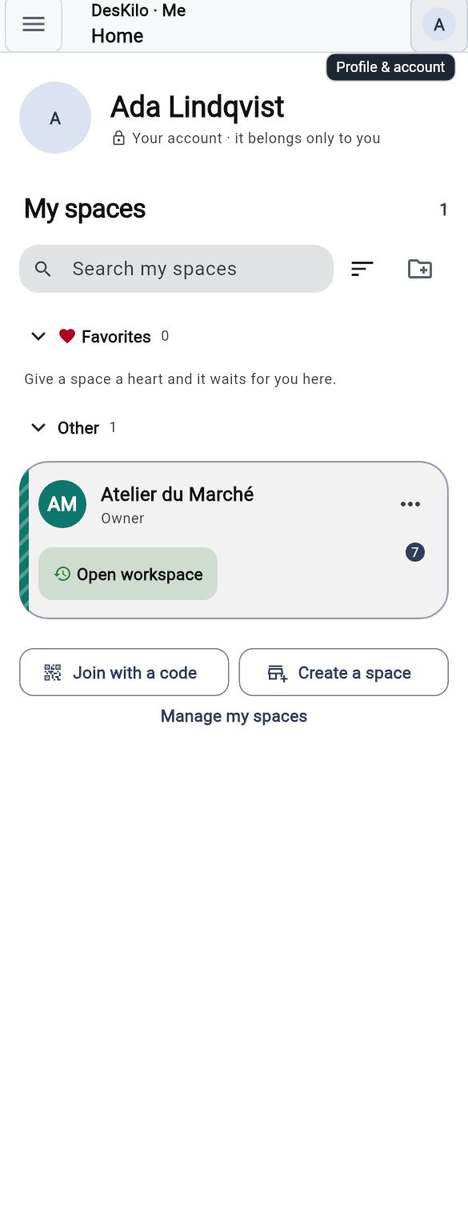
You want one place that shows who you are and every space you belong to. Me is yours alone and never takes a space's colours. Under your name, My spaces lists each space as one card.

Steps

  1. Open Me. If you owe money somewhere, a card at the top says To pay and opens your finances.
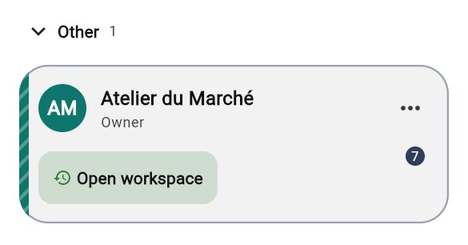
  2. Find your space under My spaces. A real space has an Open workspace button; a space with a test twin also has Test space.
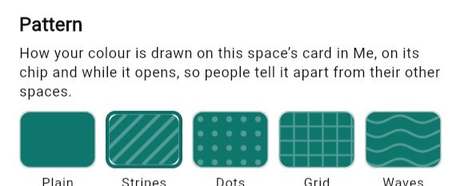
  3. Tap the button to enter. The screen fills with the space's colour, pattern and logo, then the space opens.
  4. Tap Join with a code or Create a space below the list to add another.

Good to know

  • The small clock on a button marks the side you used last.
  • The small number on a button counts what waits for you there, side by side for the real space and its test twin. Press and hold the button to read the full sentence.
  • The pattern on the card's left edge is the space's own identity. If animations are switched off, the space simply opens.
  • A space that is still Waiting for approval shows that instead of your role.
  • A space that lives on another server shows Open on that server; opening it switches server and asks you to sign in there.

See also: Keep your spaces in order · Profiles: one account, several spaces

Me: your home and your spaces

Keep your spaces in order

Everyone

You belong to several spaces and want your own order. Hearts, groups, stars and the order are yours and stay on this device.

Steps

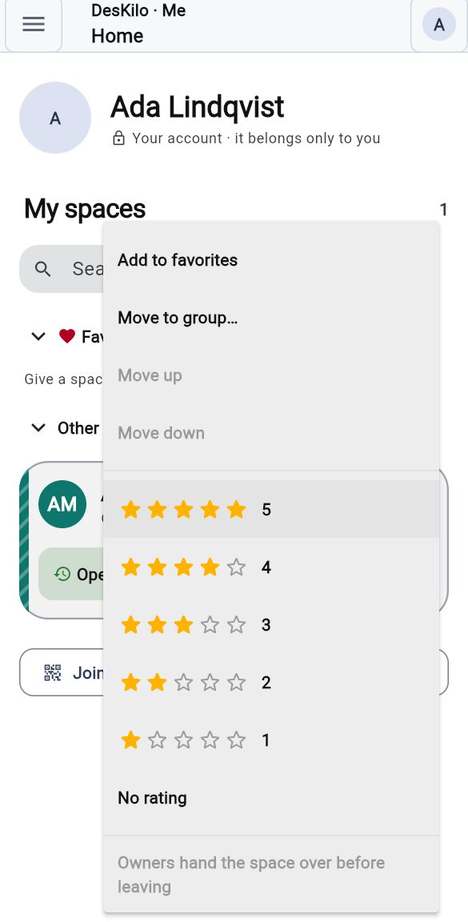
  1. On Me, tap the three dots on a space's card.
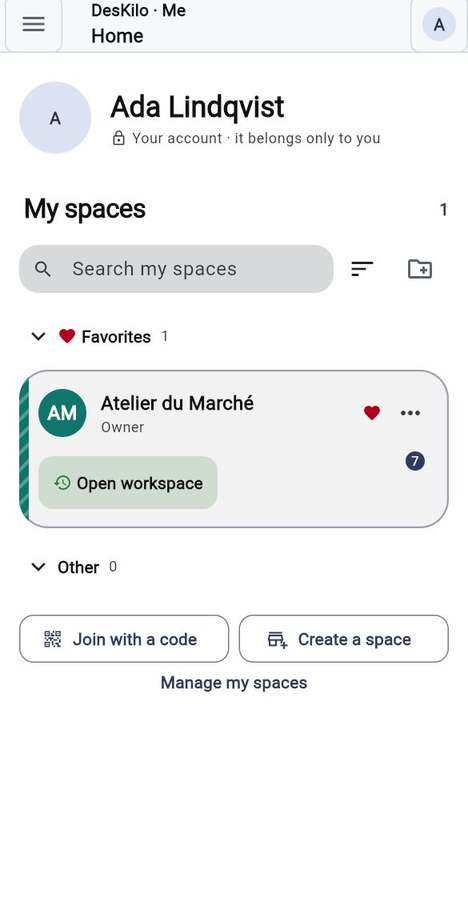
  2. Choose Add to favorites: the space moves to Favorites and shows a heart.
  3. Choose Move to group… to file it in another group, or tap the folder button above the list for New group.
  4. Tap one of the five stars to rate the space, or No rating to clear it.
  5. Type in Search my spaces to filter, and use the sort button to choose My order, Recently used, Best rated or A–Z.

Good to know

  • In My order, hold a card for a second to drag it, or use Move up and Move down.
  • Tap a group's name to fold it. Groups you made can be renamed or deleted from their menu; Favorites and Other are always there.
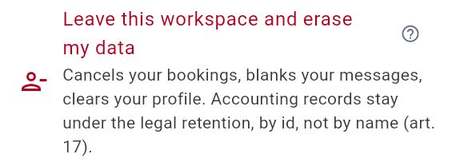
  • Leave this space is in the same menu. You stop being a member; bookings, invoices and messages stay with the space. Owners hand the space over first.
  • Manage my spaces at the bottom opens the profiles list.

See also: Profiles: one account, several spaces · Erase my data

Keep your spaces in order

Profiles: one account, several spaces

Everyone

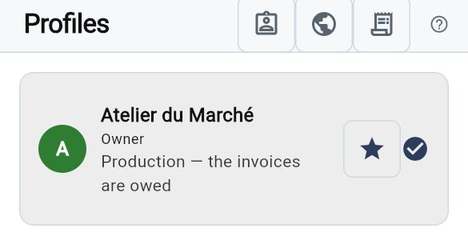
One account can belong to many spaces. Each space gives you a profile there: your role and your own data. The Profiles list shows them all and decides which one the app opens with.

Steps

  1. Open Profiles, or tap Manage my spaces on Me.
  2. Read each row: the space's name, your role there and the environment it is in.
  3. Tap a row to switch to that profile. The check mark shows the Active profile. The app opens with it next time, on every device.
  4. To make a profile the default without switching to it, tap the star (Use as default at startup); tap it again to clear it.
  5. Tap Add a profile to join or create one more space.

Good to know

  • A space with a test twin shows one row that opens into two choices, Development — for trying things out and Production — the invoices are owed. Tap the one you want; the check mark follows.
  • Everything you see in the app belongs to the active space.
  • Your account, photo and language are not part of a profile: they are in Me and the same everywhere.

See also: Me: your home and your spaces · Join a workspace

Profiles: one account, several spaces

Find your way around

Everyone

You are in a space and want to reach a screen. Everything is in one menu, and a few buttons sit at the top.

Steps

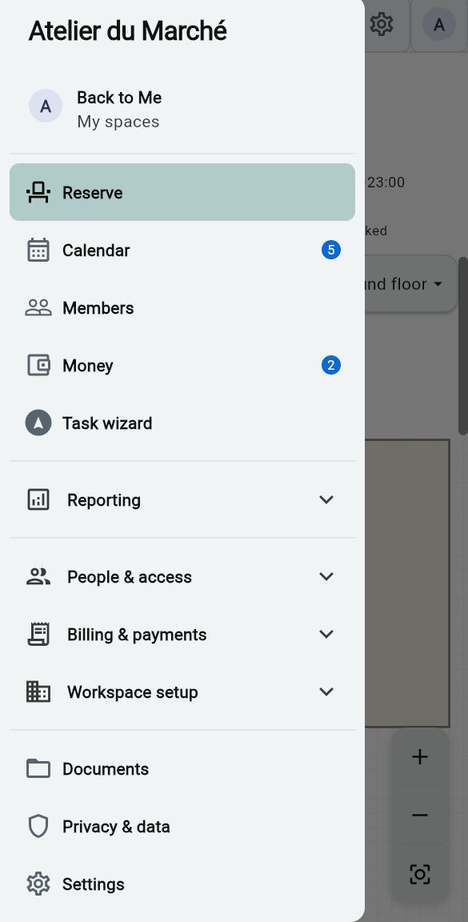
  1. Tap the ☰ button at the top left. The menu opens with your space's name, Back to Me and the daily destinations: Reserve, Calendar, Members, Money.
  2. Tap a destination to open it. A blue number beside it counts what waits there.
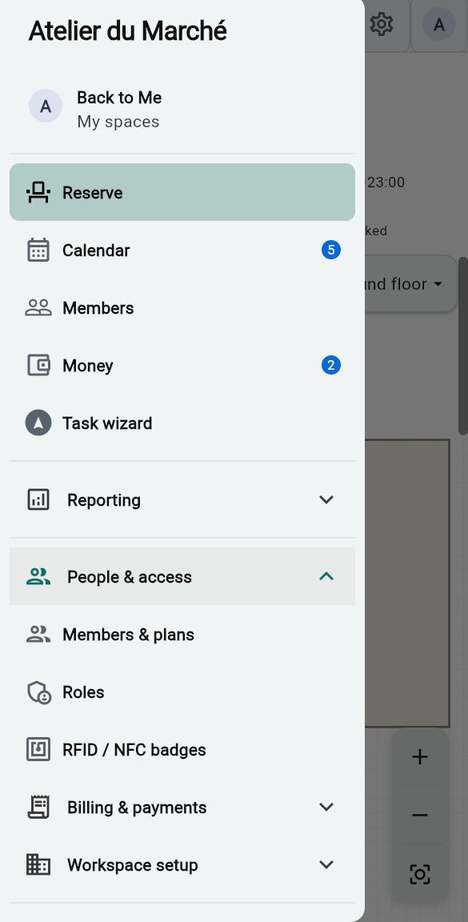
  3. Open Reporting, People & access, Billing & payments or Workspace setup to see the administration tools your role allows.
  4. At the bottom, Documents, Privacy & data and Settings are always close.
  5. Tap the avatar at the top right, or Back to Me, to leave the space and return to Me.

Good to know

  • Destinations come and go with the features the owner switched on and with your role. A plain member sees none of the administration groups.
  • When your space has Events switched on, Events at the top right (the tray icon with a count) collects what happened and what awaits your decision; when the Calendar holds the alerts, use its Alerts view. Scan a space code and Edit workspace appear on the Reserve screen when you may use them.
  • On a wide window, the menu stays open as a sidebar. A narrow window or enlarged text uses the ☰ menu.
  • In the apps for phones and computers, Navigation style in Settings lets you choose the classic bottom bar with the round Reserve button. Swipe that bar down for a full-screen view; swipe up, or long-press the Reserve button, to bring it back. A browser always uses the menu.

See also: Navigation style · Me: your home and your spaces

Find your way around

The Get started card and the tips

Everyone

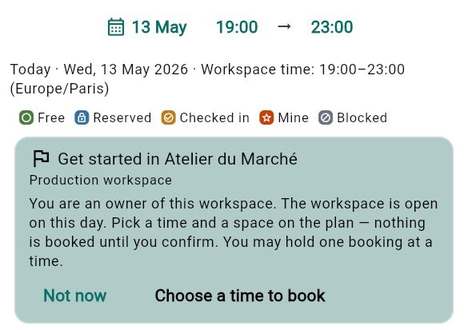
You open a space and are not sure what to do first. The Get started card names one next step for you, and short tips explain each screen.

Steps

  1. Open Reserve. The card Get started in your space appears at the top of the plan.
  2. Follow the action it offers, for example Choose a time to book.
  3. Tap Not now to put it away.
  4. To bring it back, open the view menu at the top of the plan, the one that says Plan, and choose Get started.

Good to know

  • For an owner or an administrator the card tells what is missing before anyone can book, with Finish setting up.
  • Tips are small cards on each screen. Dismiss hint hides one, and Next tip shows another.
  • You can show every dismissed tip again with Restore the hints.

See also: Restore the hints · Find your way around

The Get started card and the tips

Prepare a space with the setup questionnaire

Owner

You are about to open a space and have many decisions to make: what a booking looks like, what a month costs, what an invoice must say. The setup questionnaire lets you make them all at once, before you start, on a big screen and with your accountant or your board if you like.

Steps

  1. Open the questionnaire in a browser: setup.html. There is nothing to install and no account.
  2. Answer the steps in order: Identity, Features, Availability, Floor plan, Subscriptions, Legal identity and VAT, Services and accessories, Payment instructions, Roles and validations, Members and invitations. Each step only asks what your earlier answers make possible.
  3. Read the Feature summary and untick what you do not want: that feature starts switched off in the app and nothing about it is exported.
  4. On Check and export, fix the blocking items, then tap Export XML.
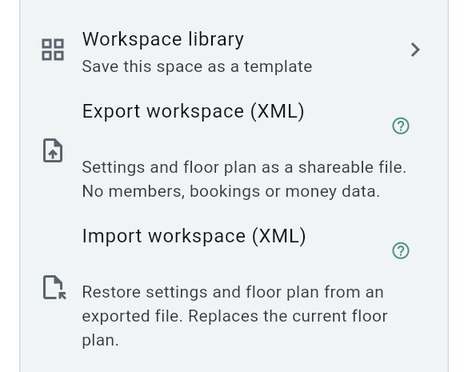
  5. In the app, open the workspace settings and choose Import workspace (XML) to create the settings, accessories and floor plan.
  6. Keep the file. Load file… brings your answers back later, and Reset starts over.

Good to know

  • Your answers are saved in your own browser and sent nowhere. You can close the tab and come back.
  • The file is plain text: leave tokens and keys empty and type them in the app instead.
  • Each question says where the setting lives in the app, so you can finish the rest screen by screen.
  • Skipping it costs nothing: every answer is a setting you can make or change later in the app.

See also: Create a workspace · Import the space (XML)

Chapter 02

Reserve

The Reserve hub and the floor plan

MemberAdministratorOwner

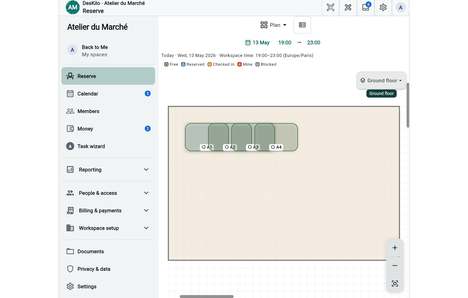
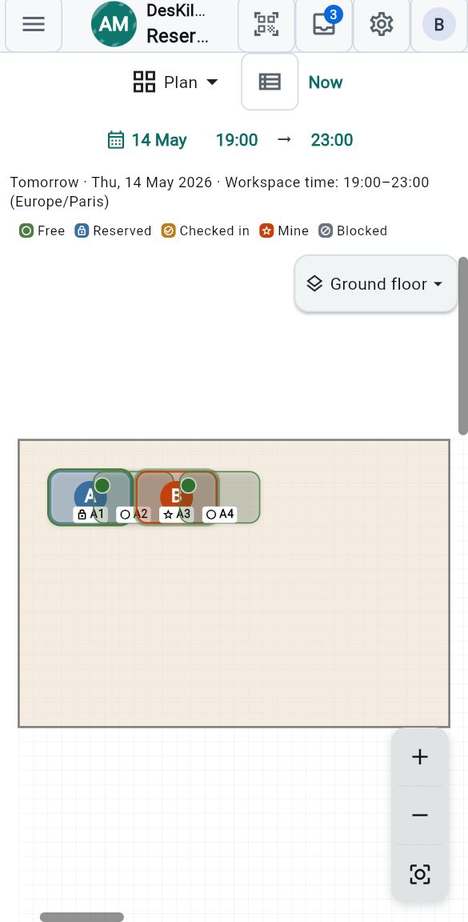
You want to see which places are free. The Reserve hub opens on the floor plan of one level of your space, drawn for the day and the time you are looking at.

Steps

  1. Open Reserve.
  2. Read the plan: every place carries its name and a small symbol, and a colour that says what it is.
  3. Tap a place to act on it. A free place opens the booking sheet; your own place offers check-in and cancel; someone else's place tells you who has it and until when.
  4. The legend under the date explains the colours. It is the same on the plan and in the Day, Week and Month views.
State What it means
Free Nobody holds the place in the time you chose.
Reserved Someone has booked it.
Checked in The person who booked it has arrived.
Mine It is your booking.
Blocked The place is out of service, for maintenance for example.
Closed day The space is closed that day (Day, Week and Month views).

Good to know

  • An occupied place shows who is there: an initial, or a photo when the person set one and your space shows photos on the plan. A small green dot means they are using the app right now.
  • A whole table, room or level that is booked says so on the plan, with the name of who holds it.
  • Some spaces show fewer states: a booked place and a checked-in place then look the same, and blocked reads Unavailable.
  • When the latest availability could not be loaded, a banner says Offline with the time of the last data and a Retry button, because a place shown free may have been taken since.

See also: Choose the day and the time · The booking sheet

The Reserve hub and the floor plan

Find your way around the plan

MemberAdministratorOwner

You want to reach the level, the room or the desk you have in mind. The plan can be moved, zoomed and switched from one level to another.

Steps

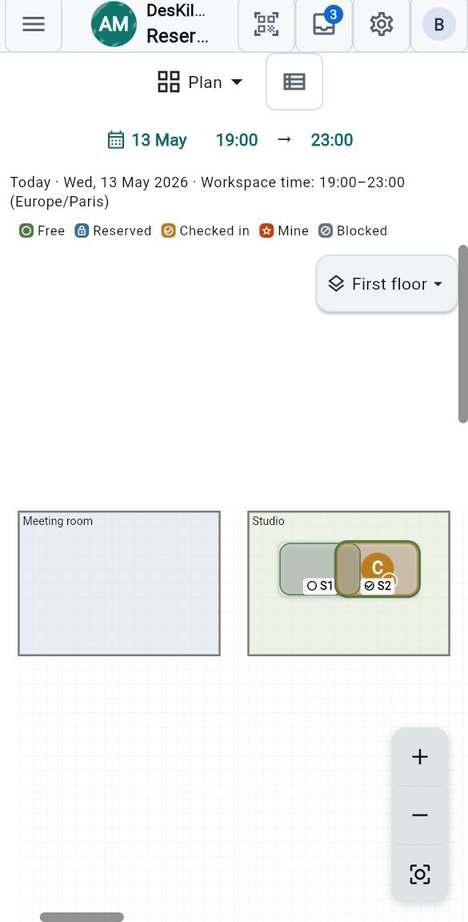
  1. Tap the level name at the top right of the plan, for example First floor, and choose another level. Your choice is kept for the next time you open the hub.
  2. Zoom with two fingers, or with Zoom in and Zoom out. Drag the scroll bars along the edges to move.
  3. Tap Fit the plan to the screen to bring the whole level back into view.
  4. Read the room names in the corner of each room. Tap a place inside it to book it.

Good to know

  • The level selector only offers a menu when your space has more than one level.
  • A level, a room or a desk that can be booked as a whole shows its own button or double-tap: see Book a whole desk, room or level.

See also: See the places as a list · Day view

Find your way around the plan

See the places as a list

MemberAdministratorOwner

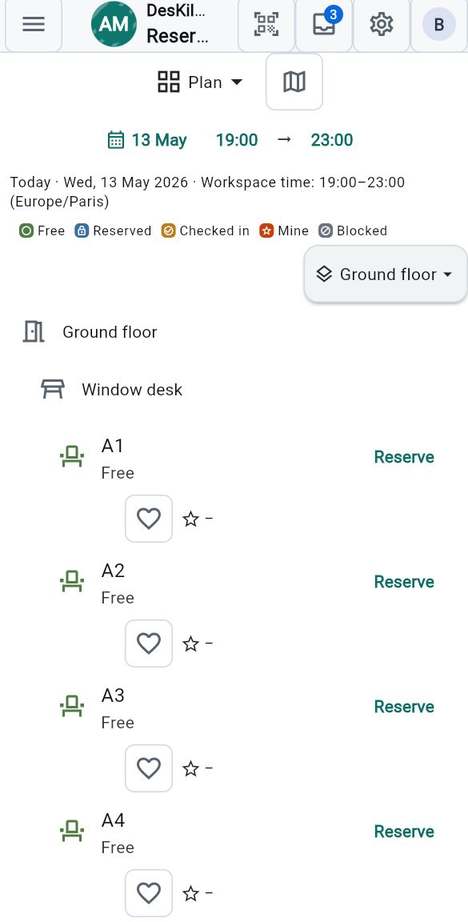
You prefer rows to a drawing, or the plan is hard to read on a small screen. The list shows the same places, level by level and desk by desk.

Steps

  1. In Reserve, tap List view, the button beside the view menu.
  2. Find the place. Each row names it and says whether it is free, reserved or yours.
  3. Tap Reserve on a free row to open the booking sheet.
  4. To go back to the drawing, tap Plan view.

Good to know

  • The list follows the day and the time you chose, exactly like the plan.
  • With favourites and ratings switched on, each row also carries a heart (Add to favourites) and stars.

See also: Choose the day and the time · The booking sheet

See the places as a list

Choose the day and the time

MemberAdministratorOwner

You want to book for another day, or for a time that is not now. The two rows of controls at the top of the hub say what you look at and when.

Steps

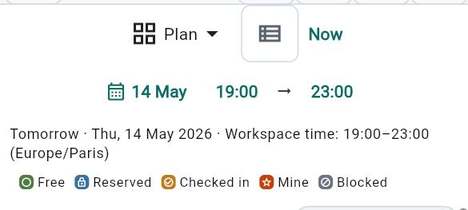
  1. Tap the date, for example 14 May, and pick a day in the calendar. You can look up to a year ahead.
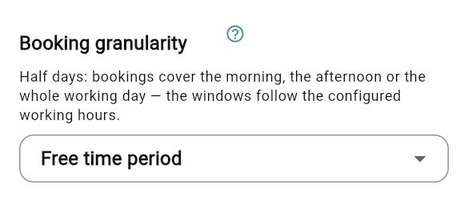
  2. Choose the time. If your space books half-days, tap Morning, Afternoon or Full day. If it books by the hour or on a free time range, tap the first time to set From and the second to set To.
  3. Read the line under the controls: it names the day, the period and the hours in the workspace's time zone, and in yours when it differs.
  4. To come back to today, tap Now.

Good to know

  • Which controls you see follows the space's rules: some spaces book half-days, some whole days only, some any time on a grid.
  • On a phone the day-part chips are small icons of a half or a whole day. Hold one to read its name and its hours.
  • The plan answers for the time you chose: a place shown free is free for all of it.
  • Where bookings are per half-day, the period you start on is your usual one, set in Default booking period.

See also: The Reserve hub and the floor plan · Book a place

Choose the day and the time

Day view

MemberAdministratorOwner

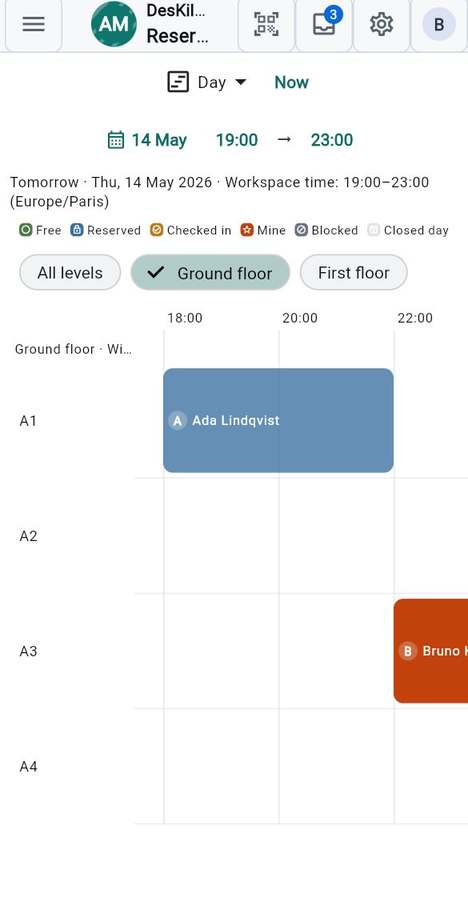
You want to see who is where during the day, not only at one moment. The Day view lays out every place as a row along the hours.

Steps

  1. In Reserve, open the view menu, which reads Plan at first, and choose Day.
  2. Pick the day with the date button. Choose a level with the chips above the rows: All levels or one level.
  3. Read the bars. Each one is a booking, with the name of who holds it; yours stand out in the colour of Mine.
  4. Tap a free stretch of a row to book that place for the time you chose. Tap your own booking to open its details; tap someone else's to see who holds it and until when.

Good to know

  • A closed day is drawn as closed and cannot be booked.
  • The menu behind the View control also holds Week and Month.

See also: Week view · Change or cancel a booking

Day view

Week view

MemberAdministratorOwner

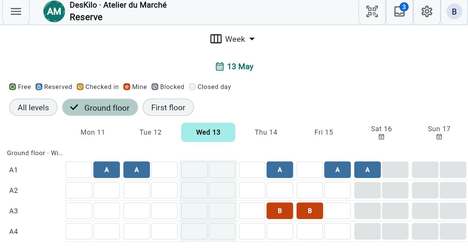
You want to find a free morning or afternoon in the coming days. The Week view shows places down the side and the days of the week across.

Steps

  1. Open the view menu and choose Week.
  2. Find your day. Each day has two cells side by side, the morning and the afternoon. A filled cell shows the initial of whoever holds it.
  3. Tap an empty cell to book that half of the day on that place.
  4. Tap a day name at the top to jump to that day in the Day view.

Good to know

  • Closed days are greyed out and carry a closure mark.
  • Choose All levels or one level with the chips above the grid.

See also: Day view · Month view

Week view

Month view

MemberAdministratorOwner

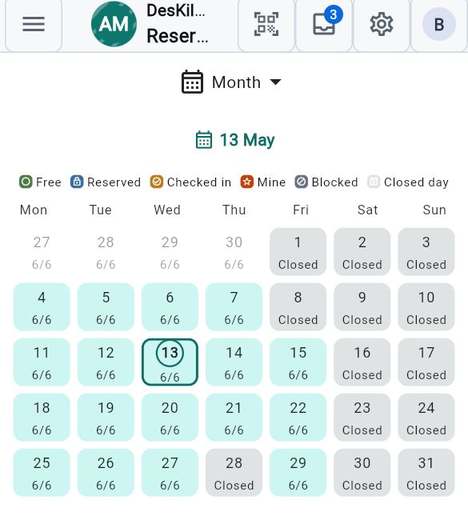
You want to know which days have room. The Month view counts the free places for every day.

Steps

  1. Open the view menu and choose Month.
  2. Read each day: the number of free places out of the total, for example 6/6. Closed days read Closed.
  3. Tap a day to open it in the Day view, where you see who is booked.

Good to know

  • The count covers all levels of the space.
  • Today is ringed.

See also: Closure days and public holidays · Day view

Month view

Book a place

MemberAdministratorOwner

You want a place for a given day and time. From the plan it takes a few taps: the day, the time, the place, and a confirmation.

Steps

  1. Open Reserve and choose the day and the time, as described in Choose the day and the time.
  2. Choose the level, if your space has several.
  3. Tap a free place. The booking sheet opens on it.
  4. Check the line that names the place and the period, change what you need, and tap Reserve.
  5. A message confirms the booking. Tap Details in it to open the new booking.

Good to know

  • Nothing is booked until you tap Reserve.
  • If the place was taken a second ago, the app tells you instead of double-booking it.
  • If the connection drops after you tapped, the screen Your booking request lets you check what happened, resume the same request or let it go. A request is never booked twice.
  • On a closed day the plan says Closed on this day and offers the next open day.

See also: The booking sheet · The rules you meet when you book

The booking sheet

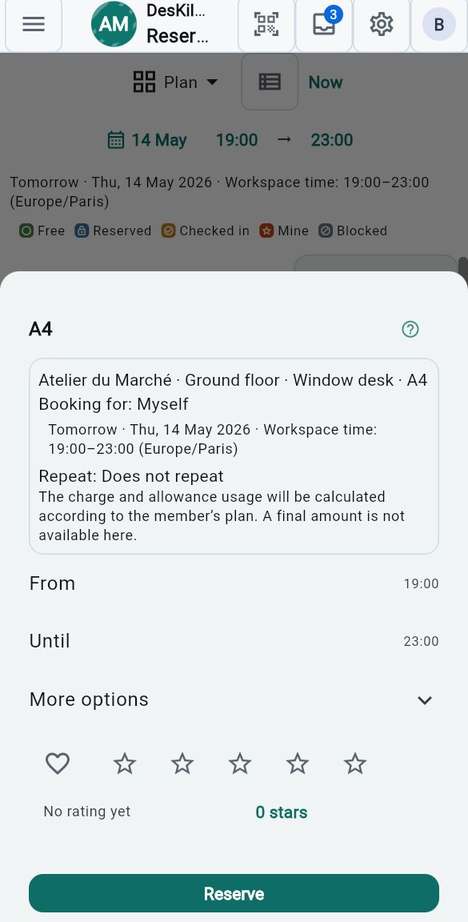
MemberAdministratorOwner

You tapped a free place and the sheet opens. It shows what you are about to book and lets you adjust it before you confirm. The sheet only proposes: the space's rules are checked when you confirm.

Steps

  1. Read the summary: the workspace, level, desk and place, who the booking is for, the day, the hours and the repetition.
  2. Adjust the period. Under half-days, tap Morning, Afternoon or Full day. On a time grid, set From and Until; on a minute grid a slider named Duration sets the length.
  3. Open More options to repeat the booking.
  4. Optionally add the place to your favourites with the heart, or rate it with the stars.
  5. Tap Reserve.

Good to know

  • If the chosen period is not allowed, a line in red under the period says why and Reserve stays greyed out.
  • If another booking follows on the same place, the sheet says that the seat is reserved from that time and stops your booking there.
  • Administrators see Book for and, for blocking a place, Manage resource.
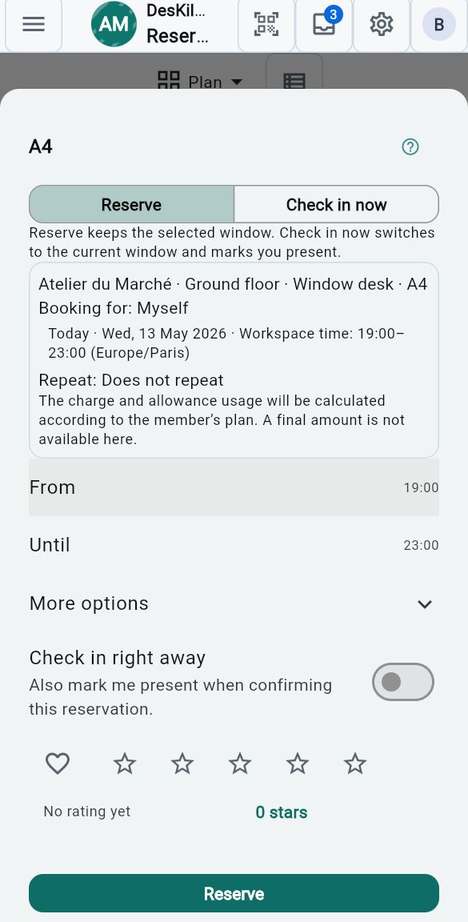
  • When the chosen period includes this moment, a switch Check in right away appears, off by default.

See also: Check in now when you are already there · Repeat a booking · Book for someone else

The booking sheet

Check in now when you are already there

MemberAdministratorOwner

You are standing at a free place and want to take it right now. On today's plan the booking sheet offers two actions side by side.

Steps

  1. Open Reserve on today, with no other time chosen, and tap a free place.
  2. At the top of the sheet choose Reserve or Check in now.
  3. Reserve keeps the period you chose. Check in now switches to the current period and marks you present.
  4. Tap Check in to confirm.

Good to know

  • The check-in stops where the next booking on that place begins, and the sheet tells you.
  • A walk-up check-in must start today.
  • Where bookings are per half-day, the check-in ends with the current half-day, or with the day when your usual period is the full day.

See also: Check in and check out · The rules you meet when you book

Check in now when you are already there

Book a whole desk, room or level

MemberAdministratorOwner

You need the whole table, the whole room or the whole floor, for a meeting or a day. Spaces that are set up for it can be booked as one.

Steps

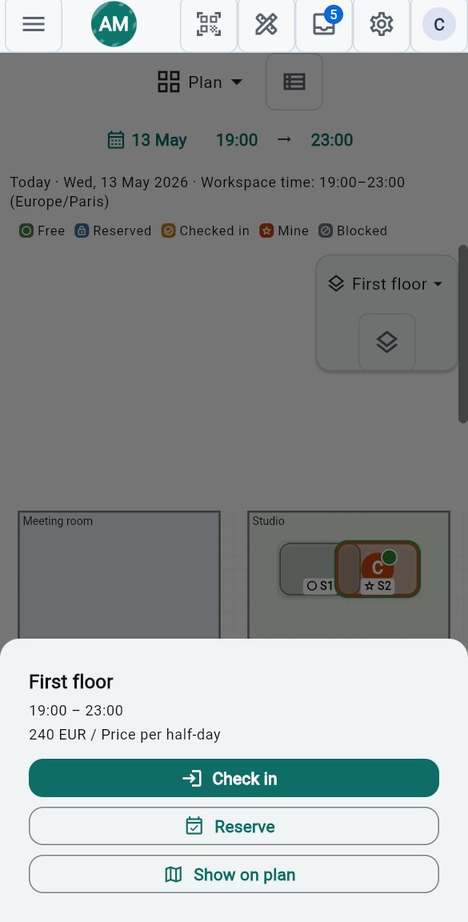
  1. On the plan, double-tap the desk, the room or the empty floor. For a level you can also tap Reserve level, the button under the level selector.
  2. The sheet names the space, the period and the Price per half-day when there is one.
  3. Tap Check in to take it now, or Reserve to book it for the period shown.
  4. In the booking sheet that opens, choose the period and tap Reserve.

Good to know

  • A member needs the right to book whole spaces; owners and administrators have it. Without it the sheet says You are not allowed to reserve a whole desk, office or level.
  • A whole space cannot be booked while one of its places is taken in that period, and no place can be booked while its table, room or level is booked as a whole.
  • Where the owner asks for approval, a whole-space booking blocks the space at once and waits for the validators; if they reject it, it is cancelled.

See also: When a booking is awaiting confirmation · Scan a space code

Book a whole desk, room or level

Book for someone else

AdministratorOwner

You want to book a place on a member's behalf. Administrators can pick the member in the booking sheet.

Steps

  1. Tap a free place in Reserve to open the booking sheet.
  2. Open Book for and choose the member.
  3. The summary now reads Booking for that member, and the button changes to Send for confirmation.
  4. Tap Send for confirmation. A message says Sent to the member for confirmation.

Good to know

  • The member has to accept before the booking exists. They find the request on their Calendar and in their notifications.
  • A booking made for someone else is never checked in and cannot repeat.
  • The Book for field only appears if the owner lets administrators book for members. For a whole level, the owner decides who may assign it.

See also: When a booking is awaiting confirmation · Decisions waiting for you on the Calendar

Book for someone else

Repeat a booking

MemberAdministratorOwner

You sit at the same place every Tuesday, or every weekday for a month. A repeating booking creates all the dates at once.

Steps

  1. Open the booking sheet on a free place and the first day you want.
  2. Open More options.
  3. In Repeat, choose Every day, Every weekday or Weekly. The default is Does not repeat.
  4. Set Repeat until, the last date. The sheet proposes four weeks ahead.
  5. Tap Reserve. A dialog tells you how many bookings were created.

Good to know

  • Dates that could not be booked are listed in the dialog and skipped. The others stand.
  • To cancel a repeating booking, open one of its dates and choose Cancel this occurrence or Cancel this and following.
  • You can also turn a single booking into a repeating one from Edit times in its details.
  • Repeating is not offered when you book for someone else.

See also: Change or cancel a booking · The booking sheet

Repeat a booking

The rules you meet when you book

MemberAdministratorOwner

You tried to book and the app said no, or you wonder what is allowed. Your owner sets the rules of the space; this is what you see of them.

Rule What you see
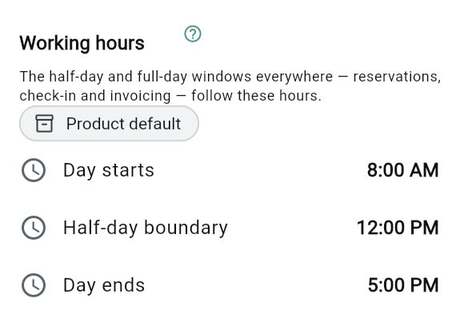
Opening hours and open days The plan and the views follow the working day, 08:00 to 17:00 by default, with the half-day split at 12:00. A closed day says Closed on this day.
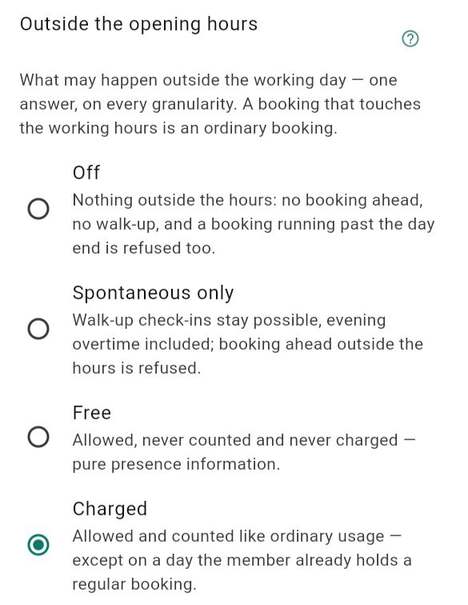
Outside the opening hours Depends on the space. Off: Bookings outside the opening hours are not allowed. Spontaneous only: you can check in on the spot but not book ahead. Free: allowed, never counted or charged. Charged: allowed and counted as usage, except on a day you already hold a regular booking.
Past bookings A booking on a day that has already ended is refused unless the owner allows past bookings: This booking lies entirely in the past. Earlier on the same day it is recorded as a past visit.
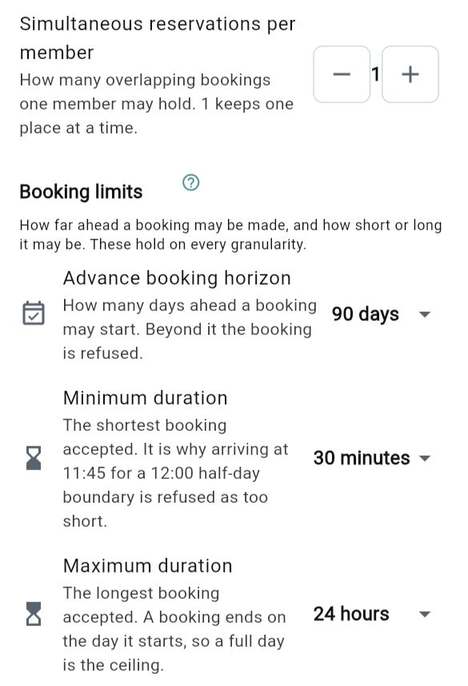
Limits A booking has a longest horizon (Too far ahead, 90 days by default), a shortest and a longest length (Too short, Too long) and ends on the day it starts.
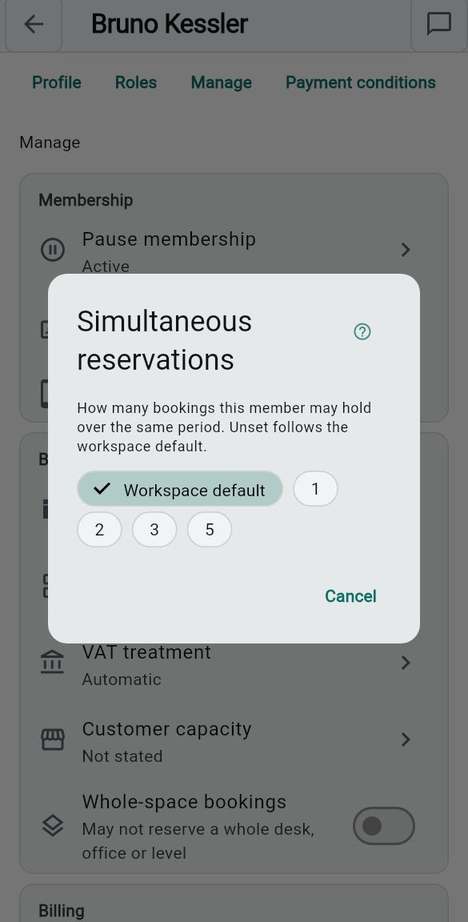
One place at a time By default you may hold one booking in a given period: You already have a booking in that period. An administrator may allow you more.
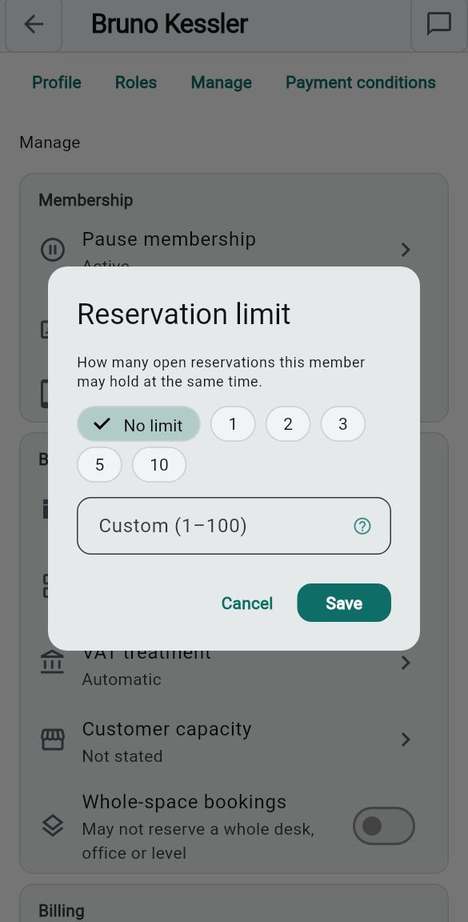
Reservation limit Reservation limit reached when you hold the most open bookings you are allowed.
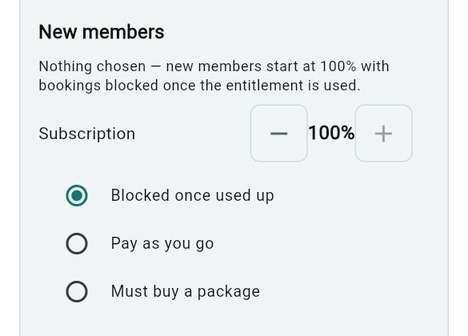
Days in your plan When your plan's days run out, the owner's setting for you applies: bookings may stop, you may be asked to buy a package, or the extra days are charged.

Steps

  1. When a period is refused, read the red line under it in the booking sheet.
  2. Change the day, the time or the place, or ask an administrator.
  3. If your days are used up, open Money to see your plan and, where offered, tap Request extra half-days.

Good to know

  • The same rules apply on the plan, in the Reserve hub, on a scanned code and at the wall kiosk.
  • The app checks a period before it offers it, so most refusals appear in the sheet and not after you tapped.

See also: Booking policies · Simultaneous reservations · Reservation limit

Closure days and public holidays

MemberAdministratorOwner

You want to know why a day cannot be booked. Your space is closed on some weekdays and on the closure days the owner has added, such as public holidays.

Steps

  1. Choose the day in Reserve. A closed day shows a banner, Closed on this day.
  2. Tap the shortcut in the banner, which reads "Show" and the next open day, to go there.
  3. In Month, closed days read Closed; in Week they are greyed with a mark; in Day they are marked as closed, under the legend entry Closed day.
  4. In the Calendar, closed days are struck through, and the day's list states Closed with the reason when the owner gave one.

Good to know

  • On a closed day the places carry the blocked symbol and cannot be booked or checked in to.
  • Public holidays appear exactly like any other closure day.

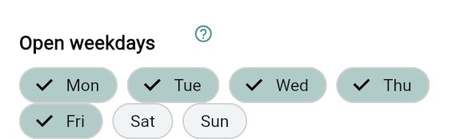
See also: Month view · Closure days · Open weekdays

Closure days and public holidays

Check in and check out

MemberAdministratorOwner

You arrive at your place, and later you leave. Checking in says you are there; checking out frees what you no longer need.

Steps

  1. Open Reserve, find the day of your booking and tap your own place, the one marked Mine.
  2. Tap Check in. If it is greyed out, it tells you when it opens, for example "Check-in opens on 14 May".
  3. When you leave, tap your place again and tap Check out. The rest of the booking is released at once for others.
  4. The booking then reads Completed: checked out at the time.

Good to know

  • Check-in opens 15 minutes before the start, or one grid step before when the grid is coarser. Where bookings are per half-day, per day or per real hour, it opens for the whole day of the booking.
  • It closes when the booking ends: This reservation is over — check-in is no longer possible.
  • If you are still checked in somewhere else, check out there first.
  • With auto check-in and check-out on, a booking nobody checked in or out completes itself once its time has passed. Without it, a booking you did not check in reads This period is over without a check-in.
  • At a wall kiosk you check in with your badge; see Your badge and NFC badge check-in.

See also: Scan a space code · Change or cancel a booking

Check in and check out

Scan a space code

MemberAdministratorOwner

You stand in front of a desk, a room or a seat that carries a QR card, or a chair with an NFC tag. Scanning shows what you may do there, without searching the plan.

Steps

  1. In Reserve, tap Scan a space code, the scanner icon at the top of the screen.
  2. Point the camera at the card, or type the printed number in Code and tap Confirm. Hold your phone to a chair's NFC tag where the device supports it.
  3. For a seat, choose Check in, Reserve or Check out, the same actions as at the kiosk, without the badge step.
  4. For a table, an office or a level, the sheet shows its state, its period and its Price per half-day; tap Check in, Reserve or Show on plan.

Good to know

  • If someone else holds the space, the sheet says who and offers to message that person.
  • A code that is not from this workspace says Not a space code of this workspace. A removed space says This code does not match any space here anymore.
  • In a browser the camera is not available: type the code instead. An NFC tag only identifies seats.
  • The scanner icon only appears when your space uses QR codes.

See also: Book a whole desk, room or level · Check in and check out

Scan a space code

Change or cancel a booking

MemberAdministratorOwner

Your plans changed. You can move a booking, shorten it, extend it or cancel it, as far as it has not been used.

Steps

  1. Open the booking: tap it in the Day or Week view, in the Calendar, or tap Details in the message that follows a booking.
  2. For a booking that has not started, tap Edit times to choose another period, or Cancel reservation to remove it.
  3. For a repeating booking, choose Cancel this occurrence or Cancel this and following.
  4. For a booking you are checked in to, Stay longer and End earlier appear when the space's rules allow a later or earlier end. The start does not move.
  5. For a booking that has started, been checked in or been completed, and where your space allows deletion requests, tap Request deletion, give a reason if you wish, and tap Send request.

Good to know

  • Request deletion does not delete anything: an owner or administrator decides whether the check-in was only forgotten, in which case the booking stays, or whether the booking was never used, in which case it is removed.
  • An administrator can remove someone else's booking with Remove reservation (overrule); the member and the administrators are told.
  • Show on plan jumps to the place on the plan.

See also: Check in and check out · Save a booking to your own calendar · Repeat a booking

Change or cancel a booking

When a booking is awaiting confirmation

MemberAdministratorOwner

A booking or request reads awaiting confirmation. It does not mean something went wrong: someone still has to say yes.

Steps

  1. Look at what is waiting: the Calendar lists it with the words awaiting confirmation, and a decision addressed to you sits at the top.
  2. If it is for you to decide, tap Accept or the cross on the Calendar.
  3. If you are waiting for someone else, nothing is needed from you; the answer arrives as a notification and on the Calendar.

What waits for a confirmation:

  • A booking an administrator made for you: you confirm it.
  • A whole-space booking, when the owner asks validators to approve it. The space stays blocked while it waits, and a rejection cancels the booking.
  • A request to delete a booking that has already started, been checked in or been completed.

Good to know

  • Who may validate and how many must agree is the owner's rule; see Validation rules.
  • A request shows its progress, for example 1/2 validations, and later its outcome: validated, refused, rejected or expired.

See also: Book for someone else · Decisions waiting for you on the Calendar

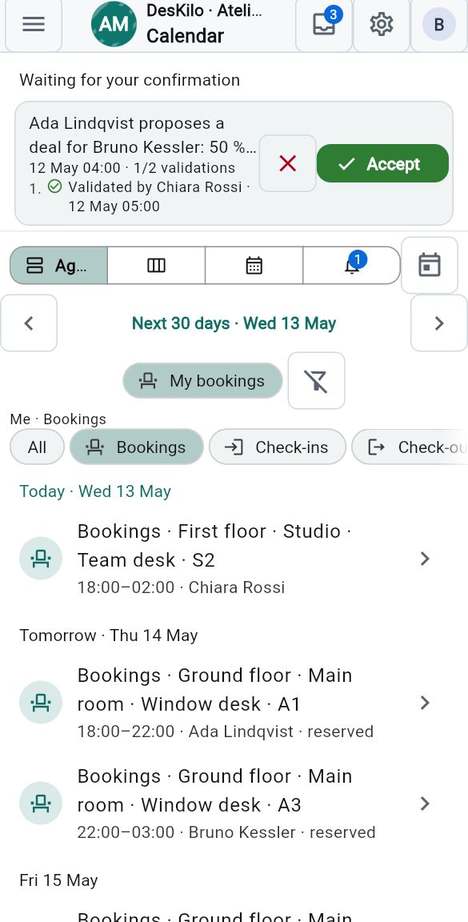
The Calendar tab

MemberAdministratorOwner

You want everything dated in one place: your bookings, check-ins, alerts, messages, payments due. The Calendar tab lists it by day and every row opens its source.

Steps

  1. Open Calendar. It opens on the Agenda: the next 30 days, grouped under Today, Tomorrow and the day names.
  2. Use the arrows to step 30 days at a time, or tap the date for a day picker. The button at the top right brings you back to Today.
  3. Tap a row to open it: a booking opens its details, a message its conversation, an invoice its sheet.
  4. Narrow the list with the chips below, as described in Filter the Calendar.

Good to know

  • Bookings appear for everyone in the space, because the plan shows occupancy to everyone. Messages and money stay private to you and to the people the space's rules allow.
  • A member with the finance or member permission can switch the list to another member with the Me chip. What the server does not allow shows as locked, not as an empty day.
  • If your space keeps the simpler calendar, you pick one day or a range of days instead of the three views.

See also: Agenda, Week and Month in the Calendar · Save a booking to your own calendar

The Calendar tab

Agenda, Week and Month in the Calendar

MemberAdministratorOwner

You want to see a week or a month at a glance. The Calendar offers three ways to look.

Steps

  1. Choose Agenda, Week or Month in the bar at the top. The fourth button, Alerts, shows your alerts when your space offers them.
  2. In Week, tap a day among the seven to read its list below.
  3. In Month, tap a day in the grid. Under each day up to three dots show what it holds: bookings and presence, alerts and messages, money. Today is ringed.
  4. Closed days are greyed and struck through.

Good to know

  • In Month the list below shows only the day you selected; in Week it lists the whole week.
  • The arrows step by a week or a month, according to the view.
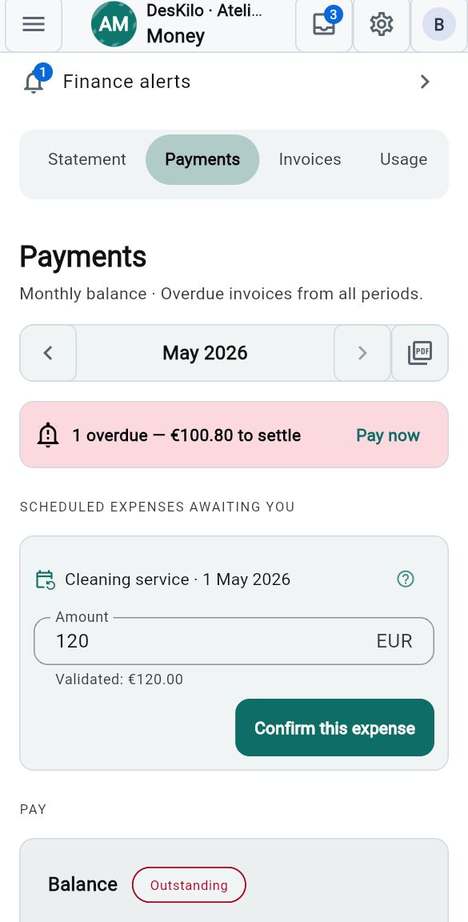
  • The Calendar also shows the date a payment is due and each scheduled expense that falls due.

See also: The Calendar tab · Closure days and public holidays

Agenda, Week and Month in the Calendar

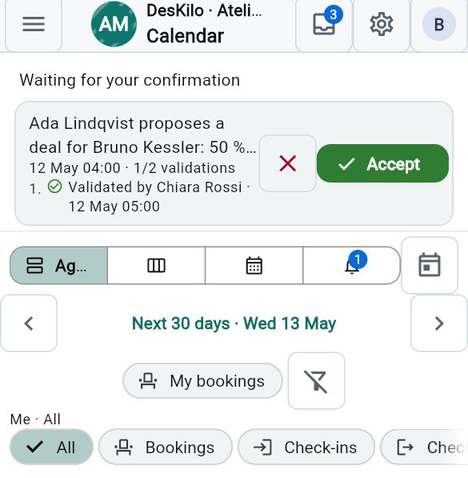
Decisions waiting for you on the Calendar

MemberAdministratorOwner

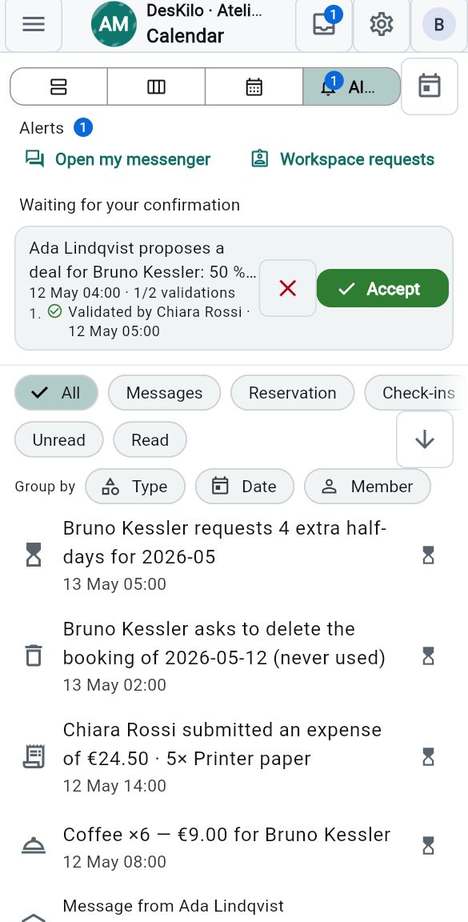
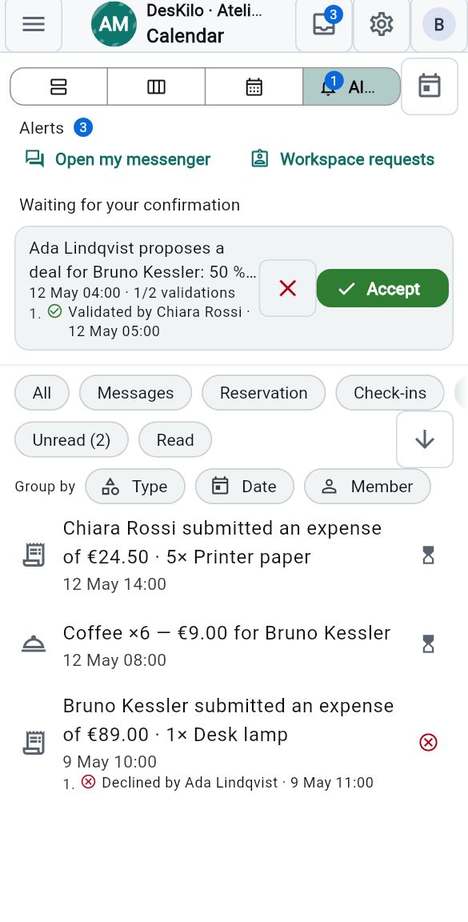
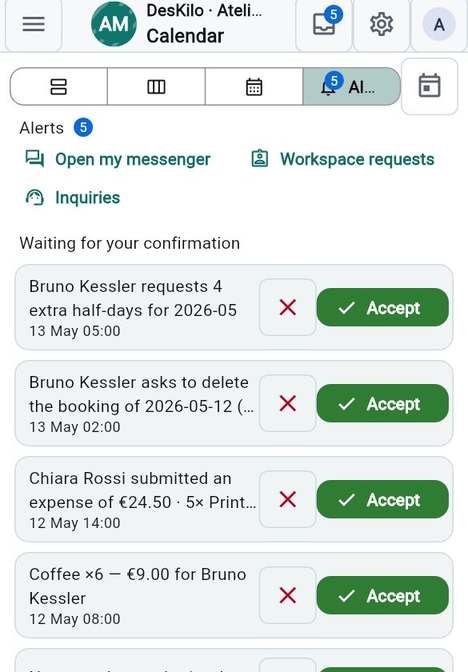
You were asked to confirm something. When something needs your answer, it is pinned at the top of the Calendar, under Waiting for your confirmation.

Steps

  1. Open Calendar. Each waiting decision is a card with a short text and the date it was sent.
  2. Read the card. It may show how many validations it has, for example 1/2 validations.
  3. Tap Accept to agree, or the cross to refuse.
  4. Open the Alerts view to see the whole list with its history.

Good to know

  • The Alerts button in the bar shows how many decisions wait for you.
  • Once you answered, the decision leaves the top and appears in the list with its outcome.

See also: When a booking is awaiting confirmation · Validation rules

Decisions waiting for you on the Calendar

Filter the Calendar

MemberAdministratorOwner

The list is long and you only look for bookings. The chips under the bar narrow it.

Steps

  1. Tap My bookings to keep only your own bookings. Tap it again to see everything.
  2. Or choose chips such as Bookings, Check-ins and Check-outs; All shows every kind.
  3. To undo your choices, tap Reset filters, the funnel button.
  4. A line above the chips repeats what you see, for example Me · Bookings.

Good to know

  • Several chips can be on at once.
  • Which chips are offered depends on what your space has switched on, for example validations.

See also: The Calendar tab · Agenda, Week and Month in the Calendar

Filter the Calendar

Save a booking to your own calendar

MemberAdministratorOwner

You want a booking in your phone's or your computer's calendar. The app writes a standard calendar file that Google, Outlook, Apple and others import.

Steps

  1. Open one of your own bookings, in the Day view, the Week view or the Calendar.
  2. Tap Save calendar file.
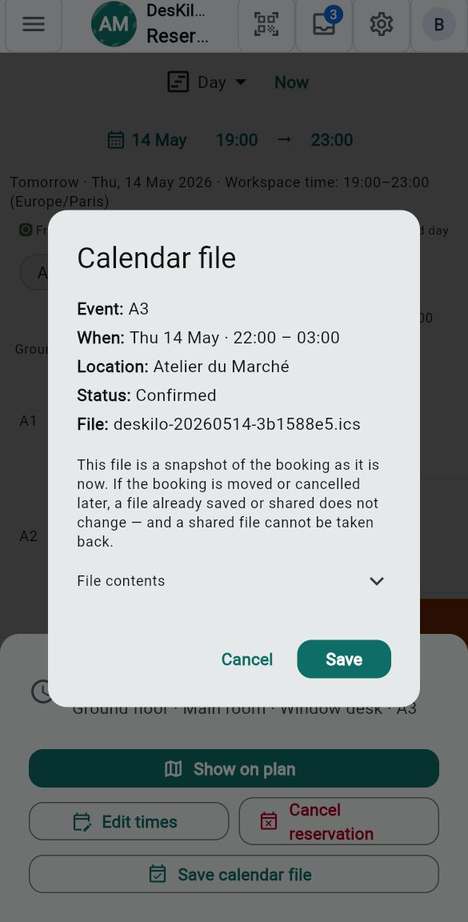
  3. Read the preview: the Event, When, Location, Status and the File name. Open File contents to read the file itself.
  4. Tap Save. The app saves the file, usually in your downloads folder, and tells you where; open it with your calendar.

Good to know

  • The file carries the time, the place, the workspace name and whether the booking is confirmed or cancelled. No amount, no name, no e-mail address.
  • It is a snapshot: if the booking changes later, a file already saved does not change.
  • If the booking changed between the preview and Save, nothing is written and the preview refreshes.
  • Your owner can switch this feature off.

See also: Change or cancel a booking · The Calendar tab

Save a booking to your own calendar
Chapter 03

Collaborate: members, requests, messages and the wider network

The Members directory

MemberAdministratorOwner

You want to see who is in your workspace, who is here today and who is about to be.

Steps

  1. Open Members from the menu (or from the bottom bar if you chose the classic navigation style).
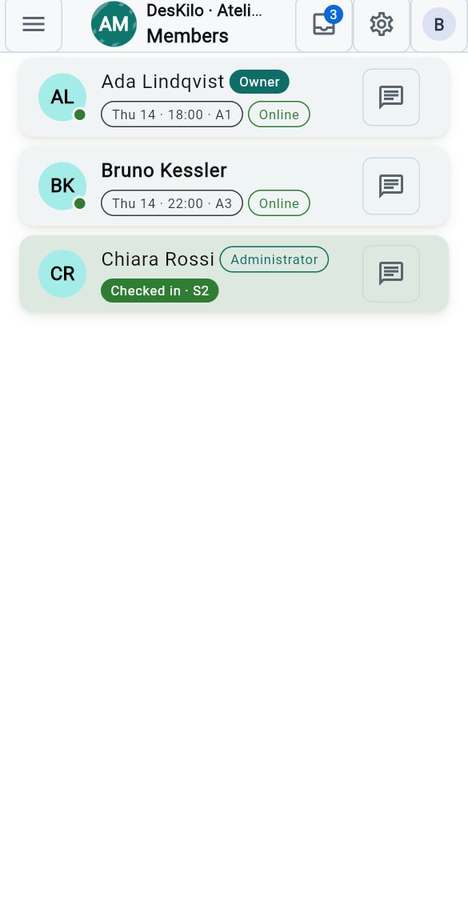
  2. Read each card: photo or initials, name, role badge (Owner or Administrator; plain members carry none), the person's status line, and two small chips.
  3. Read the chips. The first one is the booking: Checked in with the place, Reserved now, or the next booking (day, time, place). The second says Online, or when the person was last seen.
  4. Tap a card to open the member's page.
  5. Pull the list down to refresh it.

Good to know

  • Only active members are listed, in alphabetical order.
  • Administrators and owners also see each person's e-mail address under the name. Members do not: between members, contact stays opt-in.
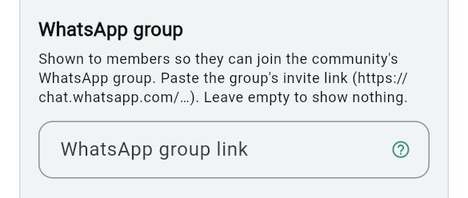
  • If your owner set up a WhatsApp group, a Open WhatsApp group line sits above the list.

See also: A member's page · Writing to a member

The Members directory

A member's page

MemberAdministratorOwner

You want to know whether a colleague is in, when they come next, and how to reach them.

Steps

  1. Tap a card in Members.
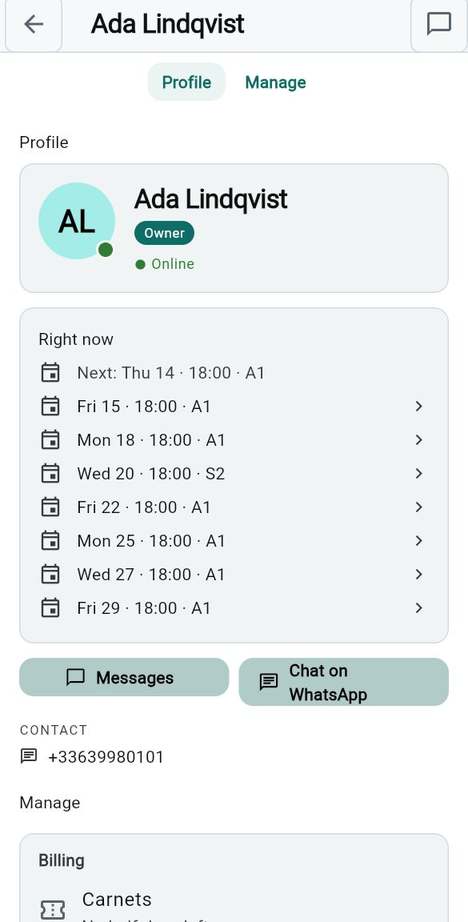
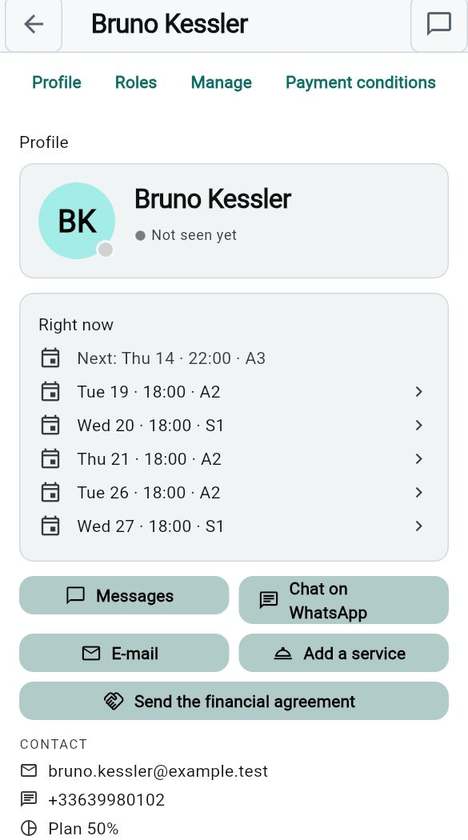
  2. Read the top card: photo, role, presence and the person's own status line. Further down you can see how long they have been a member.
  3. Read Right now: whether the person is checked in, holds a booking this minute, or when their next booking is. Tap a booking to open it.
  4. Use the buttons: Messages, Chat on WhatsApp and, for administrators, E-mail.

Good to know

  • Contact shows a WhatsApp number only when the person chose to share it.
  • Where you may see them, money figures (open invoices, payments, the current month) sit on the same page. You always see your own; someone else's only with the right to view finances.
  • Administrators and owners also get a Manage area with Membership, Booking rules, Billing and Badges & access, each row showing its current value.

See also: Writing to a member · The member's actions

A member's page

Writing to a member

MemberAdministratorOwner

You want to ask a colleague something without leaving the workspace.

Steps

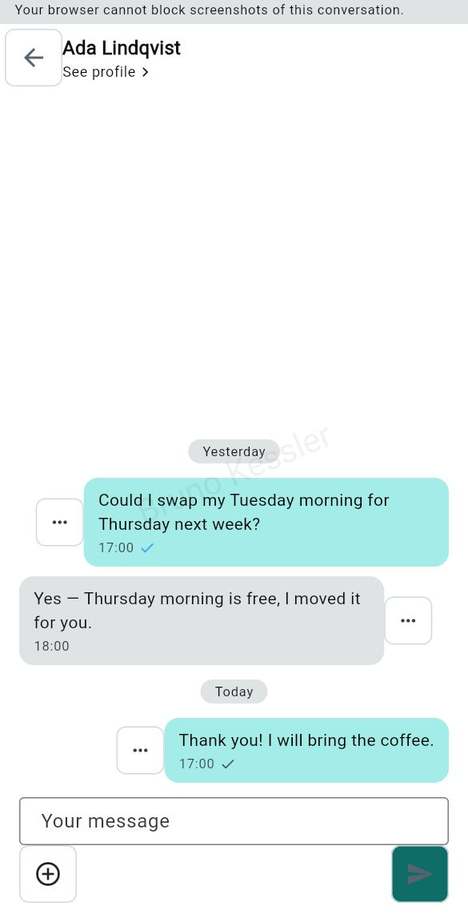
  1. Open Members, tap a card to open the member's page, then tap Messages.
  2. Type in the Your message field.
  3. Tap Send.

Good to know

  • Messages read oldest to newest, under day separators. A tick under your message means it was delivered; a blue double tick means it was read.
  • Tap the … beside a bubble for the message actions (react with an emoji, star, copy, edit within 15 minutes, forward, delete). The paperclip button attaches a reservation or a space; the other person sees a link that opens it.
  • This needs the Member notifications feature of your workspace.

See also: Messages

Writing to a member

Events & confirmations

MemberAdministratorOwner

You want to see what happened in the workspace, and what is waiting for an answer.

Steps

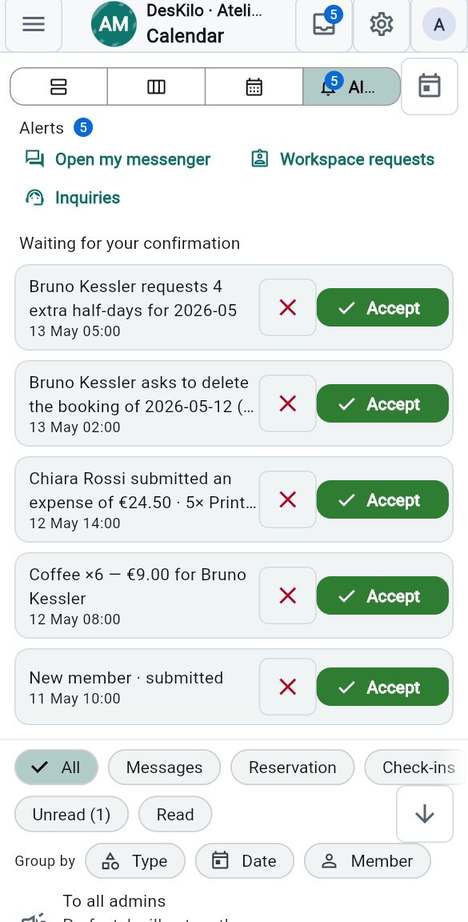
  1. Tap Events in the top bar (the tray icon with a number), or open Events from the menu. The page opens on Alerts.
  2. Read Waiting for your confirmation at the top: requests that need you.
  3. Read the feed below. Each row says what happened; an hourglass means pending, a green check means confirmed. Money rows show who validated them and when.
  4. Narrow the feed with the chips: All, Messages, Reservation, Check-ins, Money, Members, then Unread or Read.
  5. Tap Type, Date or Member next to Group by to fold the feed into groups; tap the group symbol to go back to the flat list.

Good to know

  • An event is created whenever something is booked, changed or cancelled, a payment or an expense is recorded, extra half-days or a deletion are requested, a role changes or someone joins.
  • Members see their own events; administrators and owners see everyone's.
  • Your filter is remembered. The number on the Events button counts new updates and decisions waiting for you.
  • Open my messenger at the top takes you to your conversations.

See also: Accept or decline a request · Validation rules

Events & confirmations

Accept or decline a request

MemberAdministratorOwner

Somebody asked you to confirm something, and you want to answer.

Steps

  1. Open Events.
  2. Find the request under Waiting for your confirmation.
  3. Tap Accept, or the red cross to Decline.

Good to know

  • When an administrator does something for you (books a place, records your payment), it stays pending until you confirm. What you do for yourself never needs your own confirmation.
  • Nobody confirms their own request: it waits for another person, or for the rule's exception (validation rules).
  • After seven days without an answer, an act that creates or changes something (an administrator booking for you, say) is confirmed automatically; a deletion or a charge expires instead.
  • A row can show progress such as "1/2 validations" when the rule asks for several.

See also: Events & confirmations · Required validations

Accept or decline a request

What needs you

AdministratorOwner

You want one place that answers: does anything need me today?

Steps

  1. Open What needs you.
  2. Read the lines in order: each one is a decision (for example a request to confirm or a person waiting to be admitted), the most costly delays first.
  3. Tap a line to deal with it.

Good to know

  • This screen exists only when your workspace has switched on the What needs you feature; without it the address leads back to the start page.
  • Several identical decisions are shown as one line. When nothing is waiting, the screen says Nothing needs you.
  • It also lists configuration that is not done: "Set up: …" for each required area of the setup list that is not ready (only for someone who configures the space), and "… switched-on features wait for “…”" when a switched-off feature holds others back. A tap opens the screen where it is set up, or Features.

See also: Events & confirmations

Validation rules, domain by domain

Owner

You decide, for each kind of act, whether a person must confirm it first, and who.

Steps

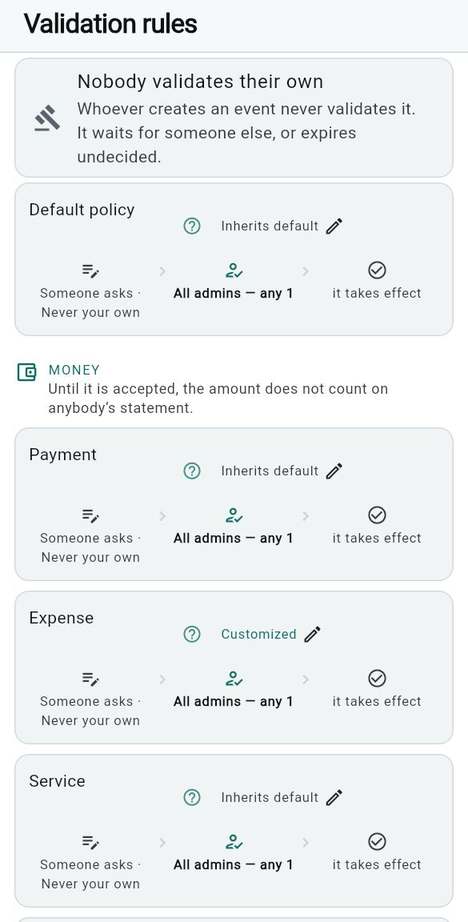
  1. Open Validation rules (it is also in Settings).
  2. Read the three groups: Money, Bookings and People and roles. Each states what stays unchanged until the act is accepted.
  3. Read a card from left to right: someone asks, the people who may validate, it takes effect. A card says Inherits default or Customized.
  4. Tap a card to edit its rule. Tap Default policy to change what every other card inherits.

Good to know

  • A rule covers acts such as payments, expenses, services, extra half-days, booking deletions, reservations, role changes, new members, invoices, refunds and subscription changes.
  • Every decision is an event: who decided, when, and on what. Nothing is validated silently.
  • The banner on top applies to every rule: Nobody validates their own.
  • You need the permission to configure validation policies; owners always have it.

See also: Required validations · The role matrix

Validation rules, domain by domain

Required validations

Owner

You choose how many people must confirm before the act goes through.

Steps

  1. Tap a card in Validation rules.
  2. Tap the plus or minus beside Required validations.
  3. Tap Save.

Good to know

  • One is the usual case; two is common for money.
  • If you ask for more validations than there are people who may give them, the sheet warns Not enough eligible validators and does not save: a rule nobody can satisfy would block the act forever.

See also: Who may validate

Required validations

Who may validate

Owner

You choose which people are allowed to give the confirmation.

Steps

  1. Tap a card in Validation rules.
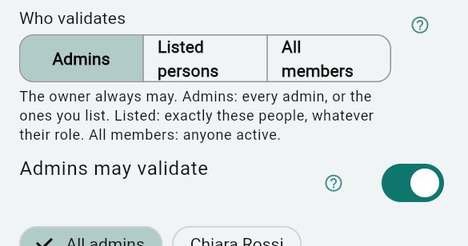
  2. Under Who validates, pick Admins, Listed persons or All members.
  3. For Admins, keep Admins may validate on and choose All admins or tap the names of specific administrators. Switch it off and only owners validate.
  4. For Listed persons, pick exactly the people you want.
  5. Tap Save.

Good to know

  • The owner may always validate.
  • A named list is a deliberate choice: someone who later becomes an administrator is not added to it.
  • The choice of scope appears when your workspace has the validation scopes feature on; otherwise a rule works with administrators.

See also: An owner is required

Who may validate

An owner is required

Owner

For some acts an administrator's approval alone is not enough.

Steps

  1. Tap a card in Validation rules.
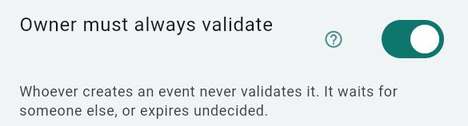
  2. Switch on Owner must always validate.
  3. Tap Save.

Good to know

  • At least one of the confirmations then comes from an owner, whatever the required number says. The card shows "and the owner, always".

See also: Required validations · An owner may confirm their own request

An owner is required

An owner may confirm their own request

Owner

You run a space on your own and need to be able to settle your own requests.

Steps

  1. Tap a card in Validation rules.
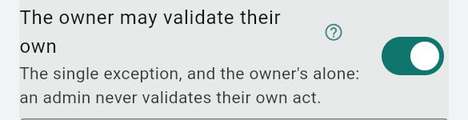
  2. Switch on The owner may validate their own.
  3. Tap Save.

Good to know

  • Off, an owner's own request waits for someone else. On, the owner settles it.
  • This is the owner's exception alone: an administrator never validates their own act.
  • The switch appears when your workspace has the validation chain feature on.

See also: Auto-validate an owner's own request

An owner may confirm their own request

One after another

Owner

You want the confirmations collected in order, so the second person sees the first one's decision.

Steps

  1. Tap a card in Validation rules.
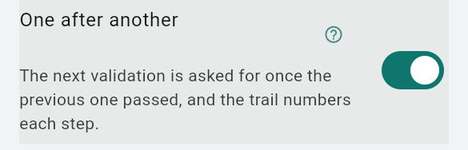
  2. Switch on One after another.
  3. Tap Save.

Good to know

  • The next validation is asked for once the previous one has passed, and the validation trail numbers each step.
  • It is slower; use it when the order matters.
  • On money rules you can also set Only above this amount: smaller amounts apply straight away.

See also: Required validations

One after another

Auto-validate an owner's own request

Owner

You do not want a ping about a question that is already closed.

Steps

  1. In Validation rules, tap the Booking deletion card.
  2. Switch on Owners delete without validation.
  3. Tap Save.

Good to know

  • An owner's own deletion request then settles itself and stays marked Auto-validated in the feed, so the trail is unbroken.
  • This switch exists on the Booking deletion rule only, and it is off by default.

See also: Auto-validate an administrator's own request

Auto-validate an owner's own request

Auto-validate an administrator's own request

Owner

You want administrators to delete their own bookings without waiting.

Steps

  1. In Validation rules, tap the Booking deletion card.
  2. Switch on Admins delete without validation.
  3. Tap Save.

Good to know

  • It is independent of the owner switch: every owner is also an administrator, so one switch could not say "owners yes, administrators no".
  • Off by default, and only for booking deletions.

See also: Auto-validate an owner's own request

Auto-validate an administrator's own request

Messages

Everyone

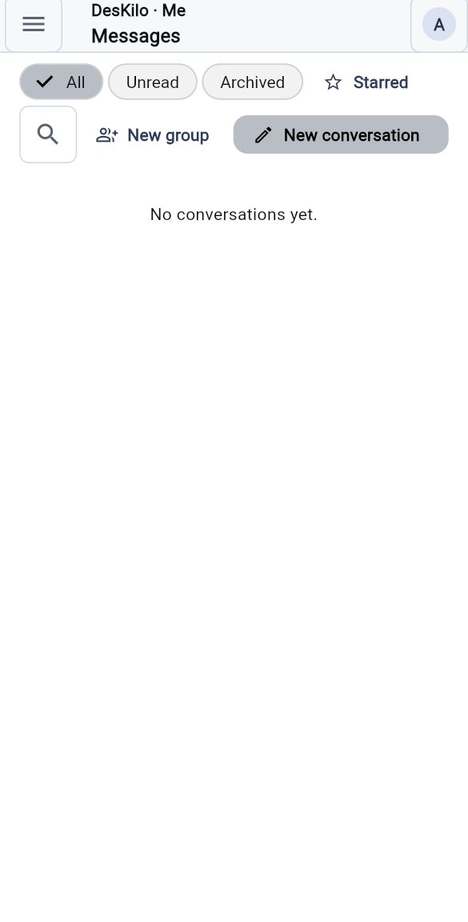
You want all your conversations in one list, whichever space or server they belong to.

Steps

  1. Open Messages in Me.
  2. Read each row: the title, the context (for example "In" a space, "Person to person", "Group"), the last message and the unread count.
  3. Filter with All, Unread or Archived, open Starred for the messages you starred, or tap the magnifier to search.
  4. Press and hold a row to Pin to top, Mute notifications, Mark as unread or Archive.
  5. Tap a row to open the conversation.

Good to know

  • Conversations from your other connected servers appear in the same list, with the server named.
  • Only the people in a conversation can open it; a space's owners and administrators cannot read it. Messages are not end-to-end encrypted: whoever runs the server a conversation lives on can technically reach it. See Your data, your rights.
  • A message you wrote shows a tick when delivered and a blue double tick once read.
  • An archived conversation keeps its history. A muted one stays silent but is still counted.
  • From the workspace, Open my messenger (in Alerts) leads here.

See also: Writing to a member · Start a conversation or a group

Messages

Start a conversation or a group

Everyone

You want to write to someone new, or to several people at once.

Steps

  1. In Messages, tap New conversation.
  2. Type a name under Find available people and tap the magnifier.
  3. Tap the person; the chat opens.
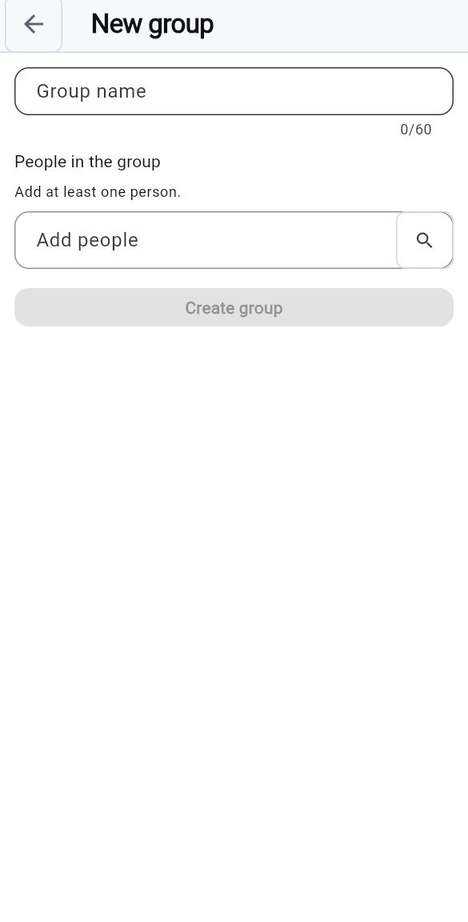
  4. For a group, tap New group instead, give it a Group name, Add people and tap Create group.

Good to know

  • You find people who chose to be reachable: each person decides under Who can start a conversation with me.
  • In a group, tap its name to see the members; an administrator can add or remove people, rename it or allow only administrators to post (Only admins can post). Anyone can Leave group.
  • A long message is limited to 4000 characters.

See also: Message requests

Start a conversation or a group

Message requests

Everyone

Someone you did not choose to hear from wrote to you, and you decide what happens.

Steps

  1. Open Messages. A card Message requests appears above your conversations when there is one.
  2. Read the first message.
  3. Tap Accept to turn it into a conversation, Ignore to hide it, or Block to end all contact.

Good to know

  • The card says it plainly: these people are outside the ones you chose to be reachable by, and they are not told what you decide.
  • Who may write to you first is set in Me, under Who can start a conversation with me.

See also: Block someone · Who can see my data

Block someone

Everyone

You want a person to stop seeing you and writing to you.

Steps

  1. Tap Block on a message request, or Block this person in a conversation.
  2. Confirm.
  3. To undo it, open Me, then Blocked people, and tap Unblock beside the name.

Good to know

  • A block works both ways: neither of you sees or reaches the other.
  • The person is not told.

See also: Message requests

Block someone

Notifications

Everyone

You want to know what alerts you, and to switch alerts off on this device if you prefer.

Steps

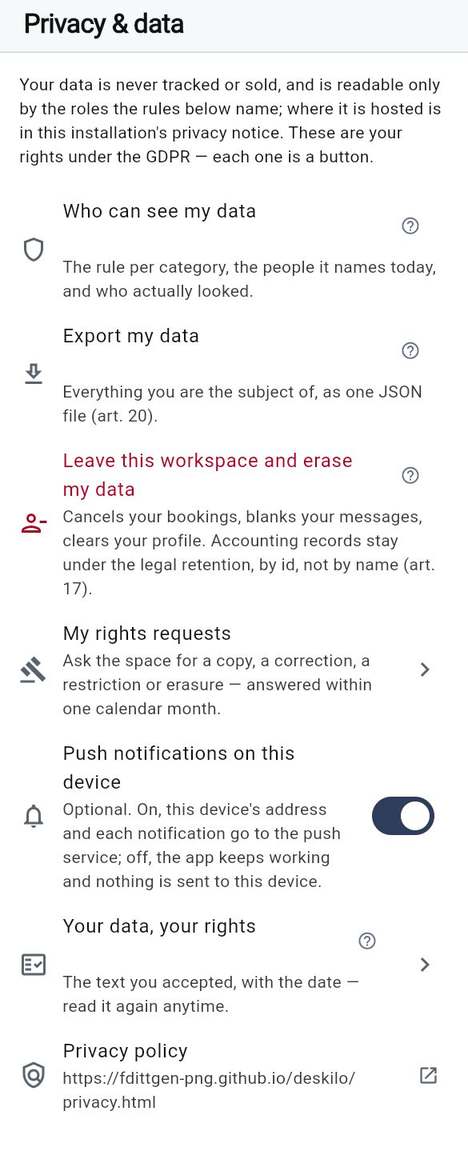
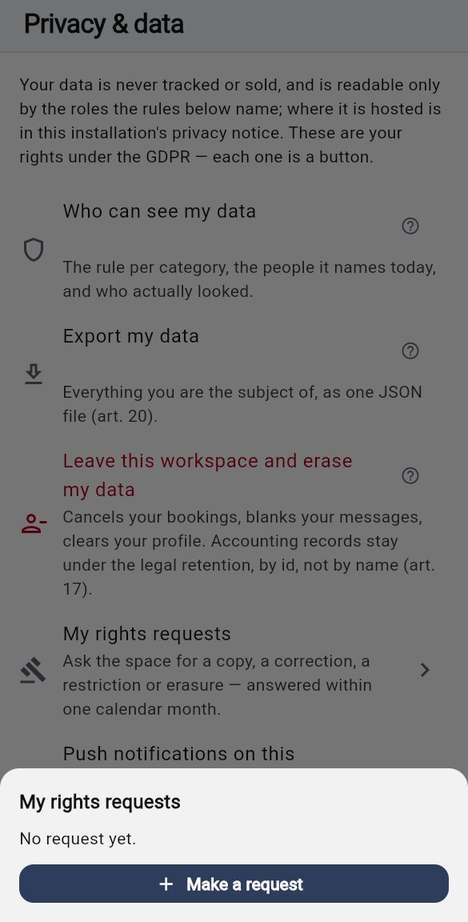
  1. Open Privacy & data.
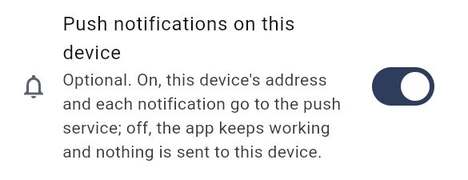
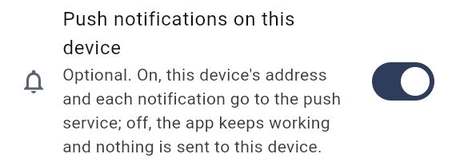
  2. Use the switch Push notifications on this device to turn push on or off.
  3. To silence one conversation, press and hold it in Messages and choose Mute notifications.

Good to know

  • You are alerted to requests waiting for your confirmation and to messages: in the feed and on the bell, by push when your installation has push set up, and, in the installed app (not in the browser), by a reminder on your device 15 minutes before a booking you have not checked in to yet.
  • DesKilo sends no e-mail of its own: the only e-mails are your account's (sign-up confirmation, password reset).
  • The count on the bell and the app icon adds your pending confirmations and unread messages.
  • Off, the app keeps working; nothing is sent to this device. There are no separate switches per category. If your system blocks the app's notifications, allow them in the system settings.

See also: Events & confirmations · Your data, your rights

Notifications

Discover

Everyone

You want to find workspaces that publish themselves, and write to their hosts.

Steps

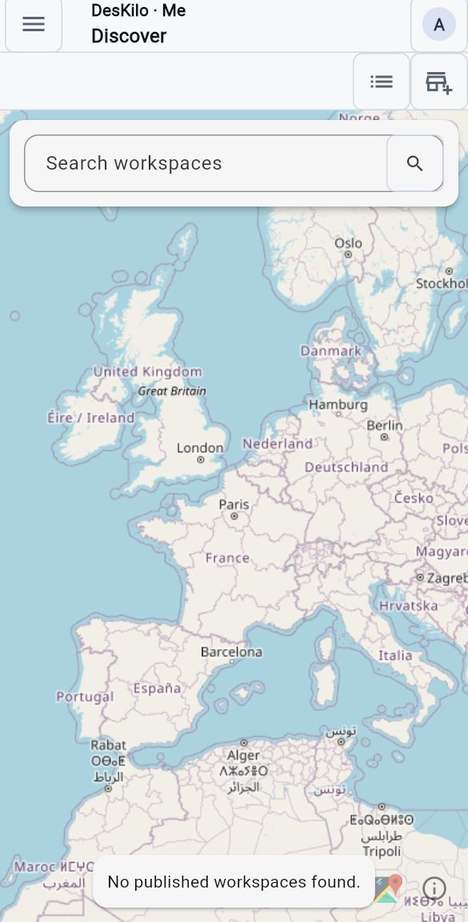
  1. Open Discover in Me. It opens on the map.
  2. Type in Search workspaces and tap the magnifier.
  3. Swipe the cards under the map, or tap the pin symbol on a card to Locate on map.
  4. Tap the list button to switch to List, and the map button to come back to Map.
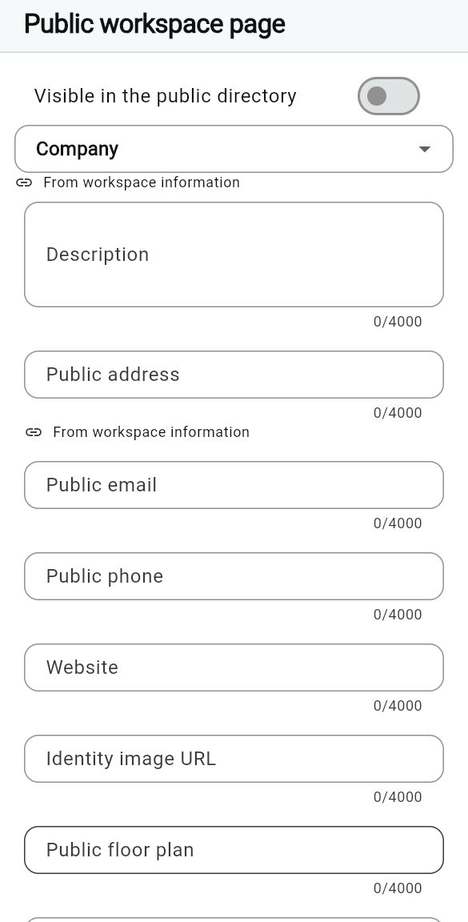
  5. Tap a workspace to read its public page: description, address, contacts, website, public floor plan.
  6. Use Write to the hosts, the chat button beside a host, Enter or Request a workspace profile, as the workspace offers.

Good to know

  • Only workspaces whose owner chose Visible in the public directory appear. If none match, the screen says No published workspaces found.
  • Writing to someone or asking to join connects you to that workspace's server first, and asks you before anything is sent.
  • Your messages with people on other servers appear in Messages; manage those servers under Connected servers.
  • Owners publish their page from their settings.

See also: Start a conversation or a group

Discover

Your public profile

Everyone

You want people outside your spaces to be able to read a few words about you.

Steps

  1. Open Me, then the Privacy section.
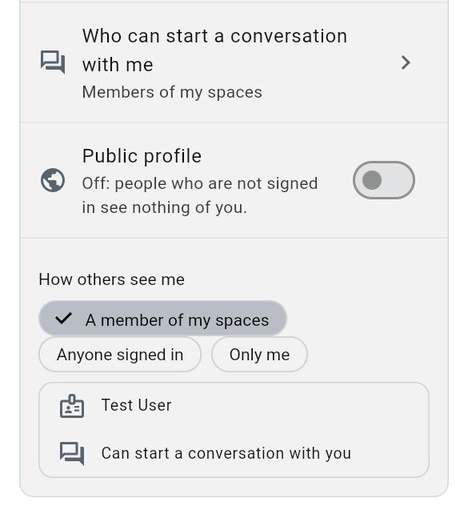
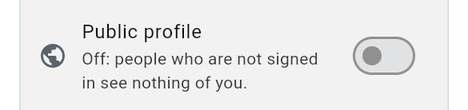
  2. Switch on Public profile and confirm Publish.
  3. Tap Copy the link and share it.
  4. Switch it off at any time to withdraw it.

Good to know

  • Anyone with the link, signed in or not, reads your name, profession and bio. Contact details, presence and spaces stay private.
  • A link to a profile that is withdrawn or unknown says This profile is not public.
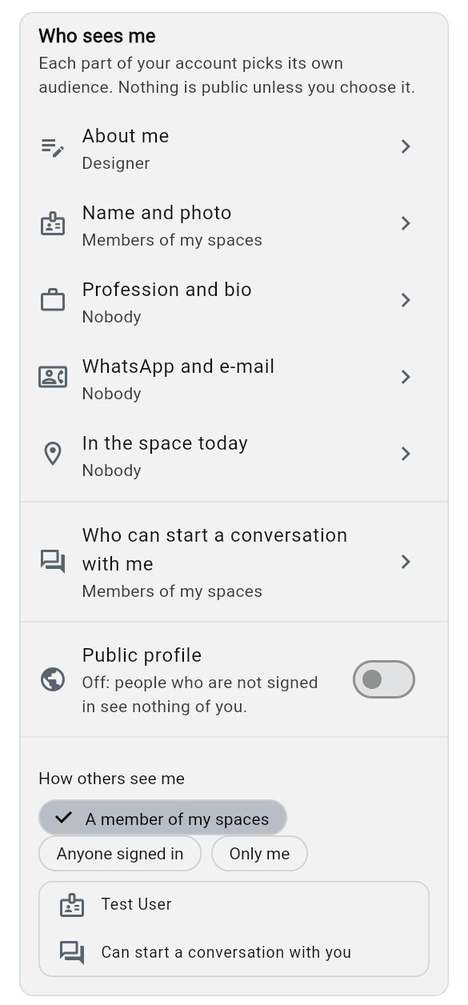
  • How others see me previews what each audience sees.

See also: Who can see my data

Your public profile

Your visits as a guest

Everyone

You asked to visit a space without becoming a member, and want to follow it.

Steps

  1. Open Me, then Home.
  2. Find My visits: each visit shows the space, the time and a status (Requested, Confirmed, Declined, Cancelled or Expired).
  3. To withdraw one that is still ahead, tap Cancel this visit.

Good to know

  • A visit is not a membership: it gives no role and no subscription.
  • The list appears only when you have visits, and only where the space has the Guest visits feature on.

See also: Discover

Chapter 04

Settings & profile, and your data

Everything personal about DesKilo lives in two places: Me, which is yours in every workspace, and Settings, which is where a single workspace keeps what is specific to your membership there. This chapter walks through both, then your privacy rights and the option to run your own server.

In this chapter:

How Settings is organised

Everyone

You want to know where a setting lives before you hunt for it.

Steps

  1. Open Settings. If your workspace calls it My account, it is the same screen.
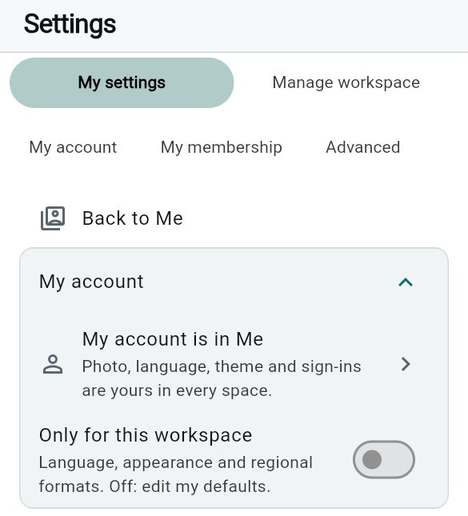
  2. Stay on My settings for everything about you. Owners and administrators also see Manage workspace, which holds the workspace configuration; members who administer nothing see no second tab.
  3. Use the three shortcuts under the tabs to jump: My account, My membership, Advanced.
  4. Open Back to Me to return to your Me page.

Good to know

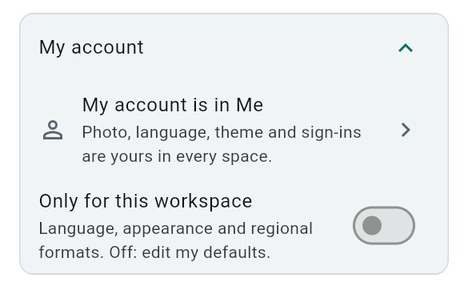
  • My account is a short card: it points to Me, where your photo, language, theme and sign-ins live for every workspace.
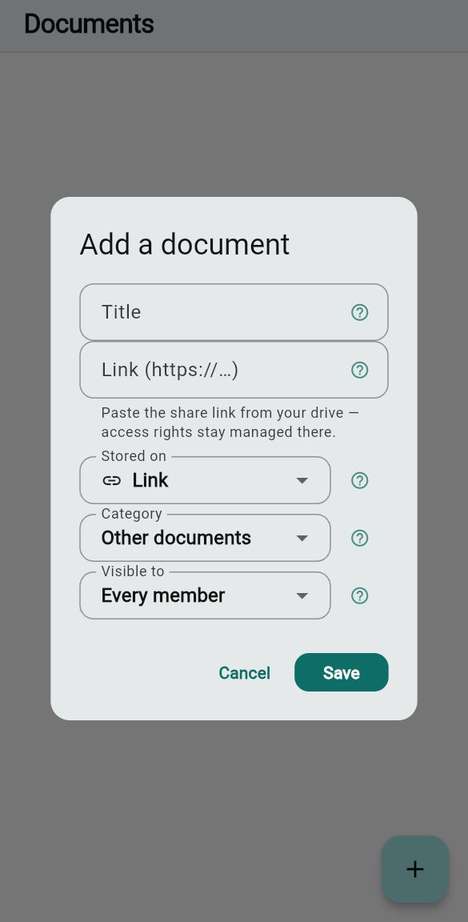
  • My membership is what concerns this workspace only: what you can do here, your badge and PIN, your status, your default booking period, your payment conditions and the documents.
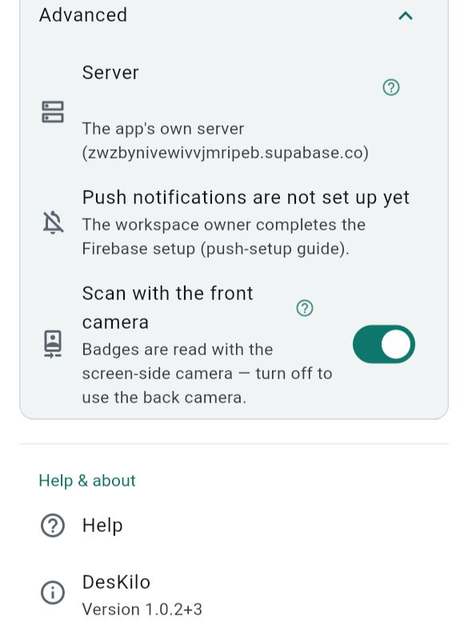
  • Advanced starts closed. It concerns this device: the server, push, the front camera.
  • Under the sections you also find Help, the app version, the privacy policy and Sign out.

See also: The workspace-only switch · Your own server

How Settings is organised

Choose a setting only for this workspace

Everyone

You want English in one workspace and French in the others, or a dark theme in just one of them.

Steps

  1. Open Settings and look at My account.
  2. Switch on Only for this workspace. The language, theme and regional rows appear right there.
  3. Change what you want. It applies to this workspace only.
  4. To undo, tap Use my defaults.

Good to know

  • With the switch off, you edit your defaults, the ones that apply everywhere.
  • A setting you changed only for this workspace is listed under In this space in the card.
  • The switch covers language, appearance and regional formats, nothing else.

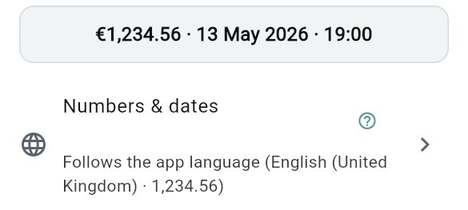
See also: App language · Theme · Numbers and dates

Choose a setting only for this workspace

Your account and photo

Everyone

You want people to recognise you in the directory, on the plan and in messages.

Steps

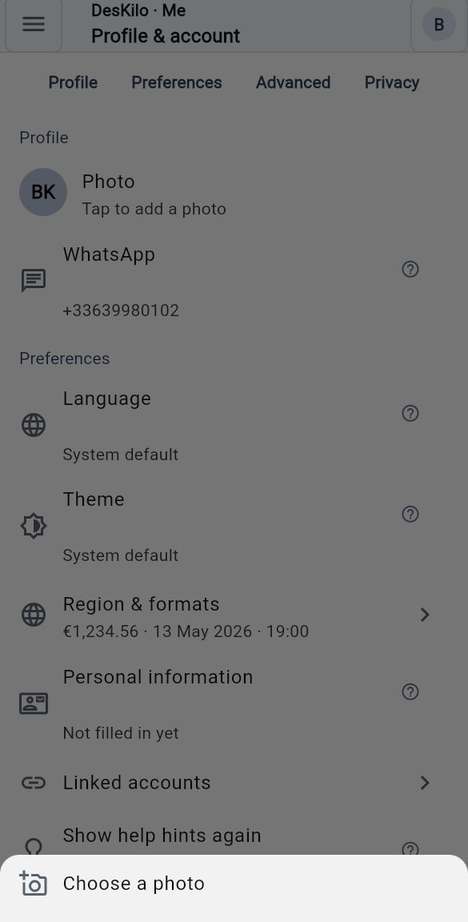
  1. Open Me. Your account is the Profile, Preferences, Advanced and Privacy blocks of that page.
  2. Tap Photo.
  3. Choose Choose a photo and pick an image, or choose Remove photo.

Good to know

  • The row says Tap to add a photo until you have one, then Tap to change.
  • Who sees your photo is your decision: see Who sees me.
  • Your account is yours across workspaces; your standing in one workspace is in its Settings.

See also: Profiles · Who sees me

Your account and photo

Personal information

Everyone

You want your invoices and letters to carry your name and details correctly.

Steps

  1. Open Me and tap Personal information.
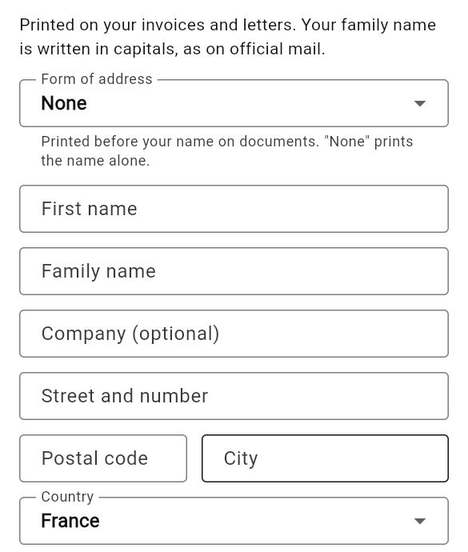
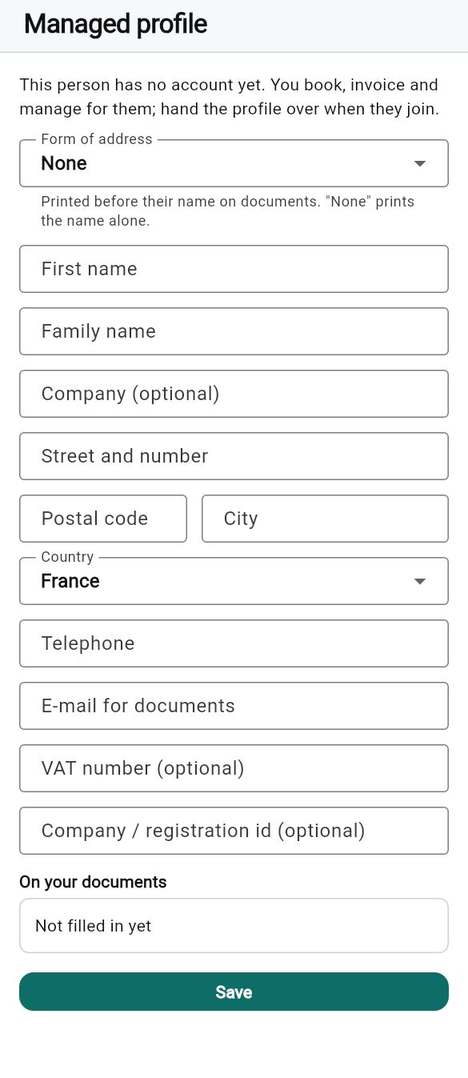
  2. Choose a Form of address if you want one printed before your name, then fill in First name, Family name, Company (optional), the address, Telephone and E-mail for documents.
  3. Check On your documents, which shows how it will print.
  4. Answer any questions your workspace adds under its own heading, then tap Save.

Good to know

  • Your family name and your city are written in capitals, as on official mail.
  • An empty form shows Not filled in yet.
  • The answers to your workspace's questions are personal data: they are part of your export and are erased when you leave the space.

See also: Your address · Your VAT number

Personal information

Your address

Everyone

You want invoices sent to the right place.

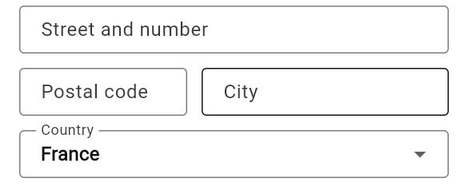
Steps

  1. Open Me and tap Personal information.
  2. Fill in Street and number, Postal code and City.
  3. Pick your Country, then tap Save.

Good to know

  • Where your workspace does not use the personal information form, Me shows a simpler Address row with a Country choice instead.
  • The address is printed on your invoices.

See also: Personal information

Your address

Your VAT number

Everyone

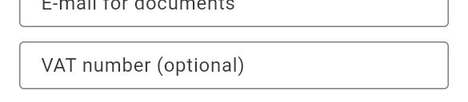
You are invoiced as a business and want the invoice to show your VAT number.

Steps

  1. Open Me and tap Personal information.
  2. Type your number in VAT number (optional).
  3. Add your Company / registration id (optional) if you have one, then tap Save.

Good to know

  • Leave it empty if you are a private person.
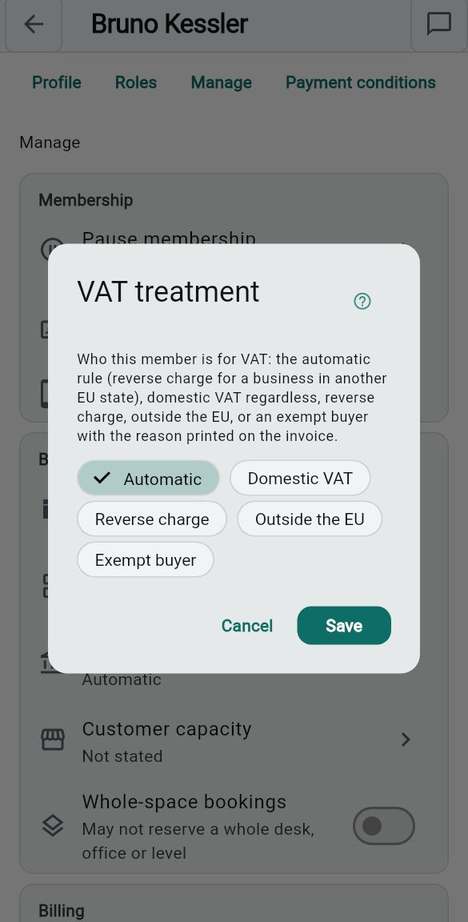
  • Whether an invoice carries VAT depends on this number and on the country; the workspace applies its own rules.

See also: Personal information

Your VAT number

Your payment terms

Member

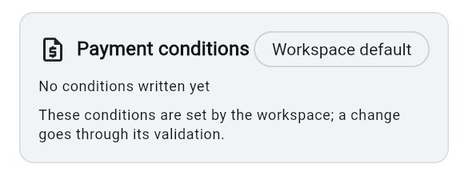
You want to know on what terms you are invoiced.

Steps

  1. Open Settings and, under My membership, tap Payment conditions.
  2. Read the badge: Workspace default, or Member's own if terms were agreed with you.
  3. Read the conditions: you cannot change them yourself. To have them changed, ask an administrator.
Good to know

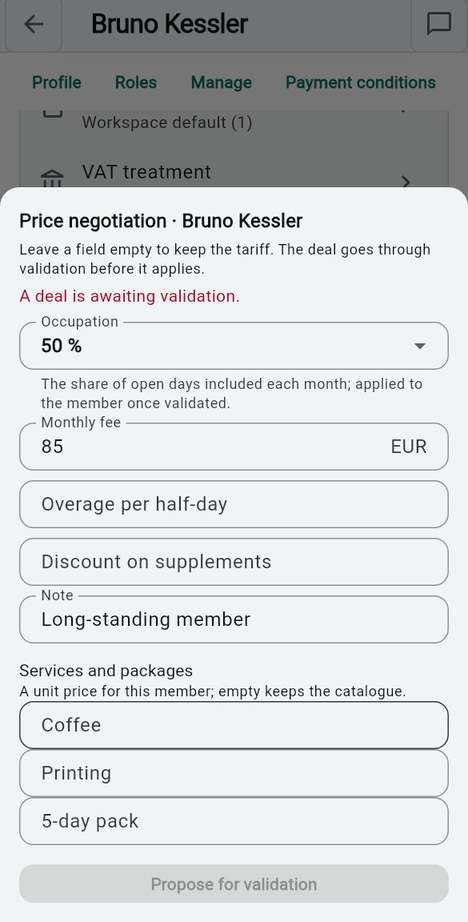
  • An administrator or owner with the permission proposes a change from your member page: Request a change, only the fields to change (a field left empty keeps the workspace's wording), a Reason (optional), then Submit request.
  • The workspace sets these conditions; a change goes through its validation and applies once validated.

See also: Your VAT number

Your payment terms

Your WhatsApp number

Everyone

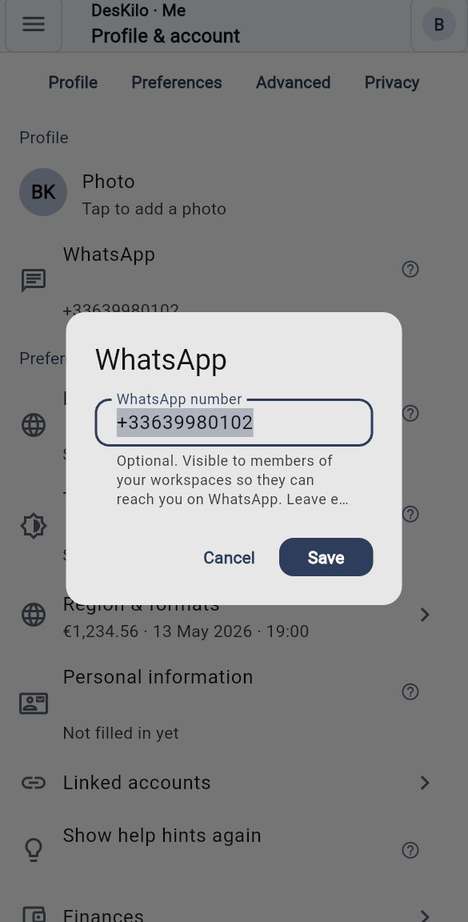
You want colleagues to reach you on WhatsApp, or to stop sharing the number.

Steps

  1. Open Me and tap WhatsApp.
  2. Type your number in WhatsApp number, with the country code.
  3. Tap Save. To stop sharing, empty the field and save.

Good to know

  • It reads Not shared until you set it.
  • Who sees the number is under WhatsApp and e-mail in Who sees me.
  • The row only appears when your workspace uses WhatsApp.

See also: Who sees me

Your WhatsApp number

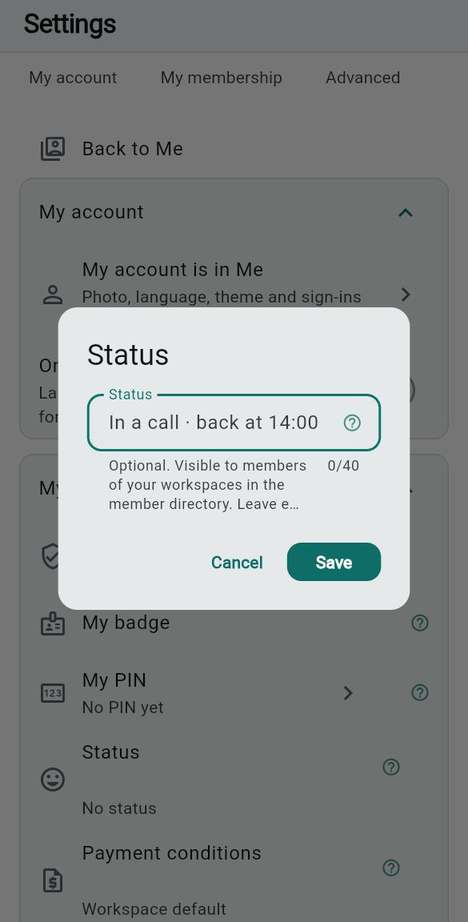
Your status line

Member

You want a short line beside your name, such as "In a call · back at 14:00".

Steps

  1. Open Settings and, under My membership, tap Status.
  2. Type your line in Status.
  3. Tap Save. To clear it, empty the field and save.

Good to know

  • It is optional and short; the field stops you at its limit.
  • Members of your workspaces see it in the member directory.
  • It says No status until you write one.

See also: Who sees me

Your status line

Default booking period

Member

You usually book the same half-day and want it already chosen.

Steps

  1. Open Settings and, under My membership, tap Default booking period.
  2. Choose Morning, Afternoon, Full day or No preference (full day).

Good to know

  • It only pre-selects: you can still change the period each time you book.
  • The row appears only when your workspace's booking setup offers a choice.

See also: The booking sheet

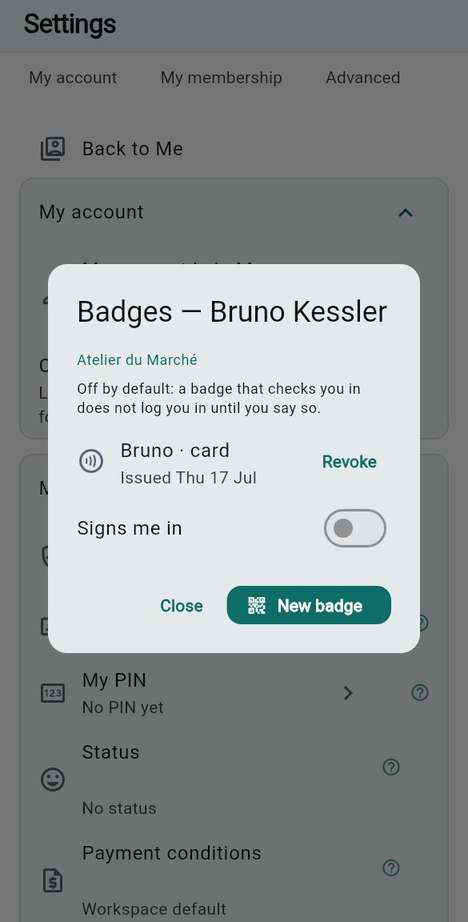
Your badge

Member

You want a badge or a card to identify you at the door or the kiosk.

Steps

  1. Open Settings and, under My membership, tap My badge.
  2. Tap New badge to get your QR code, then Save as PDF to print it, or tap Register card and hold your RFID or NFC card to the back of the device.
  3. To retire a badge, tap Revoke.

Good to know

  • A new QR code is shown only once: save it right away.
  • A revoked badge stops working at once. Issue a new one rather than looking for the old.
  • Signs me in is off by default: a badge that checks you in does not sign you in until you switch it on, and it needs a PIN first.
  • New badge needs the QR badges feature and Register card the RFID / NFC badges feature; your workspace may offer only one of them.

See also: Your badge PIN

Your badge

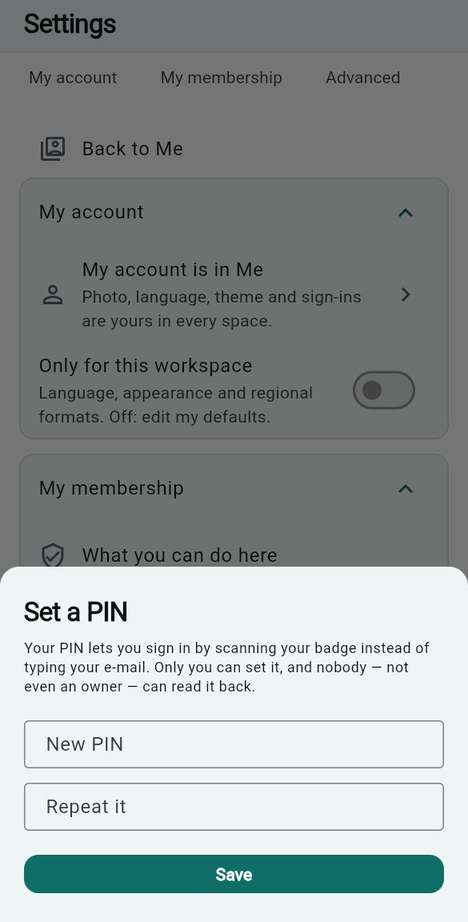
Your badge PIN

Member

You want to sign in by scanning your badge instead of typing your e-mail.

Steps

  1. Open Settings and, under My membership, tap My PIN.
  2. Choose Set a PIN, enter it in New PIN, repeat it in Repeat it and save.
  3. Open My badge and switch on Signs me in for the badge you want.

Good to know

  • The row reads No PIN yet or PIN set.
  • Only you can set it, and nobody, not even an owner, can read it back.
  • Change PIN replaces it; Remove PIN switches off badge sign-in for all your badges.

See also: Your badge

Your badge PIN

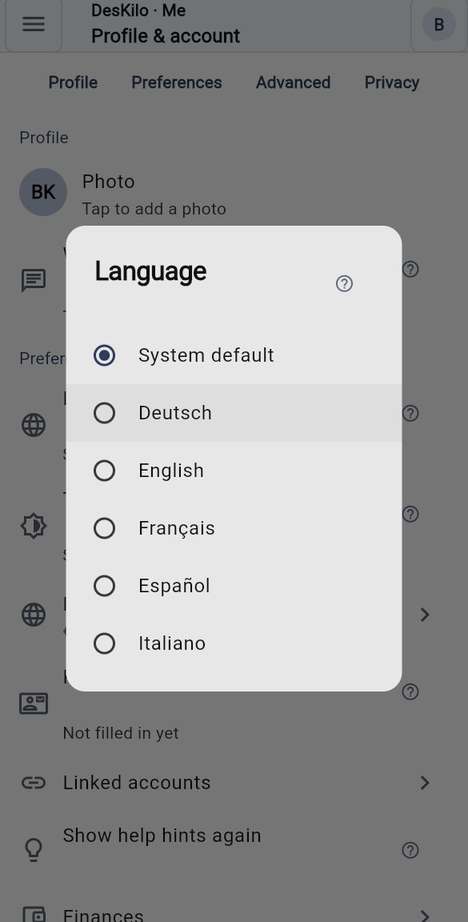
App language

Everyone

You want the app in your own language.

Steps

  1. Open Me and tap Language.
  2. Pick a language, or System default to follow your phone.

Good to know

  • It applies to every workspace, unless you set one for a single workspace with Only for this workspace.
  • Each language is written in its own name, so you can always find yours.

See also: Numbers and dates

App language

Theme

Everyone

You want the app lighter or darker.

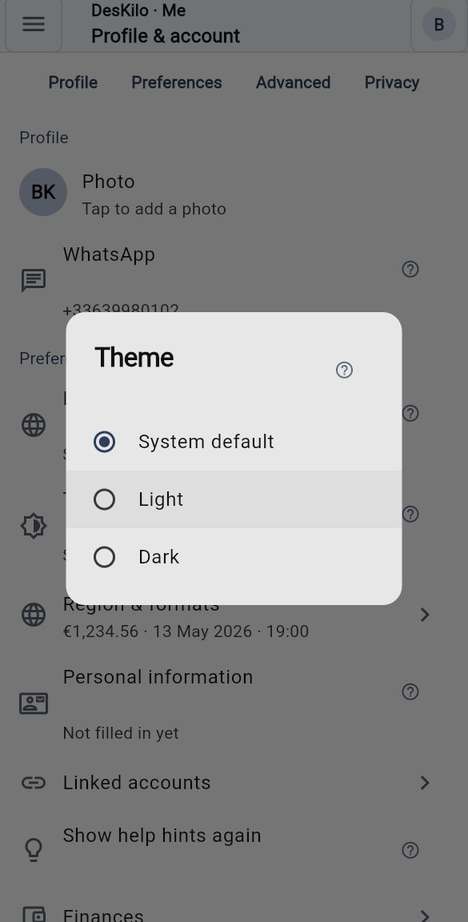
Steps

  1. Open Me and tap Theme.
  2. Pick System default, Light or Dark.

Good to know

  • System default follows your phone's own light and dark switch.
  • Like the language, it can be set for one workspace only.

See also: App language

Theme

Navigation style

Everyone

You prefer the bottom bar, or the menu you know from the web.

Steps

  1. Open Me and tap Navigation.
  2. Choose Default for this device, Classic: the bottom bar and the round button or Menu: the hamburger, like the web.

Good to know

  • The row is hidden in the web version, which always uses the menu, and appears only when your workspace offers it.

See also: How Settings is organised

Numbers and dates

Everyone

You want amounts and dates written the way you read them, whatever the app language.

Steps

  1. Open Region & formats.
  2. Tap Numbers & dates and pick a region, or Automatic to follow the app language.
  3. Check the preview line above: it shows an amount, a date and a time as you will see them.

Good to know

  • It is independent of the language: an English app can write French dates.
  • It can be set for one workspace only with Only for this workspace.
  • The row appears only when your workspace uses Region & formats.

See also: Clock

Numbers and dates

Clock

Everyone

You prefer 24-hour or 12-hour times.

Steps

  1. Open Region & formats.
  2. Under Clock, choose Auto, 24h or 12h.

Good to know

  • Auto does what your region does.
  • It changes how times are written, never what they mean.
  • The row appears only when your workspace uses Region & formats.

See also: Show times in my time zone

Clock

Show times in my time zone

Everyone

You are travelling and want times as your own clock shows them.

Steps

  1. Open Region & formats.
  2. Switch Show times in my time zone on.

Good to know

  • Off, times are in the workspace's zone, the one bookings are made in. This is the default.
  • On, times follow your device and are labelled wherever they differ from the workspace's.
  • The row appears only when your workspace uses Region & formats.

See also: Clock

Show times in my time zone

Restore the hints

Everyone

You dismissed the help hints and now want them back.

Steps

  1. Open Me.
  2. Tap Show help hints again.

Good to know

  • A message confirms: Help hints will be shown again.
  • Nothing else is reset.
  • The row appears only when your workspace uses help hints.

See also: How Settings is organised

Restore the hints

Front camera for scanning

Everyone

You scan badges with a wall-mounted tablet whose back camera faces the wall.

Steps

  1. Open Settings and open Advanced.
  2. Switch Scan with the front camera on to use the screen-side camera, or off for the back camera.

Good to know

  • It is on by default and applies to this device only.

See also: Your badge

Front camera for scanning

Linked accounts

Everyone

You want to sign in with another identity, such as a Google account, as well as your e-mail.

Steps

  1. Open Me and tap Linked accounts.
  2. Tap Link beside a provider and finish in the browser.
  3. To remove one, tap Unlink.

Good to know

  • A linked identity shows Linked.

See also: Profiles

Linked accounts

Privacy: who can see my data

Everyone

You want to know who can read what about you, and who actually looked.

Steps

  1. Open Privacy & data.
  2. Tap Who can see my data.
  3. Read the rule for each category, the people it names today, and Who accessed your data.

Good to know

  • Your data is never tracked or sold. Roles decide who reads it, and the server enforces that.
  • The sheet states the rule; there is nothing to switch on it. To choose what other members see of your profile, use Who sees me.

See also: Who sees me · Your data, your rights

Privacy: who can see my data

Choose who sees me

Everyone

You want to decide, one item at a time, who sees your name, bio, contact details and presence.

Steps

  1. Open Me and scroll to Privacy, to the Who sees me card.
  2. Tap an item: About me, Name and photo, Profession and bio, WhatsApp and e-mail, In the space today or Who can start a conversation with me.
  3. Choose an audience, for example Nobody, Members of my spaces or Members of chosen spaces, tick spaces if you chose some, and tap Save.
  4. Check How others see me at the foot of the card.

Good to know

  • Nothing is public unless you choose it.
  • Widening an audience asks you to confirm first.
  • Blocked people below the card lists whoever you blocked; they cannot see or reach you and you cannot reach them. Tap Unblock to undo it.
  • Anyone signed in is offered only for some items, such as Name and photo and Profession and bio. WhatsApp and e-mail and In the space today never go wider than your own spaces.

See also: Public profile · Who can see my data

Choose who sees me

Publish a public profile

Everyone

You want a page with your name and a few words that people can read without an account.

Steps

  1. Open Me and find Public profile in the Who sees me card.
  2. Switch it on and confirm with Publish.
  3. Tap Copy the link to share it.

Good to know

  • Anyone with the link reads your name, profession and bio. Contact details, presence and spaces stay private.
  • Off, people who are not signed in see nothing of you.

See also: Choose who sees me

Publish a public profile

Export my data

Everyone

You want a copy of everything DesKilo holds about you.

Steps

  1. Open Privacy & data.
  2. Tap Export my data.
  3. Save or share the file that is produced.

Good to know

  • It is one JSON file, built at the moment you ask.
  • The row appears only when your workspace offers data export.

See also: Rights requests

Export my data

Erase my data

Everyone

You want to leave a workspace and have your data erased.

Steps

  1. Open Privacy & data.
  2. Tap Leave this workspace and erase my data.
  3. Read what it will do, type the confirmation word and tap Erase.

Good to know

  • It cancels your open bookings and blanks your messages in this space. Your profile is cleared when this is your last space; past bookings stay as the space's occupancy record.
  • Accounting records stay for the legal retention period, by identifier and not by name.
  • The row appears together with data export. It is greyed out for an owner, who must hand the workspace over first, under Co-ownership.

See also: Export my data

Erase my data

Rights requests

Everyone

You want to ask the workspace for a copy, a correction, a restriction or erasure, and keep a record.

Steps

  1. Open Privacy & data and tap My rights requests.
  2. Tap Make a request and choose what you ask: see a copy of your data, take it elsewhere, correct it, restrict its use, object to a use, or erase it.
  3. Add Details (optional) and tap Send the request.

Good to know

  • The space answers within one calendar month; the sheet shows the date.
  • Each request shows whether it was received, extended (with the new date and the reason), answered or refused.

See also: Export my data · Erase my data

Rights requests

Push notifications on this device

Everyone

You want to stop notifications from being sent to this device, or turn them back on.

Steps

  1. Open Privacy & data.
  2. Switch Push notifications on this device off or on.

Good to know

  • Off, the app keeps working and nothing is sent to this device.
  • On, this device's address and each notification go to the push service.

See also: Your data, your rights

Push notifications on this device

Your data, your rights

Everyone

You want to reread what you accepted about your data.

Steps

  1. Open Privacy & data.
  2. Tap Your data, your rights.
  3. Read the text: what is processed and where, what is never done, who sees what, messages, push notifications, who is responsible, how long, and your rights.

Good to know

  • It shows the date and version you accepted; a change of the text asks for your acceptance again.
  • Privacy policy, just below, opens the full policy online.

See also: Who can see my data

Your data, your rights

Your own server

Everyone

By default the app uses DesKilo's service. Your community may run its own server, and you want to connect to it.

Steps

  1. Open Settings, then Advanced, then Server.
  2. Choose Connect an existing organization.
  3. Tap Scan a server QR, or paste the code into Server code.
  4. Save. The app signs you out and uses the new server the next time it opens.

Good to know

  • You never need an administrator key.
  • Use the app's server takes you back to the default at any time.
  • Your account lives on a server, which is why switching signs you out.

See also: How to run your own

Your own server

How to run your own

Everyone

You run a community and want to host DesKilo yourself.
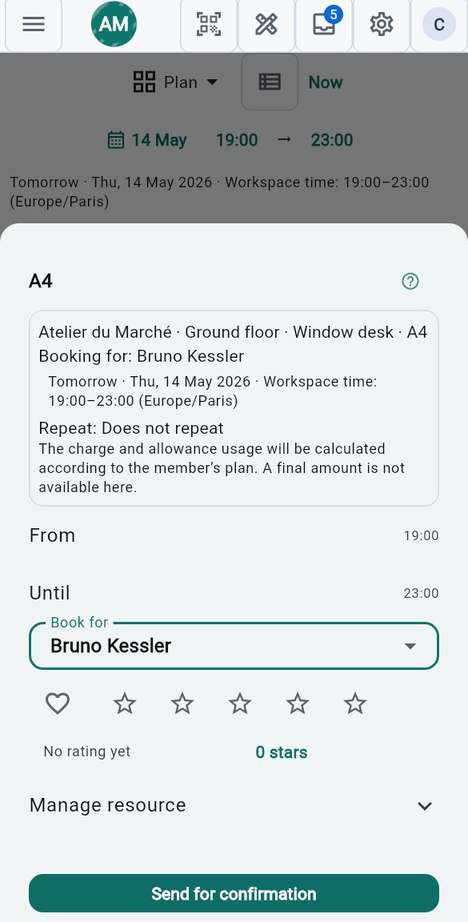
Steps

  1. Open the Server screen and tap Use your own server.
  2. Follow the four steps shown: create a project at supabase.com, install the schema, copy the Project URL and the publishable key, then paste them and Test the connection.
  3. Or tap Create a new instance for the guided set-up.

Good to know

  • The test tells you what is wrong: unreachable address, refused key or missing tables.
  • Members join the same server by scanning the QR on this screen.
  • The operator side, environments and deployment, is in the advanced chapter.

See also: Your own server

How to run your own
Chapter 05

Money

Everything you owe, have paid and have been invoiced lives in the Money tab: one place to read the month, settle it, find an invoice and ask for a change.

In this chapter:

Read your statement

Member

You want to know where the month stands: what you used, what it costs and what is left to settle.

Steps

  1. Open Money and stay on Statement.
  2. Use the arrows beside the month name to browse other months.
  3. Read Balance first: Outstanding in red means you owe it, Settled means nothing is left.
  4. Read This month below it: the days you used out of the days your plan includes, and the days left.
  5. Read the cards that follow: your subscription, extra half-days, services, packages, open positions and Payments & credits.

Good to know

  • A booked morning or afternoon counts as half a day, so you may see values like 0.5 days.
  • The card also states your plan's rule. With pay as you go it always shows the rate of extra days; with the other two rules it tells you to ask an administrator or to buy a package once all your days are used.
  • A line marked "pending validation" is waiting for someone to confirm it and is not counted yet.
  • Tap the PDF icon beside the month to export the bill.

See also: Pay what you owe · What each booking cost

Read your statement

When a month has been invoiced

Member

You want to know which figure to trust once the workspace has sent you an invoice for a month.

Steps

  1. Open Money and go back to the invoiced month with the left arrow.
  2. Look for the card named Invoice (or Credit note when the total is negative) followed by its number.
  3. Read the state on the card, then Invoice total; a partly paid invoice also shows Paid so far and Remaining to pay.

Good to know

  • Once a month is invoiced, the invoice decides whether it is settled. The payment that clears it usually arrives in a later month, so the month's own balance is no longer the reference.
  • A credit note reads "The workspace owes you this amount": there is nothing to pay on your side.

See also: Your invoices

When a month has been invoiced

Pay what you owe

Member

You want to settle your balance and know how the workspace expects the money.

Steps

  1. Open Money and choose Payments.
  2. Check Balance under Pay; overdue invoices from all periods are called out above it.
  3. Read Payment instructions: the bank details, the payment reference to quote and the other ways the workspace accepts. Tap an IBAN or a value to copy it.
  4. If the button is there, tap Pay online.
  5. Once you have paid another way, record the payment.

Good to know

  • The instructions appear only while something is owed, and only if the workspace has set them up. If there is nothing, ask your administrator how to pay.
  • An online payment the provider has not confirmed shows as Online payment pending: the balance keeps showing what is owed until it is confirmed.
  • Under Requests you can also submit an expense, ask for Request extra half-days or, if your plan works with packages, Buy a package.

See also: Record a payment · Submit an expense

Pay what you owe

Record a payment

Member

You paid by transfer, cash or another way and you want the workspace to know.

Steps

  1. Open Money, choose Payments and tap Record a payment.
  2. Enter the Amount.
  3. Tap how you paid: Bank transfer, Cash, PayPal, TWINT, Card, Wero, Lydia, Wise or Other. Tap it again to clear it.
  4. Check Payment date and Applies to, the month this payment settles.
  5. Add a Note (optional), then tap Submit for confirmation.

Good to know

  • Your payment is not final when you send it. It waits as "pending validation" until the people the workspace has chosen confirm it, as set in Validation rules. Only then does it settle your balance.
  • Your payment date cannot be in the future. Applies to can reach one month ahead, to pay in advance.

See also: Pay what you owe · Finance alerts

Record a payment

Your invoices

Member

You want to find an invoice, see whether it is paid and get its PDF.

Steps

  1. Open Money and choose Invoices.
  2. Read the list, newest first. Each row shows the number, a status chip, the month, the date and the amount.
  3. Tap an invoice to open it.
  4. Tap Quick view to read it on screen, Download PDF to save it or Share PDF to send it.

Good to know

  • The statuses are Open, Awaiting validation, Paid, Partially paid, Partially paid · remainder cancelled and Refunded. An open invoice says when it is due or how many days it is overdue, and how many reminders you have received.
  • Tap the payment icon on an open invoice to go to Payments.
  • If the list is empty, the workspace has not invoiced you yet; it invoices a month once it closes.
  • Invoices cannot be edited. A wrong invoice is marked Erroneous and replaced by a new one, and the erroneous one leaves your list. When invoices are regrouped into one, the regrouped invoice replaces them in your list.

See also: Pay what you owe · Your finances across spaces

Your invoices
Your invoices

What each booking cost

MemberAdministrator

You want to see, booking by booking, what was billed this month.

Steps

  1. Open Money and choose Usage.
  2. Pick the month with the arrows.
  3. Read each card: the day, the time, the place, then Booked, Present and Billed.
  4. For a booking you left early, tap Bill the time I was here, add a reason if you like and tap Ask.
  5. For a summary of the month, tap Month consumption report.

Good to know

  • A booking nobody checked in to is billed in full, and the card says so.
  • Your request is never decided by you: someone else accepts or refuses it. A corrected row keeps showing what it used to be.
  • Administrators can ask to Remove this record.

See also: Reports · The booking sheet

What each booking cost

Finance alerts

MemberAdministrator

You want to see what is waiting on you in money matters, without reading the whole feed.

Steps

  1. Open Money.
  2. Tap Finance alerts, the row at the top. The number on the bell is how many are waiting.
  3. Read the list: the requests you must confirm come first, then the money events.

Good to know

  • This is the usual alerts view of Events, already filtered on money.
  • Payments, expenses and extra half-days you submitted appear here while they wait for confirmation, and show who validated or declined them.
  • The row appears when the Events tab feature is on.

See also: Approve or decline an expense

Finance alerts

Reports: quick view, download, share

Member

You want a document about your own money, to read, keep or send to your accountant.

Steps

  1. Open Money and choose Documents.
  2. Pick the month with the arrows, for the reports that depend on a month.
  3. Tap a report: My conditions, Payments report, Consumption report or This month's statement (PDF).
  4. Choose Quick view, Download PDF or Share PDF.

Good to know

  • The same three choices appear on every report and every invoice.
  • Quick view shows the document on screen without saving anything.
  • A report you cannot see is not switched on in your workspace.

See also: Your invoices · Your negotiated prices

Reports: quick view, download, share

Your negotiated prices

Member

You want to know whether you pay the workspace tariff or a price agreed just for you.

Steps

  1. Open Money and choose Documents.
  2. Read My negotiated prices: for Monthly fee, Overage per half-day and Discount on supplements, Tariff shows what everyone pays and Mine what you pay.
  3. Tap Who can see this to learn who can read your prices.

Good to know

  • "You are on the workspace tariff" means no deal applies; your column shows a dash.
  • When a deal applies, the card says since which month, and the tariff figure is crossed out.
  • A deal proposed for you waits as "awaiting validation" and applies only once validated.
  • You cannot change a deal here; an administrator proposes it. See Price negotiation.

See also: Read your statement

Your negotiated prices

Open a document from the library

Member

You want the statutes, a guide or the statements your workspace has shared.

Steps

  1. Open Money, choose Documents and tap Document library, or go straight to Documents.
  2. Find your document under its category: Statutes & legal, Financial statements, Meeting minutes, Guides & manuals or Other documents.
  3. Tap it. It opens in your browser from wherever it is stored.

Good to know

  • You only see the documents your role may read; a lock marks those limited to Admins and owners or Owners only.
  • The library holds links. Who may open the file is decided where it is stored, not in DesKilo.
  • Administrators with the right permission add and remove documents; see Document title.

See also: Reports

Submit an expense

Member

You paid something for the space and you want the workspace to reimburse you.

Steps

  1. Open Money, choose Payments and tap Submit an expense.
  2. Enter the Amount.
  3. Pick a Category: Coffee & kitchen, Equipment, Supplies or Other.
  4. Write a Description.
  5. If you bought something members will use, turn on This is a supply for the space (it appears when your workspace has Supplies from expenses switched on) and fill in the item, the quantity and the unit price.
  6. Tap Submit for confirmation.

Good to know

  • You see "Expense submitted — waiting for approval". The expense counts only once it is confirmed.
  • A confirmed supply goes on the shelf as a service: members who use it pay for it.
  • In a VAT-registered space with Input VAT switched on, choose the VAT on this expense and the Deductible share (%) — 100 % unless part of the expense is private or serves an exempt activity. Once the expense is approved, its deductible VAT is subtracted on the VAT return of the month it was approved. Turn on A fixed asset for equipment the space keeps and depreciates: its VAT is declared on its own line (CA3 line 19). A scheduled expense asks the same once, and every occurrence carries it.
  • Recurring costs have their own door, Scheduled expenses, next to this button.

See also: Approve or decline an expense

Submit an expense

Approve or decline an expense

AdministratorOwner

An expense is waiting and you decide whether the workspace pays it.

Steps

  1. Open Events, or tap Finance alerts in Money.
  2. Look under Waiting for your confirmation for the line naming the amount and the member.
  3. Tap Accept to confirm it, or the cross to Decline it.

Good to know

  • Some expenses need more than one validation. The line shows how many are done, such as "1/2 validations".
  • Who may validate, and how many are required, is set in Validation rules.
  • Each decision stays on the line: who confirmed or declined, and when. The member sees the outcome.
  • Finance alerts in Money appears when the Events tab feature is on.

See also: Finance alerts

Approve or decline an expense

How amounts are shown

Everyone

You want to read a figure without second-guessing what it includes.

Good to know

  • Amounts use your workspace's currency and your number format. An invoice keeps the currency it was issued in.
  • On the statement, charges carry a minus sign and payments and credits a plus. A balance in red is money you owe.
  • Where a price includes VAT it says so, for example "incl. VAT 20 %". The invoice PDF lists the VAT it contains.
  • If your workspace does not charge VAT, no VAT is shown.
  • Days are shown in whole and half days.

See also: Read your statement · Your invoices

Your finances across spaces

Member

You belong to several spaces and want all your invoices, payments and reminders in one place.

Steps

  1. Open Money, choose Payments or Invoices, and tap Open for your space on the card Your finances across spaces.
  2. Choose a tab: Outstanding, Paid, Payments or Reminders.
  3. If you belong to several spaces, filter by space at the top.

Good to know

  • Outstanding shows "Nothing to pay — you are up to date" when you owe nothing.
  • Reminders lists the reminders you have received, with their level.
  • Full history, usage and other servers are reachable from the same screen.

See also: Your invoices

Invoicing at a glance

Billing administratorOwner

You issue and chase the invoices of the whole workspace and want to know where to start.

Steps

  1. Open Invoicing.
  2. Read the tabs: To invoice lists members still to be invoiced for the month, Open the invoices issued and unpaid, and Archive those that are closed.
  3. Read the line of four steps under the banner: To issue, To collect, To confirm and Closed, with a count for each.
  4. Tap Month-close wizard to invoice a month, or New invoice for a single one.
  5. Tap the tools icon for the invoice register, reminder rules, the invoice PDF template and My finances.

Good to know

  • Invoices are never edited or deleted. A wrong one is marked erroneous and replaced.
  • The full workflow, from month-close to settlement and reminders, is in chapter 08: Reminder rules and The invoice PDF template are good places to continue.

See also: Reminder rules

Invoicing at a glance
Chapter 06

Your space, set up by you (Workspace settings)

This chapter is for the people who run a space: owners, co-owners and the administrators they trust with the settings. Here you draw the floors, decide who may come in and when, choose which features exist, give the space its look and its words, and take a copy of everything.

In this chapter:

Tip Most screens in this chapter sit in the menu under Workspace, Availability, Features and Roles. Each entry only appears for people who hold the permission it needs, and some only while their feature is switched on. An administrator sees these screens only if the owner has given them the permission in the role matrix.

Space editor: add, rename and delete floors

OwnerAdministrator

You want to give the building its floors, in the order people expect them. The Workspace editor lists every floor of the space.

Steps

  1. Open Workspace editor, or tap Edit workspace on the Reserve screen.
  2. Tap Add level, type the name and tap Save.
  3. Drag the handle at the left of a floor to change the order.
  4. Tap the three dots (Level actions) to Rename or Delete a floor.
  5. Tap a floor to draw on it.

Good to know

  • Deleting a floor removes every office, desk and seat on it. The confirmation says what becomes of bookings that point at them.
  • The line under each floor tells you whether it is Bookable as a whole or Not bookable as a whole.
  • Without any floor the editor says No levels yet. Add the first floor of your workspace.

See also: Book a whole floor · Draw rooms, desks and seats

Space editor: add, rename and delete floors

Let members book a whole floor

OwnerAdministrator

You want one team to be able to take a complete floor for a day.

Steps

  1. In the Workspace editor, tap the layers button on the floor's row.
  2. Switch on Bookable as a whole.
  3. Type the Price per half-day.
  4. Tap Save.

Good to know

  • The layers button is filled when the floor is bookable as a whole.
  • Booking a whole floor, office or desk also needs the Desk, office & level reservations feature. Each member needs the level-reservation right; administrators have it automatically. See A feature switch.

See also: Office and desk properties

Let members book a whole floor

Draw rooms, desks and seats

OwnerAdministrator

You want the plan on screen to look like the real floor. Everything sits inside a room: you draw a room, put desks in it, then put seats on the desks.

Steps

  1. Open a floor from the Workspace editor. An empty floor offers Draw the first room.
  2. Tap Office and drag on the grid to draw a room.
  3. Tap Desk and drag inside the room to draw a desk.
  4. Tap Seat, then tap a desk to add a seat to it.
  5. Tap Image, then tap where an illustration should go.
  6. Tap an element to select it. The bar at the bottom offers Duplicate, Properties and Delete.

Good to know

  • Tapping the armed tool a second time puts it down again, and the canvas goes back to selecting.
  • The app refuses a shape that is Overlaps an existing element. or Must be fully inside an office. Seats can only be placed on a desk, and a desk that is full says No room left on this desk.
  • The picture button at the top right sets, replaces or removes the Background image of the floor, for example a scan of the real plan.
  • Deleting a room takes its desks and seats with it.

See also: Seat properties · Desk transparency

Draw rooms, desks and seats

Name an office or a desk and put a price on it

OwnerAdministrator

You want a room or a desk to carry its own name, and to be bookable in one piece.

Steps

  1. Select the office or the desk on the floor and tap Properties.
  2. Change Office name (or Desk name).
  3. Switch on Bookable as a whole if somebody may reserve it entire, with everything inside it.
  4. Type the Price per half-day that appears.
  5. Tap Save.

Good to know

  • The price field only appears while the switch is on.
  • A room that is bookable as a whole can only be reserved while nothing inside it is booked.

See also: Book a whole floor · Seat properties

Name an office or a desk and put a price on it

Set up a seat

OwnerAdministrator

You want a seat to say which way the chair faces, what comes with it and when it is out of service.

Steps

  1. Select the seat on the floor and tap Properties.
  2. Change Seat name.
  3. Pick the Sitting direction: the arrow shows which way the chair faces on the plan.
  4. Choose a Chair type.
  5. Tap the Accessories that belong to this seat. A price shown beside one is a supplement per half-day.
  6. If the seat carries a tag, type its number into NFC/RFID tag, or use Read a tag now. The tag field appears when the NFC/RFID chair tags feature is on, and reading needs a device that can read tags.
  7. Switch on Blocked (maintenance) to take the seat out of service, then tap Save.

Good to know

  • A tag number can only belong to one chair: This tag is already linked to another chair.
  • With no accessory yet, the sheet offers No accessories yet — set them up.

See also: NFC badge check-in

Set up a seat

The workspace ID

OwnerAdministrator

You want people to find your space and ask to join. The Workspace ID & QR screen shows the member invite: a QR code and the ID behind it.

Steps

  1. Open Workspace ID & QR. The Member invite tab is shown.
  2. Tap Copy ID to paste the ID anywhere, or Share as PNG to print or post the QR code.
  3. To choose an ID people can remember, tap Change workspace ID, type 4 to 20 letters or digits and tap Save.

Good to know

  • The ID is unique across DesKilo. If it is taken, or not 4 to 20 letters or digits, the app says That ID was rejected.
  • Anyone who scans the code or types the ID asks to join as a member. Nobody gets in without approval.
  • Once you change the ID, the old one stops working. Print the QR code again.
  • The Administrator invite tab is for owners and co-owners.

See also: Administrator invite · Invite someone

The workspace ID

Invite an administrator

Owner

You want to bring in a person who will help run the space. The Administrator invite tab gives you a code for exactly one person.

Steps

  1. Open Workspace ID & QR and tap Administrator invite.
  2. Give the code, or its QR, to the person it is meant for.
  3. For the next administrator, tap New administrator code.

Good to know

  • The code admits one person as an administrator, then it expires.
  • There is no owner invite. Only an owner can grant ownership, in Members & plans.

See also: The workspace ID · The role matrix

Invite an administrator

Invite someone by message

OwnerAdministrator

You want to send a friendly, ready-made invitation instead of a bare code.

Steps

  1. On Workspace ID & QR, tap Invite someone.
  2. Fill in First name (optional), Last name (optional) and the phone number if you want.
  3. Under Roles on arrival, tap any role this person should receive when they join.
  4. Pick the Message language.
  5. Send it with WhatsApp, SMS or Share….

Good to know

  • The message explains the steps: download, create an account, join. It is written in the language you pick, and starts from the one set as Workspace language.
  • Each message carries its own personal code. You can write your own text under Invitation message.

See also: The workspace ID

Invite someone by message

Open weekdays

OwnerAdministrator with the permission

You want the space to be open only on the days you work. The Availability screen starts with the days of the week.

Steps

  1. Open Availability.
  2. Under Open weekdays, tap a day to open or close it.

Good to know

  • At least one weekday must stay open.
  • A booking that touches a closed weekday is refused, and the plan draws that day as closed.

See also: Closure days · Granularity

Open weekdays

Granularity

OwnerAdministrator with the permission

You want bookings to follow a rhythm that suits your space: half days, full days, or any time you like.

Steps

  1. Open Availability.
  2. Under Booking granularity, choose the shape of a booking.

Good to know

  • The choices are Free time period, 5-minute slots, 15-minute slots, 30-minute slots, 1-hour slots, Half days (morning & afternoon), Full days only and Real hours (exact from–to, half/full days as shortcuts). Real hours appears when the Working hours feature is on.
  • The plan, the booking sheet, a scanned code and the kiosk all offer only what the granularity allows.

See also: Working hours

Granularity

Working hours

OwnerAdministrator with the permission

You want a morning, an afternoon and a day to mean the same thing everywhere.

Steps

  1. Open Availability.
  2. Under Working hours, tap Day starts, Half-day boundary and Day ends and set each time.
  3. With Real hours granularity, also set Hours billed as a half day and Hours billed as a full day.

Good to know

  • Half-day and full-day windows in reservations, check-in and invoicing follow these hours.
  • The small tag under the title says whether the hours are the product default, come from a template or are your own. Reset to template and Reset to product default take them back.
  • The day must run in order: start, then the half-day boundary, then the end.
  • This section is part of the Working hours feature.

See also: Outside the opening hours

Working hours

Closure days

OwnerAdministrator with the permission

You want a holiday, a week in August or a day for the plumber to close the space without anyone booking it.

Steps

  1. Open Availability and go to Closure days.
  2. Tap Add closure day, pick the date and, if you like, a Reason (optional).
  3. To remove one, tap the bin beside it.

Good to know

  • A booking on a closure day is refused and the reason is shown.
  • Days that are already invoiced cannot be turned into closure days by the public holidays generator.

See also: Public holidays

Closure days

Public holidays

OwnerAdministrator with the permission

You want a whole year of public holidays as closure days in one go.

Steps

  1. In Availability, under Closure days, tap Add public holidays.
  2. Use the arrows to choose the year. The sheet lists the dates that would become closure days.
  3. Tap the button at the bottom to create them.
  4. Prefer an open-data list? Tap Import public holidays (open data), pick the region and confirm.

Good to know

  • Nothing is created before you confirm, and days that already exist are marked.
  • Months that are already invoiced are skipped.
  • These entries appear when the Public holidays feature is on. Import public holidays (open data) also needs the Import public holidays feature.

See also: Closure days

Booking policies

OwnerAdministrator with the permission

You want to relax or tighten the rules of booking. Whatever you set here holds on every way of booking: the app, a scanned code and the kiosk.

Steps

  1. Open Availability and go to Booking policies.
  2. Switch the policies you want on or off.
  3. Under Outside the opening hours and Booking limits, set the rest.

Good to know

  • The two switches are off by default.
  • This section is part of the Booking policies feature.
  • The line What the plan tells apart below it explains the states members see on the plan.

See also: Allow past bookings · Admins may check members out · Booking limits

Booking policies

Allow past bookings

OwnerAdministrator with the permission

You want members to record a booking after the fact, for a space that notes attendance later.

Steps

  1. In Availability, under Booking policies, switch on Allow past bookings.

Good to know

  • Off, a booking that already ended on an earlier day is refused.
  • Booking an earlier window on the same day is always allowed.

See also: Booking policies

Administrators may check out

OwnerAdministrator with the permission

You want staff to close the room in the evening and end the check-ins people forgot.

Steps

  1. In Availability, under Booking policies, switch on Admins may check members out.

Good to know

  • Off, check-out is strictly personal.
  • With it on, an administrator can end a member's running check-in.

See also: Booking policies

Outside the opening hours

OwnerAdministrator with the permission

You want to say what happens when somebody arrives early or stays late. One answer applies to every granularity.

Steps

  1. In Availability, find Outside the opening hours.
  2. Choose Off, Spontaneous only, Free or Charged.

Good to know

  • Off: nothing outside the hours, no booking ahead, no walk-up.
  • Spontaneous only: walk-up check-ins stay possible, evening overtime included, but booking ahead outside the hours is refused.
  • Free: allowed, never counted and never charged.
  • Charged: allowed and counted like ordinary usage, except on a day when the member already holds a regular booking.
  • A booking that touches the working hours is an ordinary booking.

See also: Working hours

Outside the opening hours

Booking limits

OwnerAdministrator with the permission

You want to say how far ahead people may book, how short or long a booking may be, and how many they may hold at once.

Steps

  1. In Availability, find Simultaneous reservations per member and use the minus and plus buttons.
  2. Under Booking limits, set Advance booking horizon, Minimum duration and Maximum duration.

Good to know

  • Simultaneous reservations per member is how many overlapping bookings one member may hold. 1 keeps one place at a time.
  • A booking ends on the day it starts, so a full day is the longest it can be.
  • The minimum cannot exceed the maximum, otherwise no booking would be accepted. The screen warns you.
  • Every refusal names the limit and its value.

See also: Booking policies

Booking limits

Switch whole processes on or off

OwnerCo-owner

You want a bird's-eye view of what the space can do, and to switch a whole area on at once. The Features screen opens on one card per business process.

Steps

  1. Open Features. The Processes view is shown.
  2. Read each card: its state, how many subprocesses are active and how many features are on.
  3. Open a card and tap Switch on or Switch off for the whole process or one subprocess.
  4. Read the preview, then confirm.

Good to know

  • A card is Active when all its features work, Partial when some do, Available when none is on yet, and Needs attention when a feature is on but waits for a prerequisite that is off.
  • The chips All, Active, Available and Needs attention narrow the cards, and Search processes and features reaches everything.
  • The preview lists what is switched on, what is Also needed from another process and what is already on. Switching something off that other features need is refused until you choose what happens to them.

See also: A feature switch

Switch whole processes on or off

A feature switch

OwnerCo-owner

You want to turn one single feature on or off.

Steps

  1. Open Features and tap Switches.
  2. Find the feature with Search features, or narrow the list with Changed or Maturity.
  3. Flip its switch.

Good to know

  • Switch a feature on and every part of it appears: the tab, the button, the link. Switch it off and none remains, even a saved link.
  • A feature that needs another sits under it with Requires… and says Waiting on the feature above while the parent is off. Its own choice is kept.
  • Switching a feature on can also switch on what it needs. The app tells you.
  • A feature not yet reviewed as stable asks you to confirm first: it may change and has known limits.
  • Something already done stays done. An invoice issued while a feature was on keeps what it says.

See also: Switch whole processes on or off

A feature switch

Country

OwnerAdministrator with the permission

You want the space to know where it is established. Workspace opens on General details.

Steps

  1. Open Workspace.
  2. Under General details, pick the Country.
  3. Tap Save at the bottom.

Good to know

  • The country proposes the currency and the time zone, and decides which VAT rates are offered.
  • Once the space has issued a document or recorded money, the country can no longer be changed: saving says "The currency and the country are fixed once this space has issued a document or recorded money. Nothing was saved."
  • Save writes the whole form together. If someone changed these settings meanwhile, nothing is saved and what you typed stays on screen.

See also: Currency and time zone

Country

Currency and time zone

OwnerAdministrator with the permission

You want prices and days to be counted the way your space counts them.

Steps

  1. In Workspace, under General details, pick the Currency.
  2. Search for the Time zone and choose it.
  3. Tap Save.

Good to know

  • The currency is proposed from the country. You can override it until the space has issued a document or recorded money; after that it is fixed.
  • The time zone is not cosmetic: a working day, a half-day boundary and a closure day are all counted in it, so a member abroad sees the space's day rather than their own.

See also: Country

Currency and time zone

Workspace language

OwnerAdministrator with the permission

You want invitations and documents to speak the language of your community.

Steps

  1. In Workspace, under General details, open Workspace language.
  2. Pick a language, or Sender's app language.
  3. Tap Save.

Good to know

  • Invitations are written in this language by default.
  • It is not your own app language. That one only changes what you see, and lives in your personal settings.

See also: Invitation message

Workspace language

Letterhead address

OwnerAdministrator with the permission

You want your postal address on the paper the space sends out.

Steps

  1. In Workspace, under General details, fill in Workspace address.
  2. Tap Save.

Good to know

  • It is free text, printed as it is on letters and invoices.
  • The structured address that an e-invoice needs is a separate entry, under the legal identity.

See also: Country

Letterhead address

WhatsApp group

OwnerAdministrator with the permission

You want members to find your community's WhatsApp group.

Steps

  1. In Workspace, open Community & invitations.
  2. Paste the group's invite link into WhatsApp group link.
  3. Tap Save.

Good to know

  • The link must be a chat.whatsapp.com invite link, otherwise the field says so.
  • Leave it empty to show nothing.

See also: Invitation message

WhatsApp group

Invitation message

OwnerAdministrator with the permission

You want invitations to sound like you, in every language you use.

Steps

  1. In Workspace, open Community & invitations.
  2. Under Message language, choose which language's text you are editing.
  3. Write the text. Tap a tag such as {firstName} or {inviteLink} to insert it where the cursor is.
  4. Tap Save.

Good to know

  • Leave the box empty to use the built-in message in that language.
  • The Message language row only says which draft is on screen. It is not saved, and it opens on the workspace language each time.
  • The tags are filled in when you send an invitation. The code and the link come from the app, so do not paste them yourself.
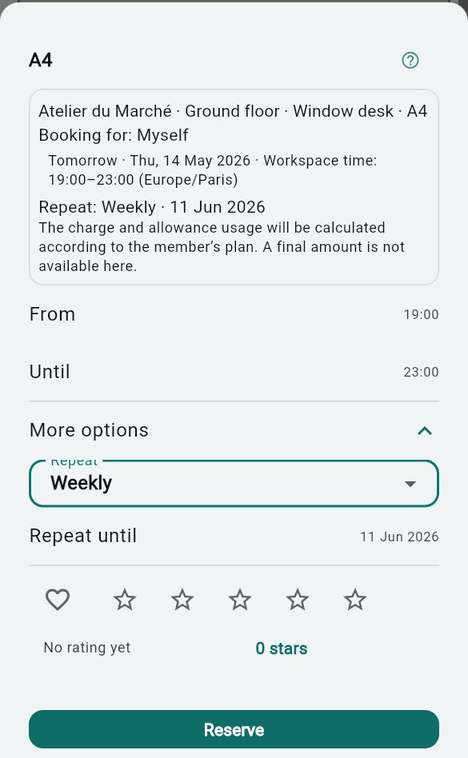
See also: Invite someone by message

Invitation message

Start new members the same way

OwnerAdministrator with the permission

You want everyone who joins to begin with the same subscription and the same rule for when their days run out.

Steps

  1. In Workspace, open New members.
  2. Set the Subscription percentage with the minus and plus buttons.
  3. Choose Blocked once used up, Pay as you go or Must buy a package.
  4. Tap Save.

Good to know

  • Until you choose, new members start at 100% with bookings blocked once the entitlement is used.
  • A member's own subscription is set later, on the member's page.

See also: A member's subscription

Start new members the same way

Wording

OwnerAdministrator with the permission

You want the app to use your words: another name for a seat, for a status on the plan, for a tab.

Steps

  1. In Workspace, open Appearance & wording and tap Wording.
  2. Find a word with Search a word, or tap Changed only to see what you renamed.
  3. Tap the pencil beside it and type your word, per language.

Good to know

  • The product's word stays shown beneath yours, so you see what you replace.
  • Reset removes your word instead of copying the product's. The term then follows the product when its wording changes.
  • Terms are grouped by where they appear: Legend, The space, Navigation, Booking.

See also: Colours

Wording

Colours

OwnerAdministrator with the permission

You want the app to wear your colour. Pick one and the app derives its light and dark themes from it.

Steps

  1. In Workspace, open Appearance & wording and tap Colours. The row is there while Workspace colours is on in the features.
  2. Tap one of the colours, or type a code such as #0F766E into Colour.
  3. Check What it looks like, in Light and Dark.
  4. Tap Save. Product colours removes yours.

Good to know

  • The app keeps its own contrast. If a colour would be unreadable somewhere, it is refused and the screen names the pair.
  • Under Room colours you can add up to eight colours of your own for the rooms on the plan.
  • The DesKilo mark, the colours of the seat states and the production banner are never restyled.

See also: Pattern · Symbol and emblem

Colours

Pattern

OwnerAdministrator with the permission

You want your space easy to tell apart from the others a person belongs to.

Steps

  1. Open Colours.
  2. Under Pattern, tap Plain, Stripes, Dots, Grid or Waves.

Good to know

  • The pattern draws your colour on this space's card in Me, on its chip and while the space opens.
  • It saves as soon as you tap it.

See also: Colours

Pattern

Symbol and emblem

OwnerAdministrator with the permission

You want a small mark that stands for the space: letters on a colour, or your own logo.

Steps

  1. Open Colours and go to Symbol.
  2. Type one or two Letters, pick a colour and tap Save.
  3. Under Emblem, tap Choose an image to add your logo. Remove takes it away.

Good to know

  • Letters on a colour are unique to a workspace. If another space already has the same, the app asks you to change the colour or the letters.
  • The emblem is shown beneath the app's name in the menu, and while someone opens this space. It is redrawn at most 512 pixels wide, and the photo's own details, such as where it was taken, are not kept.
  • The emblem never replaces the DesKilo logo.

See also: Colours

Symbol and emblem

Desk transparency

OwnerAdministrator with the permission

You drew the plan over a photograph and want the room to show through the furniture.

Steps

  1. In Workspace, open Appearance & wording.
  2. Drag the Desk transparency slider. The value shows as Opacity.
  3. Tap Save.

Good to know

  • Lower the opacity so a level's background photo shows through the tables.
  • Turn it up to 100% when the places matter more than the room.

See also: Draw rooms, desks and seats

Desk transparency

Public workspace page

Owner

You want people outside your space to find it and see what it offers.

Steps

  1. Open Public workspace page, or tap it at the top of Workspace.
  2. Switch on Visible in the public directory.
  3. Choose the kind of host, and complete Description, Public address, Public email, Public phone and Website.
  4. Tap Save and preview the external view.

Good to know

  • Fields marked From workspace information follow the workspace's own details. Use workspace information puts them back after you changed them.
  • Reset all public data to workspace information replaces every field that has a workspace counterpart.
  • Administrators can choose for themselves whether they are shown as public administrators.

See also: Discover and the public network

Public workspace page

The role matrix

OwnerCo-owner

You want to decide which permissions each role holds. Roles shows one card per role with a tick for every permission it holds.

Steps

  1. Open Roles.
  2. On the card of a role, tick or untick a permission such as Manage roles & permissions, Manage members, Edit workspace settings or Issue invoices & match payments.

Good to know

  • Everyone has exactly one base role: User, Administrator, Co-owner or Owner. Other roles add to it and never take anything away.
  • The owner always holds every permission, so that card is locked. A co-owner may hold less.
  • Anyone who may not manage roles sees the matrix read-only, with Your role highlighted.
  • A permission is checked by the server in every place, so unticking it removes it everywhere at once.
  • The Roles entry shows when the Role management feature is on.

See also: Roles this space defines · Co-owners

The role matrix

Roles this space defines

OwnerCo-owner

You want roles that fit your space, such as a host or an accountant, on top of the basic ones.

Steps

  1. In Roles, tap The roles this space defines, or open Roles this space defines. This screen appears when the Roles this space defines feature is on.
  2. Tap Add a role.
  3. Give the role a name, then choose What it adds.
  4. Tap Save the role.
  5. To give it to a member, open the member's page, find Roles and tap Add a role.

Good to know

  • Each role adds permissions to what its holders can already do. None takes anything away, and the owner always keeps every permission.
  • A role you no longer want can be put aside with In use switched off.
  • The role's key never changes: the people who hold it point at it.
  • Nobody can give a role to themselves. A role that manages roles can only be given by the owner.

See also: The role matrix

Roles this space defines

Co-owners

Owner

You want the space to survive if you ever step away.

Steps

  1. Open Members & plans and choose the member.
  2. Under Co-ownership, choose an active co-owner or a successor.
  3. To hand over now, choose Promote to owner now.

Good to know

  • An active co-owner has the owner's permissions now. A successor, shown as Successor, waits and becomes owner when activated or when the owner leaves.
  • If the last owner leaves, the best co-owner becomes owner automatically, active before successor.
  • Co-owners are part of the Co-owners feature.

See also: Co-ownership · The role matrix

Kiosk mode: A wall tablet for check-in

OwnerAdministrator

You want a tablet by the door where people check in with a badge.

Steps

  1. Create an account for the tablet, join the workspace with it and, in Members & plans, use Make kiosk device on that member.
  2. Make sure Kiosk mode is on in Features.
  3. On the tablet, open the app. It asks Start kiosk mode?. Tap Start kiosk mode.
  4. A member taps a seat, or This level, and presents a badge: a card, or a printed QR code.

Good to know

  • Kiosk mode never starts by itself. Not now — open the app normally opens the app as usual, which is handy for setup.
  • In kiosk mode the tablet only shows the plan. To leave it you restart the tablet. To make the account a normal member again, use Kiosk device under Settings on the device or Revert kiosk to member in Members & plans.
  • The sheet that opens names the rule it follows. On a closed day the kiosk says The workspace is closed today up front.
  • The badge is the confirmation: it identifies the member, carries out the action and the screen clears for the next person. A seat held by someone else shows who holds it and points you to the app.
  • Badges come with their own features, RFID / NFC badges and QR badges, both under Kiosk mode.
  • A wall tablet cannot be shown here: the kiosk only starts on a device marked as one.

See also: NFC badge check-in · Space QR codes (PDF)

NFC badge check-in

OwnerAdministrator

You want members to check in by tapping a card, with no phone.

Steps

  1. Open RFID / NFC badges.
  2. Switch on Enable NFC badge check-in.
  3. Read the This device line: it says whether this device can read cards.
  4. Give each member a card in Members & plans: open the member's badges, tap Register card, then hold the card to the back of the device.

Good to know

  • You need an Android device with NFC. iPads have no NFC, and QR badges still work there.
  • The badge manager also lets you issue a New badge, Revoke one, and Save as PDF for printing. A revoked badge can be deleted for good.
  • Signs me in is off by default: a badge that checks you in does not log you in until the member chooses to.
  • Each member can also make their own badge in their personal settings.

See also: A wall tablet for check-in

NFC badge check-in

Add a document to the library

OwnerAdministrator

You want to gather your statutes, guides, statements and minutes in one place for the members who need them. The library holds links, not files.

Steps

  1. Open Documents and tap the plus button.
  2. Fill in Title and Link (https://…).
  3. Choose Stored on, Category and Visible to.
  4. Tap Save.

Good to know

  • The library needs the Document library feature, and the permission to manage it.
  • Remove a document with its bin: it asks Remove document? first.
  • Members who may open the library see the documents they are allowed to, grouped by category.

See also: Document title · Link · Visible to

Add a document to the library

Document title

OwnerAdministrator

You want members to recognise a document at a glance.

Steps

  1. In the add-a-document form, type the Title.

Good to know

  • A document needs a title and an https:// link, or Save is refused.
  • Write it for the reader, as it is the line they see in the library.

See also: Add a document to the library

Link

OwnerAdministrator

You want the document to open where it already lives.

Steps

  1. Paste the share link from your drive into Link (https://…).

Good to know

  • DesKilo stores the link, not the file. Access rights stay managed where the document is.
  • The link must begin with https://.

See also: Stored on

Stored on

OwnerAdministrator

You want members to see where the document is kept.

Steps

  1. Choose Stored on: Google Drive, OneDrive, SharePoint, Dropbox, Nextcloud or Link.

Good to know

  • It is a label with an icon. Nothing is fetched for you.

See also: Link

Category

OwnerAdministrator

You want the library to read like a tidy shelf.

Steps

  1. Choose a Category: Statutes & legal, Guides & manuals, Financial statements, Meeting minutes or Other documents.

Good to know

  • The library groups documents under these headings, and only shows a heading that has a document.

See also: Visible to

Visible to

OwnerAdministrator

You want some documents for everyone and some for the board only.

Steps

  1. Choose Visible to: Every member, Admins and owners or Owners only.

Good to know

  • The server enforces it. A member who may not see a document does not receive it at all.

See also: Add a document to the library

Export the space (XML)

OwnerAdministrator with the permission

You want a file with the floor plan and settings, to keep as a backup, to reuse or to move to another space.

Steps

  1. Open Workspace and go to Templates & data.
  2. Tap Export workspace (XML).

Good to know

  • It carries settings and the floor plan. It never holds members, bookings or money data, nor the invite code or payment credentials.
  • With Configuration in the space file on, the file also carries tariffs, VAT rates, rules, roles and more.
  • The file is saved on your device.

See also: Import the space (XML)

Export the space (XML)

Import the space (XML)

OwnerAdministrator with the permission

You want to apply an exported file to a space.

Steps

  1. In Workspace, under Templates & data, tap Import workspace (XML).
  2. Choose the file and read the preview: levels, offices, desks, seats and configuration.
  3. Tap Replace and import.

Good to know

  • It replaces the current floor plan and overwrites the settings. This cannot be undone.
  • Once a space has bookings, only the configuration is applied. The floor plan is kept, and the app says so.
  • A file that is not readable, or not from DesKilo, is refused with a clear message.
  • When the file carries a configuration and Configuration in the space file is off in this space, the app asks first: Switch it on and apply applies it, Import without the configuration imports the rest, and the preview then reads “Configuration: not applied.” Only somebody who may change the configuration is offered to switch it on.

See also: Export the space (XML)

Export the configuration (PDF)

OwnerAdministrator with the permission

You want a document of every parameter, to read, sign or give to an accountant.

Steps

  1. Open Reports and choose Workspace documents.
  2. Tap Export configuration (PDF).

Good to know

  • It is a complete snapshot of settings, members and the floor plan. It is a record, not a backup: only the XML can be imported back.

See also: Export the space (XML)

Export the configuration (PDF)

Workspace report

OwnerAdministrator with the permission

You want the space as a document: its places, prices and rules.

Steps

  1. Open Reports and choose Workspace documents.
  2. Tap Workspace report.

Good to know

  • It is made by the report editor's workspace template, so its look follows the design you chose.

See also: Export the configuration (PDF)

Space QR codes (PDF)

OwnerAdministrator with the permission

You want a QR card on every seat, desk, office and floor, so people book or check in by scanning it.

Steps

  1. Open Reports and choose Workspace documents.
  2. Tap Space QR codes (PDF).
  3. Choose Card size, QR code size and the Information on the card, then tap Save.
  4. Print, cut and stick each card on its place.

Good to know

  • It needs the Space QR codes feature.
  • Scanning a card opens the same sheet the kiosk shows.

See also: A wall tablet for check-in

Export the data (Excel)

OwnerAdministrator with the permission

You want your figures in a spreadsheet for your own analysis.

Steps

  1. Open Reports and choose Workspace documents.
  2. Tap Export data (Excel).

Good to know

  • It arrives as one ZIP: a workbook with a tab for bookings, payments, invoices, members and the floor plan, a manifest that counts the rows, and the space's stored files.
  • It needs the Data export (Excel) feature and the permission to export data. It is an export only: nothing reads it back.

See also: Export the space (XML)

Sites

OwnerAdministrator

You run more than one address, and want each level and member to belong to the right one.

Steps

  1. Switch on Sites in Features.
  2. Open Sites and tap Add a site.
  3. Fill in Site name, Street, Post code, City and the levels that belong to it.

Good to know

  • The default site carries the workspace's address. A member's home site is the address on their documents.
  • Delete this site sends its levels and members back to the default site.
  • A site that is its own legal entity can carry its own registration and VAT number.
Chapter 07

Members, plans and billing

This chapter is for owners and billing administrators. It follows the money from the person to the price list: who is in your space and on which plan, how each plan is priced, what else you sell, how members pay you, and the costs you pay yourself.
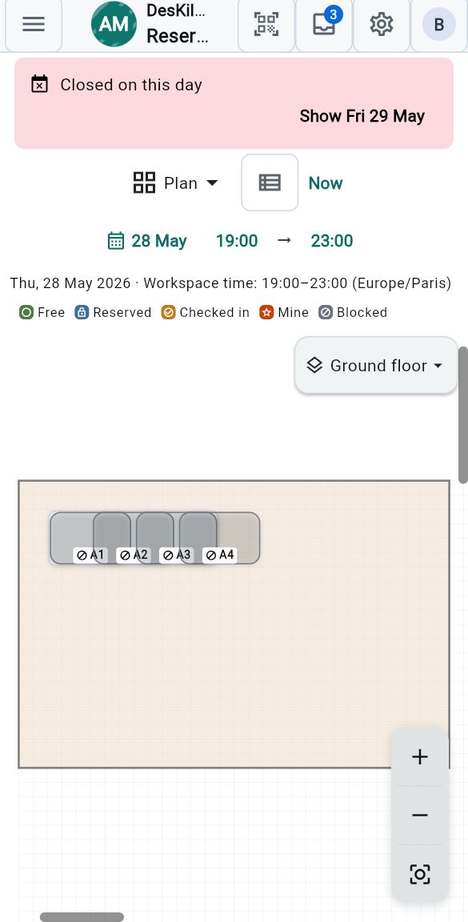
In this chapter:

Members & plans

AdministratorOwner

You want to see who is in your space, on which plan, and open anyone to change their settings.

Steps

  1. Open Members & plans from the menu.
  2. Read each row: the e-mail, the plan share (or No subscription), the role, and a status when it is not the usual one: Pending, Paused or Exited.
  3. Tap a row to open that person's member page.

Good to know

  • A row also shows max and at once chips when you set a reservation limit or more than one simultaneous reservation.
  • Depending on the features switched on, the top bar (icon buttons with tooltips) offers Notify all admins, Add a managed profile and, for owners, Invite a member and Billing.
  • Administrators reach this screen too; the controls that change money or roles stay with the owner.

See also: Invite a member · Billing

Members & plans

Invite a member

Owner

You want someone to join your space.

Steps

  1. In Members & plans, tap Invite a member.
  2. Share the workspace ID or its QR code, as described in The workspace ID.
  3. When the person asks to join, their row appears as Pending. Open it and choose Approve membership or Reject membership.

Good to know

  • Rejecting lets you add a short comment.
  • Until you decide, the person has no access to the space.

See also: Pending and paused members · Add a managed profile

Add a managed profile

AdministratorOwner

Someone has no account yet, but you want to book, invoice and manage for them. You create a profile, run it yourself, and hand it over when the person joins.

Steps

  1. In Members & plans, tap Add a managed profile.
  2. Fill in the person's identity and save. The member page then carries a Managed chip.
  3. To correct the details later, open the member page and choose Edit identity.
  4. When the person is ready, choose Hand over to the person. It creates a personal code bound to this profile.
  5. Changed your mind before the code was used? Choose Revoke handover.

Good to know

  • Whoever uses the code takes the profile over, with its reservations, invoices and subscription, once you approve the membership.
  • Nobody can send a message to a managed member, because no one would read it.
  • The feature must be switched on in Features.

See also: The member page

Add a managed profile

The member page

AdministratorOwner

You want everything about one person on a single page: who they are, what they booked, how to reach them, what they owe, and every setting you can change.

Steps

  1. Tap a member in Members & plans.
  2. Read the top of the page: Right now shows the next bookings, then come the contact details and the money position.
  3. Use the buttons under the name for a quick action. Depending on features and your rights you will see some of Messages, E-mail, Add a service or Send the financial agreement.
  4. Jump to Manage to change the person's settings, grouped as Membership, Booking rules, Billing and Badges & access.

Good to know

  • Every setting row shows its current value, so you rarely need to open it to know the answer.
  • Your own page is shorter: nobody can grant themselves rights.
  • If the page is not switched on for your space, the same actions appear in a list when you tap the row.

See also: The member's actions · Roles and co-owners

The member page

The member's actions

AdministratorOwner

You want to know which setting lives where, and who may change it.

Steps

  1. Open a member page and go to Manage.
  2. In Membership, choose Pause membership or Reactivate membership, set Co-ownership, or Make kiosk device.
  3. In Booking rules, set the Reservation limit, the Simultaneous reservations and the VAT treatment; the Whole-space bookings switch appears when the feature is on.
  4. In Billing, set the Subscription, When days run out and Price negotiation.
  5. In Badges & access, open Badges to issue or revoke the person's badges.

Good to know

  • Billing and membership changes belong to the owner. Administrators set the booking limits.
  • You can never change your own limits or co-ownership.
  • Only active members offer most of these rows.

See also: Booking rules · Billing group

The member's actions

Pending and paused members

AdministratorOwner

A newcomer waits for your decision, or a member takes a break, and you want the space to treat them accordingly.

Steps

  1. Open the member whose row says Pending.
  2. Under Membership, choose Approve membership to let the person in, or Reject membership to refuse.
  3. To put an active member on hold, open their page and choose Pause membership.
  4. To bring them back, choose Reactivate membership.

Good to know

  • The decision on a new member can also be taken through the validation rules, as described in Validation rules.
  • Pausing is for owners and keeps all history.
  • A member who left shows Exited, and cannot be paused.

See also: Invite a member

Pending and paused members

A member's subscription

Owner

You want to set which share of the month's days a member is entitled to. The share picks the fee band, and the band sets the monthly price.

Steps

  1. Open the member page, go to Billing and tap Subscription.
  2. Pick No subscription, one of the levels you offer, or type a number in Custom (1–100).
  3. Tap a level to apply it, or Save for a custom value.

Good to know

  • The levels offered are the ones you chose in Subscription levels.
  • As owner you can always type a custom value.
  • No subscription is for visitors who buy carnets. It cannot be combined with pay-as-you-go: choose a block or a package first.

See also: Fee bands · When days run out

A member's subscription

When days run out

Owner

You want to decide what happens when a member has used their whole monthly allowance.

Steps

  1. Open the member page, go to Billing and tap When days run out.
  2. Choose Block further booking, Charge overage (pay-as-you-go) or Require buying a package.

Good to know

  • Pay-as-you-go is greyed out for a member without a subscription, because it would let them book for free.
  • The overage price comes from the fee band; the packages come from Day packages.

See also: A member's subscription

When days run out

Reservation limit

AdministratorOwner

You want to cap how many open reservations one member can hold in total.

Steps

  1. Open the member page, go to Booking rules and tap Reservation limit.
  2. Tap No limit, a preset (1, 2, 3, 5 or 10), or type a number in Custom (1–100).
  3. Tap Save for a custom number.

Good to know

  • It counts all open reservations, whenever they fall. It is a different thing from simultaneous reservations, which counts overlaps.
  • The list shows max and the number beside the member.
  • You cannot set your own limit.

See also: Booking limits

Reservation limit

Simultaneous reservations

AdministratorOwner

You want to allow one member to hold bookings that overlap in time, for example two places at once.

Steps

  1. Open the member page, go to Booking rules and tap Simultaneous reservations.
  2. Pick Workspace default, or a number: 1, 2, 3 or 5.

Good to know

  • Workspace default follows the number set in Availability; one means one place at a time.
  • It is not the same as the reservation limit, which counts all open bookings.
  • You cannot set your own.

See also: Booking policies

Simultaneous reservations

VAT treatment

AdministratorOwner

You want to tell the app who this member is for VAT, so their invoices carry the right tax.

Steps

  1. Open the member page, go to Booking rules and tap VAT treatment.
  2. Pick Automatic, Domestic VAT, Reverse charge, Outside the EU or Exempt buyer.
  3. For Exempt buyer, type the Exemption reason (printed on the invoice).
  4. Tap Save.

Good to know

  • Automatic applies the place of supply: a desk, an office or a room carries your VAT for every customer; only a general service (see Place of supply of a service) is reverse-charged for a business in another EU country, or outside the scope for a business outside the EU. A consumer pays your VAT wherever they live. The dialog shows what the chosen treatment does to each kind of line.
  • Reverse charge is meant only for a member who buys services not connected with the premises: it applies to every line.
  • The same group offers Customer capacity (Business, Consumer or Not stated), which decides which payment clauses an invoice prints. It needs the permission to issue invoices.
  • Reverse charge, Outside the EU and Exempt buyer are recorded, but the invoices of such members cannot be issued in the app yet: they are issued outside the app with your accountant.
  • The VAT by counterparty feature must be on for the VAT treatment row, which administrators and owners see; the rates are set in VAT rates.

See also: VAT regime

VAT treatment

Price negotiation

Billing administratorOwner

You agreed a price with a member that differs from your tariff, and you want it recorded as a deal rather than typed over the tariff.

Steps

  1. Open the member page, go to Billing and tap Price negotiation.
  2. Fill only what differs: Occupation, Monthly fee, Overage per half-day, Discount on supplements, or a unit price under Services and packages.
  3. Add a Note if useful.
  4. Tap Propose for validation.

Good to know

  • A field left empty keeps the tariff.
  • The deal waits for validation before it applies, as described in Validation rules.
  • Once active, the member sees it on their money page, with Who can see this. People who may only view negotiations see it as Read only.

See also: Fee bands

Price negotiation

Co-ownership

Owner

You want someone to share ownership with you, or to take over if you leave.

Steps

  1. Open the member page, go to Membership and tap Co-ownership.
  2. Choose No co-ownership, Active co-owner, or Successor.
  3. To make a co-owner a full owner right away, choose Promote to owner now.

Good to know

  • An active co-owner has owner permissions now, and takes over automatically if you leave.
  • A successor becomes owner when promoted or when the owner leaves.
  • The row shows Co-owner or Successor in the members list.
  • It needs the Co-owners feature to be on, and you cannot change your own co-ownership.

See also: The role matrix

Co-ownership

Fee bands

OwnerBilling administrator

You want to price your plans: what a month costs for each share of the days, and what an extra half-day costs.

Steps

  1. Open Billing from the menu.
  2. Under Fee bands, set To %, Monthly fee and Overage on each row.
  3. Tap Add band to split the last band, or the minus icon to remove one.
  4. Choose the VAT rate the tariff is taxed at. It is saved as soon as you pick it.
  5. Tap Save to store the bands.

Good to know

  • Each row starts where the previous one ends, and the last one always ends at 100%. If the bands do not add up, the screen says "Bands must increase and end at 100%."
  • Prices are gross: VAT is included, when your space charges it.
  • Removing a band merges its range into the one before.

See also: A member's subscription · Subscription levels

Up to %

The top of the band, from 1 to 100. The next band starts where this one ends, so a percentage always falls into exactly one band. The last band is fixed at 100.

Monthly fee

What a month in this band costs. When you charge VAT the row shows the VAT share included.

Overage

The price of one half-day beyond the allowance, for members whose policy is pay-as-you-go.

Fee bands

Subscription levels

OwnerBilling administrator

You want to choose which percentages you offer when you give someone a plan.

Steps

  1. In Billing, find Subscription levels.
  2. Tap a preset (25%, 50%, 75%, 100%) to switch it on or off.
  3. To add your own, type a number in Level (1–100) and tap Add level.
  4. Tap Save.

Good to know

  • The levels you pick are the ones offered in a member's Subscription.
  • Remove a level you added with the cross on its chip.

See also: Fee bands

Level value

One percentage from 1 to 100: the share of the month's days that the plan includes.

Allow a negotiated value

The switch Allow negotiated custom value is saved with the levels. As owner you can always type a custom percentage in a member's Subscription, whatever this switch says.

Subscription levels

Day packages

OwnerBilling administrator

You want to sell blocks of days to members who run out of their allowance.

Steps

  1. In Billing, find Day packages. Each row shows the days, the price and a switch.
  2. Switch a package off to stop selling it, or on to sell it again.
  3. To create a package, follow New package.

Good to know

  • Members whose policy is Require buying a package buy these when their days run out.
  • A package that has been sold keeps its price, days and rate. To change them, switch it off and add a new one.

See also: When days run out

Day packages

New package

OwnerBilling administrator

You want to add a block of days to your price list.

Steps

  1. In Billing, under New package, type the name, the days and the price.
  2. Choose its VAT rate.
  3. Tap Add package.

Good to know

  • The package is for sale as soon as it appears, switched on.
  • Where the carnets feature is on, a Carnets editor sits below.

See also: Day packages

Package name

What members see when they buy, and what the invoice line says.

Package days

How many days the package grants, one or more.

Package price

The price of the whole package, gross. The row shows the days, the price and, when VAT applies, the VAT included.

New package

Invoice schedule

OwnerBilling administrator

You want to choose when the two automatic invoices go out: the subscription before the month, and the month's consumption after it.

Steps

  1. Open Workspace and the Payments & billing group.
  2. Tap Invoice schedule.
  3. Under Subscription, in advance, switch Issue automatically on or off and pick Days before the month starts. The line below tells you the resulting date.
  4. Under The month just finished, switch Issue automatically on or off. Switch on Also when there is nothing to pay to send a document reading zero.
  5. Tap Save.

Good to know

  • Each half needs its feature switched on in Features: "Subscription invoices" and "End-of-month invoices".
  • The subscription invoice can therefore name a month that has not started yet.

See also: Reminder rules · Fee bands

A service

OwnerBilling administrator

You sell something that is not a seat: a locker, printing, coffee. You list it once and add it to a member's month in a tap.

Steps

  1. Open Services from the menu.
  2. Tap a service to edit it, or the plus button to create New service.
  3. Fill in the Name, the Price and, when you charge VAT, the VAT rate.
  4. Tap Save.

Good to know

  • A service is never deleted, only deactivated, because invoices refer to it.
  • A service that comes from a stock shows how many are left, or Out of stock.
  • To record one for a member, use Add a service on their page.

See also: Accessories · The member page

Service name

What the invoice line says. Rename it and only new documents change.

Service price

The price of one unit, gross: the member pays exactly this, and VAT is part of it. The VAT rate only decides how much of it is tax.

Place of supply of a service

Where the VAT on this service is due. Connected with the premises, the default, keeps your VAT for every customer: a desk, an office, a room and whatever is used on the premises are taxed where the building stands. Choose General service (not connected with the premises) only for what is not tied to the building, such as mail handling or a virtual office: for a business in another EU country that line is then reverse-charged, and for a business outside the EU it is outside the scope; a consumer still pays your VAT. Each charge keeps the choice it was recorded with. The field shows when you charge VAT and the Place of supply per service feature is on.

Active

When editing a service, the Active switch decides whether it can still be sold. Switch it off for something discontinued; the list greys it and writes Inactive.

A service

Accessories

AdministratorOwner

You rent equipment with a place, such as a monitor or a chair, and charge a supplement for each half-day.

Steps

  1. Open Accessories from the menu.
  2. Tap an accessory, or the plus button for New accessory.
  3. Fill in Name and Supplement per half-day; choose the VAT rate if your space charges VAT.
  4. Switch Active off to stop offering it, then tap Save.

Good to know

  • The list shows each supplement as an amount "per half-day", or No supplement.
  • Like services, accessories are deactivated, never deleted.
  • The feature must be on in Features.

See also: A service

Accessories

Payment methods and instructions

OwnerBilling administrator

You want members to know how to pay you by transfer or wallet, without you sending the details each time.

Steps

  1. Open Payment instructions from the menu.
  2. Fill what applies: IBAN, Bank name, Account number, the bank code, BIC / SWIFT.
  3. Add the wallets you accept: PayPal.me link or handle, Wero phone number, Lydia phone number or username, Wisetag or Wise payment link.
  4. Add a Payment reference hint if members should quote something.
  5. Tap Save.

Good to know

  • Members see these details on an unpaid statement. Leave everything empty to show nothing.
  • The bank code field is named after your country: sort code, routing number, or bank code.
  • This is manual payment. To let members pay by card inside the app, see The payment provider.

See also: Provider credentials

Payment methods and instructions

The payment provider

Owner

You want members to pay an outstanding bill online, into your own provider account.

Steps

  1. Switch on the online payments feature in Features.
  2. Open Online payments from the menu.
  3. Find the provider you use: PayPal, Credit card (Stripe), Mollie — iDEAL, Bancontact… or Wero (via Mollie).
  4. Fill its keys, as described in Provider credentials, and tap Save.
  5. Check that the card says Configured.

Good to know

  • Each provider is a separate card with a status chip, Configured or Not configured.
  • Wero is paid through Mollie: enter the same Mollie API key and return URL on the Wero card as on the Mollie card.
  • Providers charge their own fees. The manual transfer route stays free.
  • Remove clears a provider.

See also: Payment methods

Provider credentials

The keys come from the provider's own dashboard: Client ID, Secret, Environment, Webhook ID and Return URL for PayPal; Secret key, Webhook signing secret and Return URL for Stripe; API key and Return URL for Mollie and Wero. Keep test and live keys apart: all keys you enter must belong to the same mode.

Secrets are stored on the server and never shown again. A saved one reads Set — leave blank to keep; type a new value to replace it.

The payment provider

Scheduled expenses

MemberAdministratorOwner

You pay for something that comes back, such as internet or electricity. You describe it once and the app presents each due date to you.

Steps

  1. Open Money and the Payments face.
  2. Tap Scheduled expenses. Existing schedules show their amount, rule, state and next date.
  3. Tap Schedule a recurring expense and fill in the form, as described in What and the fields after it.
  4. Tap Schedule it.

Good to know

  • A new schedule is Awaiting validation until the validators confirm it, then Active. It can also end Rejected or Ended.
  • Each due date is then presented to you before it counts: confirm it at the validated amount, or at another amount with an explanation, which is validated again.
  • Tap End this schedule to stop one. Finished ones are listed under Ended and rejected.
  • The feature must be on in Features.

See also: Validation rules

What

The name each occurrence carries, for example Internet. Write it as you want to read it later. Amount is what one occurrence costs, and Description is optional text for whoever validates.

Amount

What one occurrence costs, in your workspace currency. A different amount at confirmation needs an explanation and is validated again.

Description

Optional text for the validators, such as a contract number or a supplier reference.

First occurrence

The date the first one falls due. Every later date counts from here.

Every

The interval, a number and a unit: days, weeks, months or years. Every 1 month reads "monthly".

Number of times

The field Repetitions (empty = until the end date): how many occurrences to raise.

Until

Until (optional) is the date after which nothing more is raised. With both a number and a date, the series stops at whichever comes first. With neither, it runs until you end it.

Scheduled expenses
Scheduled expenses
Chapter 08

Tax, invoicing and accounting

For owners and billing administrators: who you are as a seller, how VAT is handled, where e-invoices go, how your documents look, and the monthly rhythm of issuing, sending and chasing invoices.

Careful DesKilo prints what you declare and checks that the required details are present. It does not certify your invoices, your VAT treatment or your books. Whenever a section below says "confirm with your accountant", please do.

In this chapter:

  • What the app issues itself, and what stays with your accountant
  • Your legal identity and the mentions printed on every invoice
  • VAT: regime, number, rates, groups and the periodic declaration
  • E-invoicing: where the machine-readable invoice is sent
  • The invoice PDF template and the report editor
  • Issuing and closing a month: the Invoicing screen, the month-close wizard, regrouping, shared expenses
  • Payment reminders
  • The invoice register, accounting exports and business analytics

What the app issues, and what stays with your accountant

OwnerBilling administrator

You want to know, before you rely on it, which invoices DesKilo issues itself and which you still issue with your accountant. This is the scope of this version.

Situation In the app Outside the app
A space in France or Germany, VAT-registered or outside the scope of VAT Invoices issued, numbered, sent and followed up —
A desk, an office or a room, whoever the customer is, also abroad Issued with your VAT: the place of supply is the building —
A space in another country Bookings, statements and payments The invoices, with your accountant
The VAT-exempt regime — The invoices, with your accountant
Reverse charge, export, exempt buyer Recorded on the member The invoices, with your accountant
E-invoicing The EN 16931 file, posted to the platform you configure The choice of platform and what the national scheme asks of you
Accounting Exports rebuilt from invoices and payments The ledger, the closing and the accounts
VAT return The figures, computed from invoices and payments Filing it with the tax authority

Good to know

  • E-invoicing has three steps: DesKilo produces the structured invoice; the connector posts it to your platform; the platform carries it to the customer and the authority under the national scheme. A valid file is only the first step.
  • In France, only a registered platform (plateforme agréée) can carry invoices under the reform, and DesKilo is not one: configure the platform you choose. Every business concerned must be able to receive e-invoices from 1 September 2026; small and medium businesses and micro-businesses must issue them from 1 September 2027.
  • DesKilo keeps no double-entry ledger: your accountant completes the exported files.
  • This table changes with the app. When a line moves into the app, this section says so.

See also: Issue an invoice · The e-invoicing platform · Accounting exports · VAT regime

Your legal identity

Owner

You want your invoices to name you correctly: who you are, how you are registered and how you charge VAT.

Steps

  1. Open Workspace and tap Legal identity & e-invoicing, or go straight to Legal identity & e-invoicing.
  2. Work from the top: the VAT regime first, then the identifiers, the address and the Invoice mentions.
  3. Tap Save at the bottom.

Good to know

  • The screen shows only the fields your VAT regime needs. Change the regime and the form follows.
  • Invoices already issued keep the identity they were signed with. A change applies to the next ones.
  • Only owners can open this screen.

See also: VAT regime · Organisation type · E-invoicing

Organisation type

Owner

You run either a business or a non-profit association, and your invoices should read accordingly.

Steps

  1. Open Legal identity & e-invoicing and scroll to Invoice mentions.
  2. Choose Company / business or Association (non-profit).
  3. Tap Save.

Good to know

  • For an association, the example texts change (for instance a registration such as RNA instead of a trade register). Which payment clauses print depends on your country and on the customer's capacity, not on the organisation type.
  • An association with no trading activity is normally outside the scope of VAT. The screen warns you if you pick "exempt" for an association; confirm the right choice with your accountant.

See also: Customer capacity · VAT regime

Organisation type

Default customer capacity

Owner

Business customers and private individuals are not owed the same payment clauses. You set the default for the workspace.

Steps

  1. In Invoice mentions, find Default customer capacity.
  2. Choose Not stated, Business or Consumer.
  3. Tap Save.

Good to know

  • The statutory late-penalty, recovery-indemnity and discount defaults apply only to business customers of a French workspace; for other countries nothing is printed unless you wrote it. A consumer never receives the recovery indemnity.
  • A member's own capacity wins over this default.
  • Every invoice keeps the clauses it was issued with.

See also: Late-payment penalty · Recovery indemnity

Default customer capacity

Legal form and capital

Owner

Your invoices state the legal form of your business and, where it applies, its share capital.

Steps

  1. In Invoice mentions, tap Legal form & capital.
  2. Type the line as it should print, for example "SARL au capital de 7 500 €" (an association might write "Association loi 1901").
  3. Tap Save.

Good to know

  • The text is printed as you type it, up to 300 characters. Check the exact wording required for your legal form with your accountant.

See also: Trade register

Legal form and capital

Trade register

Owner

You show where your organisation is registered.

Steps

  1. In Invoice mentions, tap Trade register.
  2. Type the registration line, for example "RCS Saint-Brieuc 680 357 910". An association might enter an RNA number, and a SIRET if it has one.
  3. Tap Save.

Good to know

See also: Legal form and capital

Trade register

Payment terms

Owner

You state when invoices are due.

Steps

  1. In Invoice mentions, tap Payment terms.
  2. Type your terms, for example "Payment within 30 days of the invoice date".
  3. Tap Save.

Good to know

  • Left empty, invoices print "Payment on receipt."
  • A member can have their own payment terms; those print on that member's documents instead.
  • Reminders do not read this text: they count from the invoice date plus Days until the first reminder in the reminder rules. The payment terms are only what the document prints.

See also: Reminder rules

Payment terms

Late-payment penalty

Owner

You state the penalty for late payment.

Steps

  1. In Invoice mentions, tap Late-payment penalty.
  2. Type your clause, or leave it empty.
  3. Tap Save.

Good to know

  • Left empty, nothing is invented for you, except for a French workspace invoicing a business customer, where the statutory wording prints (three times the legal interest rate).
  • Confirm the clause that applies to your country with your accountant.

See also: Default customer capacity

Late-payment penalty

Recovery indemnity

Owner

You state the fixed indemnity for collection costs.

Steps

  1. In Invoice mentions, tap Recovery indemnity.
  2. Type your clause, or leave it empty.
  3. Tap Save.

Good to know

  • Left empty, the fixed indemnity of €40 prints only on invoices from a French workspace to a business customer.
  • A consumer never receives this mention.

See also: Default customer capacity

Recovery indemnity

Early-payment discount

Owner

You say whether paying early earns a discount.

Steps

  1. In Invoice mentions, tap Early-payment discount.
  2. Type the conditions of your discount, or leave it empty.
  3. Tap Save.

Good to know

  • Left empty, invoices from a French workspace to a business customer print "No discount for early payment."; elsewhere the line is left out unless you write one.

See also: Payment terms

Early-payment discount

Professional insurance

Owner

If your activity requires you to name your professional insurance, it prints on your invoices.

Steps

  1. In Invoice mentions, tap Professional insurance.
  2. Type the insurer, the policy and the geographical cover as they should read.
  3. Tap Save.

Good to know

  • There is no default: an empty field prints nothing.
  • Whether you must state it depends on your activity. Ask your accountant.

See also: Special mentions

Professional insurance

Special mentions

Owner

A line of your own that must appear on every invoice.

Steps

  1. In Invoice mentions, tap Special mentions.
  2. Type the text.
  3. Tap Save.

Good to know

  • Nothing prints when the field is empty.
  • Below the mentions, when the Envelope address window feature is on, Address window sets where the recipient's address sits so it shows through a window envelope.

See also: The invoice PDF template

Special mentions

VAT regime

Owner

You declare how your organisation stands with VAT. The choice decides which number your documents need.

Steps

  1. Open Legal identity & e-invoicing.
  2. In VAT regime, choose Outside the scope of VAT, VAT-exempt (small-business scheme) or VAT-registered (charges VAT).
  3. Tap Save.

Good to know

  • Outside the scope of VAT: no VAT number is printed; the company registration number identifies you.
  • Exempt or registered: your VAT number is asked for.
  • Choosing the regime is a tax decision, not a software setting. Confirm it with your accountant before you issue invoices.
  • In this version the app issues invoices itself for workspaces in France or Germany, to domestic customers, under the VAT-registered or the outside-the-scope regime. Invoices under the VAT-exempt regime are issued outside the app with your accountant.

See also: VAT number · Company registration number

VAT regime

Reverse charge for EU businesses

Owner

When you charge VAT and invoice a business in another EU country, the tax can be due by the customer.

Steps

  1. Choose VAT-registered (charges VAT) as the regime.
  2. Switch Reverse charge for EU businesses on or off.
  3. Tap Save.

Good to know

  • On: a general service (not connected with the premises) to a business in another EU country is reverse-charged. A desk, an office or a room never is: it carries your VAT, whatever the customer's VAT number. The app issues such an invoice once the customer's VAT number was found valid in VIES; otherwise, or with that feature off, you issue it outside the app with your accountant.
  • Off: turn it off if you never invoice businesses abroad.
  • The option appears only for the VAT-registered regime.

See also: VAT treatment of a member

Reverse charge for EU businesses

VAT number check (VIES)

OwnerBilling administrator

Before a general service is reverse-charged to a business in another EU country, the app needs evidence that the customer is a business: its VAT number found valid in VIES, the EU's register of VAT numbers.

Steps

  1. Open the member page and tap VAT number check (VIES).
  2. Tap Check now.
  3. The row then reads Valid with the consultation number and the date, Not valid in VIES, or VIES did not answer.

Good to know

  • The consultation number is kept on the member and frozen on every reverse-charged invoice as evidence.
  • Issuing refuses a reverse charge without a valid check of this very number made in the last 90 days, and says so: A valid VIES check of the member's VAT number. When VIES does not answer, try again later; the invoice never falls back to your VAT on its own.
  • A desk, an office or a room is never reverse-charged, so it needs no check.
  • The row appears for whoever may issue invoices, when the VAT number check (VIES) feature is on.

See also: Reverse charge for EU businesses · Place of supply of a service

EU sales list

Owner

Each month in which you reverse-charge services to businesses in other EU countries, your tax office expects a list of them: the DES in France, the Zusammenfassende Meldung in Germany, modelo 349 in Spain.

Steps

  1. Open VAT declarations and pick the period.
  2. Tap EU sales list (CSV).
  3. File it on your tax office's portal, or hand it to your accountant.

Good to know

  • The list sums, per month and per customer VAT number, what your issued invoices reverse-charged; a desk at your own VAT never appears.
  • While one is due, Invoicing shows a notice: An EU sales list is due for the month.
  • The file has fixed columns: period, country, VAT number, customer, amount, documents.
  • It needs the EU sales list feature.

See also: VAT number check (VIES) · Reverse charge for EU businesses

When VAT falls due

Owner

Each invoice's VAT falls due on the day the law of your country sets — when you are paid, when the service is performed, or when you invoice. You keep that rule, or choose the option your country allows.

Steps

  1. Choose VAT-registered (charges VAT) as the regime.
  2. In VAT falls due, keep the first option, your country's legal rule, or choose the option your country allows: On invoices (accrual) in France, On receipts (cash) elsewhere.
  3. Tap Save.

Good to know

  • The legal rule for services: on receipts in France; the month the service is performed in Germany and Spain, advance payments when received; the invoice or the payment, whichever comes first, in Italy, the United Kingdom and Canada; the invoice in Switzerland.
  • On receipts, an invoice paid in instalments falls into as many periods as it had payments. A credit note counts when it is issued (on receipts, when refunded), never in the period of the invoice it corrects.
  • The choice is printed on every invoice and drives the VAT declaration, the VAT report and the FEC and DATEV exports alike. A French space that never chose follows receipts, and its owner is told once.
  • Which option applies to you is a tax question for your accountant.
  • An invoice keeps the rule it printed: one issued on receipts waits for the money, one that printed the option for the debits is due when issued, whatever the space chooses later.

See also: Preparing the VAT return

When VAT falls due

VAT account

Owner

Your accountant wants collected VAT booked on a specific account.

Steps

  1. Choose VAT-registered (charges VAT) as the regime.
  2. Type your account number in VAT account.
  3. Tap Save.

Good to know

  • The accounting export books collected VAT on this account. Left empty, it uses 445710.

See also: Accounting exports

VAT account

VAT number

Owner

Your VAT identification number appears on your invoices and e-invoices.

Steps

  1. Open Legal identity & e-invoicing.
  2. Type the number in VAT number.
  3. Tap Save.

Good to know

  • The field appears for the exempt and registered regimes. Outside the scope of VAT it is replaced by the company registration number.
  • Your members have their own VAT number in their settings, for their documents.

See also: Company registration number

VAT number

Reason no VAT is charged

Owner

When no VAT is charged, the law usually wants the reason printed on the invoice.

Steps

  1. Open Legal identity & e-invoicing.
  2. Type the legal basis in Why no VAT is charged, for instance "TVA non applicable, art. 293 B du CGI".
  3. Tap Save.

Good to know

  • The app cannot know which basis applies to you. Take the exact wording from your accountant.
  • The wording is printed on the invoice. For now the app does not issue invoices under the exempt regime itself: they are issued outside the app with your accountant.

See also: VAT regime

Reason no VAT is charged

Company registration number

Owner

If you are outside the scope of VAT, your registration number identifies you on e-invoices.

Steps

  1. Set VAT regime to Outside the scope of VAT.
  2. Type the number in Company registration number.
  3. Tap Save.

Good to know

  • Under the other regimes this field is replaced by the VAT number.
  • An association usually uses its registration (for instance RNA, or SIRET if assigned).

See also: Trade register

Company registration number

Structured address

Owner

An e-invoice needs your address in separate parts, not as one block of text.

Steps

  1. Open Legal identity & e-invoicing.
  2. Fill Street, Post code and City.
  3. Tap Save.

Good to know

  • The street starts from the address already in your workspace settings, so you complete it rather than retype it.
  • Invoices cannot be issued without the workspace postal address.

See also: Letterhead address

Structured address

Setting the rates

OwnerBilling administrator

You list the VAT rates your invoices may use. What members pay does not change: prices include VAT, and the tax is extracted from them.

Steps

  1. Open VAT (from Legal identity & e-invoicing, tap VAT rates).
  2. On an empty list, tap Use the usual rates (if your country has a catalogue) to start from your country's rates, or Add a rate and fill the name and Rate % (0 to 99.99).
  3. Tap the star on exactly one rate to make it the default.
  4. Tap Save.

Good to know

  • The usual rates are a starting point. Which supply falls under which rate is a question for your accountant.
  • The default rate is used by subscriptions and by anything without its own rate.
  • A rate still used by an invoice or a service is kept, deactivated, rather than deleted.
  • With no default rate in force while you are VAT-registered, no invoice can be issued; the legal identity screen warns about it.
  • This screen needs the VAT management feature; the VAT rates entry on the legal identity screen shows only for the VAT-registered regime.

See also: VAT groups · Change by law

Setting the rates

VAT groups

OwnerBilling administrator

A group says what kind of rate this is, so the invoice puts it in the right category.

Steps

  1. Open VAT.
  2. On each rate, when the VAT groups feature is on, choose a Group: Standard, Intermediate, Reduced, Super-reduced, Zero rate, Exempt, Not subject, Deposit (outside VAT) or Excise-bearing.
  3. For an exempt or not-subject group, fill the Exemption reason that appears.
  4. Tap Save.

Good to know

  • What falls in each group lists examples for your country, as a guide only.
  • A line outside VAT, such as a refundable deposit, cannot share a document with taxed lines; issue it on its own.

See also: Setting the rates

VAT groups

Change a rate by law

OwnerBilling administrator

A rate changes from a given date. Old supplies keep the old value; the new one applies from that day.

Steps

  1. Open VAT and make sure the rate is saved.
  2. Tap the Change by law button on the rate.
  3. Type New rate % and the Effective date (YYYY-MM-DD).
  4. Tap Save in the dialog, then Save on the screen.

Good to know

  • The old rate closes on that date and a new one opens, with the star moved along if it was the default.
  • Nothing already issued is re-pointed.

See also: Setting the rates

Change a rate by law

Preparing the VAT return

Owner

You want the VAT of a period computed from your invoices and payments, ready to file with the tax office or hand to your accountant.

Steps

  1. Open VAT declaration.
  2. Choose the Period and tap Prepare.
  3. Open the result with PDF or XML export, or look at VAT report (PDF) and VAT report (CSV).
  4. File the return yourself with the tax authority (or through your accountant), then tap Mark as filed and type the Receipt reference from the tax authority.

Good to know

  • It exists only under the VAT-registered regime. The note at the top says when the period's VAT falls due.
  • The server computes the figures, from the invoices, the payments recorded one by one and each invoice's tax point. Each rate is split by category: standard, reverse charge, exempt and zero-rated stay apart. Settlements are left out; their payment counts for the invoices they regroup.
  • A return goes Draft → Prepared → Filed. Preparing again replaces the figures; once filed, nothing changes it. If an invoice or a payment of the period changed since you prepared it, the app refuses to mark it filed until you prepare it again.
  • The Period list offers only periods of the length chosen under VAT return period in Legal identity & e-invoicing — monthly, quarterly or annual; quarterly until you choose. A period that overlaps a filed return cannot be prepared.
  • PDF and XML export list the boxes of your country's form — the French CA3, the German UStVA, the UK VAT return, the Swiss MWST return, the Canadian GST/HST return, the Spanish Modelo 303, the Italian periodic settlement — with each amount rounded the way that form wants it: whole euros on the CA3, whole euros with the cents dropped on the UStVA bases, whole pounds on UK boxes 6 to 9. Sales are split by category (exports, intra-EU services, exempt), deductible VAT on fixed assets apart from the rest. Any other country gets one box per rate.
  • In Germany and France, ELSTER file (UStVA) and EDI-TVA file (CA3) write the prepared return in the format the filing channel takes, from the same boxes as the PDF. Hand the ELSTER file to your transmission software or tax adviser, the EDI-TVA file to your EDI partner; the app transmits nothing. The ELSTER file asks for the Steuernummer each time (it is not the VAT number) and covers a month or a quarter; the EDI-TVA file takes the SIREN from the registration number or from a French VAT number.
  • A filed period is locked. If something in it changes afterwards — an invoice voided, a payment recorded late with an earlier date — the filed return stays as it was, and the next return you prepare carries the difference as a Correction of that period, on its own line. Filing that return records the correction, so it is declared once. On the French form the corrections go to lines 15 (VAT to pay back) and 21 (other VAT to deduct); elsewhere they add to the rate's boxes of the current period.
  • With Input VAT on, the return also lists the Deductible VAT of the expenses approved in the period, per rate, apart from the sales, and the totals show the VAT payable or the VAT credit. On the forms it goes to CA3 line 20, UStVA Kz 66, the UK's box 4, the Swiss 400 and the Canadian line 108.
  • The app does not transmit a return: France files through EDI-TVA or the professional space on impots.gouv, Germany through ELSTER. The e-invoicing platform carries invoices only.
  • It is a filing aid, not tax advice. Verify it against your accounting before filing.

See also: When VAT falls due · Accounting exports

Preparing the VAT return

The e-invoicing platform

OwnerBilling administrator

You tell DesKilo where to post your invoices as machine-readable files.

Steps

  1. Open E-invoicing platform (also reachable from Legal identity & e-invoicing).
  2. Fill Upload URL and Token or credential, and the two optional fields if your platform asks for them.
  3. Tap Save. Remove the platform clears the settings.

Good to know

  • Any platform that accepts an upload with a token works: an approved platform, a Peppol access point, a national platform.
  • The token is stored on the server and never shown again.
  • The valid file is an EN 16931 invoice. Whether your country requires a platform, and which, is something to confirm with your accountant.
  • Posting the file is the second of three steps: see What the app issues, and what stays with your accountant.

See also: Sending an e-invoice · Legal identity

The e-invoicing platform

Upload URL

OwnerBilling administrator

The address at which your platform receives invoices.

Steps

  1. Open E-invoicing platform.
  2. Paste the address in Upload URL, exactly as your platform documents it.
  3. Tap Save.

Good to know

  • It comes from your platform's documentation or your provider.

See also: Token or credential

Upload URL

Token or credential

OwnerBilling administrator

The secret that proves to the platform that the upload is yours.

Steps

  1. Open E-invoicing platform.
  2. Paste the key in Token or credential.
  3. Tap Save.

Good to know

  • Once saved, the screen says "A token is stored". Type a new one only to replace it.
  • It is kept on the server and never comes back out.

See also: Auth header

Token or credential

Auth header

OwnerBilling administrator

The name of the header that carries the token.

Steps

  1. Open E-invoicing platform.
  2. If your platform expects another header than the standard one, type its name in Auth header (default Authorization).
  3. Tap Save.

Good to know

  • Left empty, Authorization is used.

See also: File field name

Auth header

File field name

OwnerBilling administrator

The name of the form field that carries the invoice file.

Steps

  1. Open E-invoicing platform.
  2. If your platform expects another field name, type it in File field name (default file).
  3. Tap Save.

Good to know

  • Left empty, file is used.

See also: Upload URL

File field name

Customer delivery service

OwnerBilling administrator

Your customer may receive its invoices elsewhere than a government platform: its own Peppol access point, portal or agreed upload service.

Steps

  1. Open E-invoicing platform.
  2. In Customer delivery service, fill the same four fields as above.
  3. Tap Save.

Good to know

  • It is separate from the government platform. Both can be set up, and each invoice offers both sends.

See also: Sending an e-invoice

Customer delivery service

UAT endpoint and token

OwnerBilling administrator

You want to rehearse before sending real invoices.

Steps

  1. Open E-invoicing platform.
  2. Under Test environments (UAT / Dev), fill UAT upload URL and UAT token or credential.
  3. Tap Save.

Good to know

  • The choice of environment appears at send time only while developer mode is on.
  • A test send is logged as a test send.

See also: Dev endpoint and token

UAT endpoint and token

Dev endpoint and token

OwnerBilling administrator

A second test endpoint, for development.

Steps

  1. Open E-invoicing platform.
  2. Under Test environments (UAT / Dev), fill Dev upload URL and Dev token or credential.
  3. Tap Save.

Good to know

  • Same rules as for UAT. The real submission always goes to the production endpoint.

See also: UAT endpoint and token

Dev endpoint and token

Sending an e-invoice

OwnerBilling administrator

You want to hand an issued invoice over in its machine-readable form.

Steps

  1. Open an invoice in Invoicing and tap E-invoice (XML).
  2. Read the check at the top of the sheet: it says whether the file is ready or what is missing.
  3. Tap Send to the government platform, Send to the customer's service, or download or share the file (Download Factur-X (PDF) carries the XML inside the PDF).

Good to know

  • If something is missing, the sheet lists it. Complete the legal identity takes you to the screen that fixes it.
  • An invoice signed before you completed your identity keeps what it was issued with. Mark it erroneous and issue a replacement if it matters.
  • Which channel a customer must use depends on your country and the customer. Confirm with your accountant.

See also: The e-invoicing platform · The Invoicing screen

The invoice PDF template

OwnerBilling administrator

You want your invoices to look like yours: logo, layout, wording.

Steps

  1. Open Reports and the Templates tab.
  2. Tap Report editor.

Good to know

  • The template changes the PDF only. The e-invoice XML is never touched.
  • Anyone with permission to design documents can do this.
  • A template that does not render never blocks a document: the built-in layout takes over.

See also: The report editor

The invoice PDF template

The report editor

OwnerBilling administrator

You design a document on a page, instead of writing code.

Steps

  1. Open Report editor.
  2. Pick the document with the chips (Invoice, Proforma, Statement, reminders and the other reports).
  3. In Design, tap a line to edit it, add lines, or drag to reorder. Tap Preview to see it with your data.
  4. Tap Save.

Good to know

  • The Markup mode edits the same bands as text.
  • Insert image places a logo, stamp or signature from the image library.
  • Quick preview renders instantly with your newest invoice, or sample data if there is none. Reset to default brings back the built-in layout.
  • Export this design and Import a design carry a design in and out as a file. Positioned layout (XML) is for documents that must match a window envelope or a national form.
  • Leaving with unsaved work asks first.

See also: Templates and presets · Languages

The report editor

Ready-made templates

OwnerBilling administrator

You start from a finished design and change what you want.

Steps

  1. Open Report editor and pick a document.
  2. Tap Templates and choose Professional, Classic, Simple, Detailed or Formal letter.
  3. Confirm the replacement if the app asks, then edit and Save.

Good to know

  • Replacing a layout can be undone with Undo.
  • The structural reports (chart of accounts, badges, QR cards) have one shipped layout.
  • Invoice templates already carry your legal mentions. They still print only what you entered under Invoice mentions.

See also: The report editor

Ready-made templates

One design per language

OwnerBilling administrator

Your members read their documents in their own language.

Steps

  1. Open Report editor.
  2. Under the document, choose Default (all languages) or one of EN, FR, DE, ES, IT.
  3. Edit the bands for that language and Save. Use the default for this language removes an own design.

Good to know

  • A dot on a language means it has its own design; otherwise it inherits the default.
  • A member's document prints in their language when a design exists for it, otherwise in the workspace default.

See also: Workspace language

One design per language

The Invoicing screen

OwnerBilling administrator

You see at a glance what to issue, what to collect and what is closed.

Steps

  1. Open Invoicing.
  2. Read the strip: To issue, To collect, To confirm, Closed.
  3. Work in the three tabs: To invoice (members with something tracked, not yet invoiced), Open (issued, unpaid) and Archive (paid or closed).
  4. Tap the tools icon for the other tools.

Good to know

  • You see invoices for the whole workspace. Your own are in your finances, under My finances.
  • Invoices are never edited or deleted: a wrong one is marked erroneous and replaced.
  • The How invoicing works entry explains who moves at each step.

See also: New invoice · Open invoices

The Invoicing screen

Issue an invoice

OwnerBilling administrator

You invoice a member for a month.

Steps

  1. In Invoicing, tap New invoice, or Issue on a row of To invoice.
  2. Pick the Member and the month. The positions come from what was tracked.
  3. Switch on Include the detailed annex (check-ins, services, payments) if you want it.
  4. Tap Issue invoice. In To invoice, Invoice all issues every row.

Good to know

  • Invoices are derived from tracked data and cannot be composed by hand. The bottom line is the Balance due.
  • A month can only be invoiced once per member, and a month still running warns you that positions may change.
  • If a required detail is missing, Complete these details before issuing lists it (address, VAT number, exemption basis, VAT rate; also the workspace country, which must be France or Germany).
  • In this version, issuing in the app is available for workspaces in France or Germany, including for customers abroad: a desk, an office or a room carries your VAT wherever the customer lives. Export and exempt-buyer invoices, and a reverse charge without a valid VIES check, are issued outside the app with your accountant, and a general service to a customer abroad needs the customer's capacity (business or consumer) first.
  • An issued invoice is signed and immutable.

See also: Month-close wizard

Issue an invoice

Chase and settle open invoices

OwnerBilling administrator

You follow what is unpaid and close it properly.

Steps

  1. In Invoicing, open the Open tab and tap an invoice.
  2. Use the actions it offers: Send a reminder, Mark as paid (match a registered payment), Cancel outstanding amount, Mark erroneous, or share the PDF.
  3. Paid invoices move to Archive.

Good to know

  • An invoice is paid once a real payment is matched to it. A difference needs a note, or a credit note for the excess.
  • Cancelling an outstanding amount goes through validation.
  • Mark erroneous cannot be undone. Do it before payment, never after.

See also: Reminder rules · Regroup invoices

Chase and settle open invoices

The month-close wizard

OwnerBilling administrator

One guided path for the money routine: issue, send, remind, register payments, match and close.

Steps

  1. In Invoicing, tap Month-close wizard (or open the Invoicing wizard).
  2. Choose the run: Start of month (subscriptions members pay ahead, for the coming month) or End of month (usage, consumption and extra charges of the month just ended). The date proposes one.
  3. Follow the steps: Review, Issue, Send, Remind, Payments, Match, Close, Summary.
  4. Tap Next at each step, and Finish at the end.

Good to know

  • You can untick a member to leave them out of a batch; members already covered show as done.
  • Summary lists what the run did, and what is still open and whose move it is.
  • A step with nothing to do says so.

See also: The Invoicing screen · Regroup invoices

The month-close wizard

Regroup invoices into one

OwnerBilling administrator

A member has several open invoices and should pay a single one.

Steps

  1. In Invoicing, tap the tools icon and Regroup into one invoice.
  2. Choose at least two open invoices of the same member.
  3. Confirm. You are asked whether to attach the regrouped invoices.

Good to know

  • The new invoice is what is owed and chased. The originals stay readable behind it.
  • Lines and VAT are carried over; the VAT declaration counts the originals once.

See also: Open invoices

Regroup invoices into one

Distribute a shared expense

OwnerBilling administrator

A cost shared by the community is split among members.

Steps

  1. In Invoicing, tap the tools icon and Distribute an expense.
  2. Describe The expense, then choose Split by: Equal, Subscription, Usage or Custom key.
  3. Check the Shares, untick anyone to Leave out, and tap Book the shares.

Good to know

  • Once booked (after validation, if a rule asks for it), the shares land as lines on each member's next usage invoice.
  • Reversal — give back as credit notes returns the money.
  • Remember this rule proposes the adjusted rule again next month.

See also: The month-close wizard

Distribute a shared expense

Reminder rules

OwnerBilling administrator

You decide when and how often an overdue invoice is chased.

Steps

  1. In Invoicing, tap the tools icon and Reminder rules.
  2. Set Number of reminder levels, Days until the first reminder and Days between reminders.
  3. Tap Save.

Good to know

  • Reminders print the payment mentions you set up.
  • A reminder is recorded for the invoice and shows as a Reminded badge.

See also: Automatic reminders · Payment terms

Reminder rules

Automatic reminders

OwnerBilling administrator

You want reminders to leave on their own.

Steps

  1. Open Reminder rules in the Invoicing tools.
  2. Switch Automatic reminders on.
  3. Tap Save.

Good to know

  • Once a day, invoices past their recorded payment term get their next level, for the amount still outstanding.
  • Never while a payment is pending or the invoice is on hold. Invoices without a recorded term are left to you.
  • Off: you send each reminder yourself.
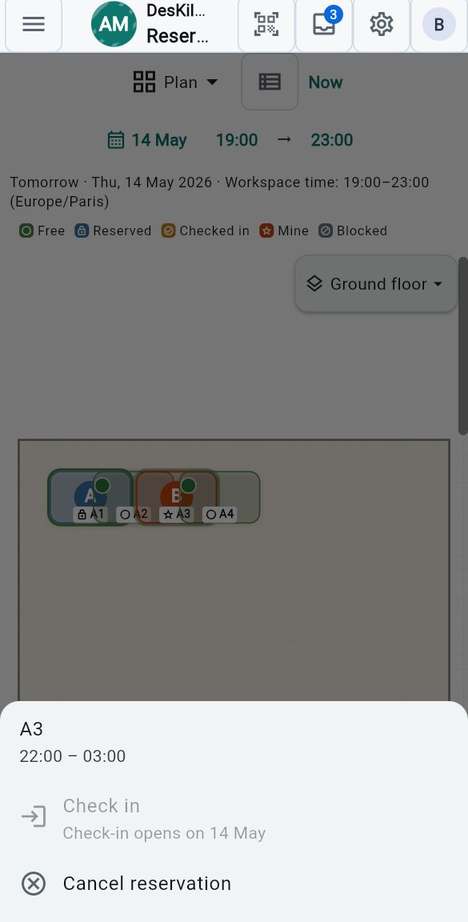
  • When it runs: each morning on the server where the installation schedules jobs, otherwise when an administrator opens Finances. Your server operator knows which applies.

See also: Reminder rules

Automatic reminders

The invoice register

OwnerBilling administrator

All invoices in one sortable list.

Steps

  1. Open Invoice register.
  2. Pick the Year or All years.
  3. Sort by Date, Name or Amount; the total is at the bottom.

Good to know

  • Members see their own; people who issue invoices see the workspace.
  • The accounting export starts here.

See also: Accounting exports

The invoice register

Accounting exports

OwnerBilling administrator

You hand the year's invoices and payments to your accountant.

Steps

  1. Open Invoice register and tap Accounting export.
  2. In Export for accounting, choose a format, such as FEC (France, required in an audit), SAF-T (XML, international), Accounting CSV, Audit trail or Year archive (zip). The list depends on your country; a few countries add their own, such as DATEV (Buchungsstapel).
  3. In Before you save, read the check, then tap Save file and report.

Good to know

  • Each format says what it claims. "For your accountant to import and review — not a filing" is not a tax return.
  • DesKilo keeps no double-entry ledger: the files are rebuilt from invoices and payments, and your accountant completes them.
  • A file is blocked until problems in the source are fixed.
  • Some formats note that DesKilo is not certified software in your country.

See also: VAT account · The invoice register

Accounting exports

Business analytics

OwnerBilling administrator

You look at how the workspace performs.

Steps

  1. Open Business analytics, or Reporting in the menu.
  2. Choose Period length (Month, Quarter, Year), a comparison, and a grouping where offered.
  3. Read the analyses by area, such as Finance (Invoiced, Collected) and Space and capacity.
  4. Save a view under Views, or tap Export as PDF.

Good to know

  • You only see analyses you are allowed to read.
  • Collected is payments matched to invoices. It is not a profit: no costs are in the figure.
  • The current period is partial; its figures still change.

See also: The Invoicing screen

Chapter 09

Advanced

The things around the everyday work: the test side of a space and the real one, assistants, the task recorder and its guided tours, the demo, the apps on each device, and what to do when something does not work.

In this chapter:

A space has two sides

Owner

You want a place to try things out without touching the real bookings and invoices. A space can come as a pair: a test side and a real side, with the same name.

Steps

  1. When you create a space, keep Create the development and production pair ticked. Both sides belong to you from the first second.
  2. Already have a space on its own? Open Settings, go to Governance and tap Create its twin. The configuration is copied once.
  3. From then on the two sides are independent. Only a deployment moves anything from one to the other.

Good to know

  • The development side is called Development — for trying things out. The production side is Production — the invoices are owed.
  • Every document printed on the development side carries a watermark, so it cannot be mistaken for a real one.
  • Create its twin only appears when the Environment pairs feature is on, and only to the owner. Deploying between the sides belongs to the holders of the deploy permissions.
  • Members, bookings, invoices and payments are never copied between the sides.

See also: Enter a side · A test space

A space has two sides

Enter the real side or the test side

Everyone

You want to open a space on the side you need. Your account sees both sides of a pair, each with its own button.

Steps

  1. Open Me and find the space under My spaces.
  2. Tap Open workspace for the real side, or Test space for the side to practise on.
  3. Or open Profiles: the pair is one card. Tap it, then Choose an environment between DEV and PROD.

Good to know

  • A side you may not enter is greyed out and does nothing.
  • A person who is a member of the real side is always a member of the test side too.
  • The test button carries the hint "Test space: practice bookings and invoices"; the real one "Real bookings and invoices".

See also: Who may deploy

What a test space is for

Owner

You are about to change prices, rules or the plan and want to see the effect first. Do it on the test space.

Steps

  1. Enter the test side with Test space.
  2. Configure, import a space file, invite a colleague, issue a trial invoice, move seats, print.
  3. When it is right, deploy it to the real side.

Good to know

  • The Workspace type switch in Settings (under Governance) says which kind a space is. Only owners see it.
  • Declaring a space production asks Declare this workspace production? — the banner goes away and documents lose their watermark. Invoices already issued keep the watermark they had.
  • Declare production only when the invoices leaving the space are really owed.
  • When you invite someone, you can choose whether they also reach the production space: Test workspace or Production workspace. They join the test space either way.

See also: A space has two sides

Who may deploy and enter production

OwnerCo-owner

You decide who may touch the real side. Three permissions in the role matrix control it.

Steps

  1. Open Roles.
  2. Find Enter the production workspace, Deploy to development and Deploy to production.
  3. Switch each on for the roles that need it.

Good to know

  • Owners and co-owners hold all three. Administrators hold Deploy to development and Enter the production workspace. Members hold none until you give it.
  • Whoever may deploy to production may always deploy to development.
  • A role enters the production side only while it holds Enter the production workspace: an invitation or a join into production is refused otherwise, and the app says why.

See also: The role matrix · Deploy between the sides

Deploy between the two sides

OwnerCo-ownerAdministrator

You settled the configuration on one side and want the other to have it.

Steps

  1. Stand on the side you want to write, and open Settings → Governance → Deployment.
  2. Tick what should travel. Entities are grouped as Configuration, Master data and Reports; what an entity needs is ticked with it.
  3. Tap Pull from PROD… (from the development side) or Pull from DEV… (from the production side).
  4. Read the preview: What changes on the production side, or on the development side. When both sides agree, it says No change.
  5. Confirm. The question names the side that is written: Deploy into this DEV? or Deploy into this PROD?

Good to know

  • A deployment always goes into the side you stand on. Nothing can be pushed onto the other side by mistake.
  • Every deployment lands in the Journal. Roll back on the latest one puts back what the side held before.
  • Floor plans are merged: what only this side has is kept, because a seat may hold a booking. Badge tags never travel.
  • Members, bookings, invoices, payments, events and credentials never travel.
  • The entry only shows when the Deployments feature is on, the space has a twin, and you hold a deploy permission.

See also: Who may deploy

Workspace status and the year archive

OwnerAdministratorBilling administrator

You want one look at what the space invoiced and collected, and a complete file of the year for your records.

Steps

  1. Open Workspace status. Pick the months in From and To.
  2. Read Invoiced, Credit notes, Payments matched, Payments received, Expenses reimbursed, Expenses shared out and Credits granted; Net sums it up. Tap the printer to Print the status.
  3. For the yearly file, choose Year archive (zip) in the invoice exports.

Good to know

  • Net is neither a profit nor a bank balance. Matched and received payments overlap, so do not add them together.
  • The status appears when the Workspace status feature is on.
  • A development space produces files marked DEV: they are not the real books.

See also: Workspace report

Run your own server

OperatorOwner

You want your community's data on a server you control, or you belong to an organisation that runs one.

Steps

  1. Read how a server is set up in How to run your own.
  2. On each device, point the app at it: Your own server.
  3. Check Me → Where my spaces live: it lists the servers this account uses.

Good to know

  • The app points at one server for sign-in; This device uses shows which. The other servers you belong to appear under Where my spaces live.
  • An invitation is only checked on its own server, so join a space while the app points at the server that issued it.
  • An operator can switch assistants on for the whole installation — see Approvals.

See also: Your own server

Assistants: what they are

Everyone

An AI assistant such as Claude or ChatGPT can check and book things for you in DesKilo. It acts as you, only in the workspaces and for the actions you approve.

Steps

  1. Open Assistants. Where you stand here lists what is still missing for you: Google sign-in, Identity for assistants, Database approval, Workspace offer, Your role, Your consent, Server.
  2. Work down the list; each line says who takes the next step.

Good to know

  • Several people take part: you, the owner or an administrator of the workspace, a database administrator and the installation's operator. No single person can open everything.
  • Switching assistants on grants nobody anything by itself.
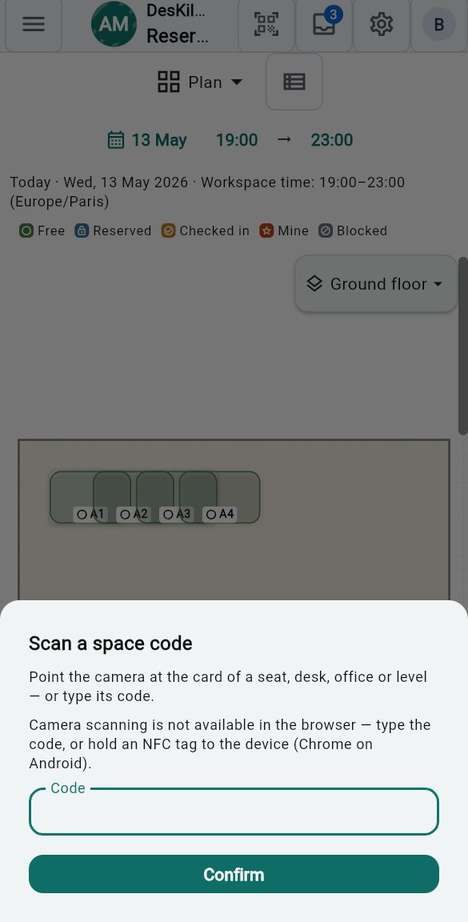
  • Under Connected assistants you see what is connected and can Disconnect it. Your assistant use today counts Requests, Refused, Applied and Awaiting validation.

See also: Connect an assistant

Assistants: what they are

Connect an assistant

MemberAdministratorOwner

You want your assistant to work with your own bookings and account.

Steps

  1. Open Connect an assistant. Under Before you connect, every line should say Done.
  2. Under Which assistant do you use?, pick Claude, Claude Code, ChatGPT, Cursor, VS Code or Other. Copy Your DesKilo address for assistants into it as the steps show.
  3. Sign in when the assistant asks, then pick this workspace and what the assistant may do there.
  4. Tap Test the connection and ask your assistant: "Using DesKilo, what are my bookings this week?"

Good to know

  • The assistant itself asks you to approve the workspace and each kind of operation; nothing is chosen for you.
  • Connecting needs the MCP interface feature in the workspace. If it is off, the screen sends you to Assistants.
  • Not working? Test the connection says what it still waits for.
  • Disconnect removes the assistant from every workspace on this database. What it already read is not taken back.

See also: Approvals

Approvals and confirmations for assistants

OwnerOperator

Assistants are approved in layers, so a person cannot switch one on alone.

Steps

  1. The workspace owner (or whoever manages integrations) opens Assistant setup and works down it: Turn assistants on for this workspace, Choose what assistants may do.
  2. Each member asks once: Ask for approval. A database administrator decides in Assistant approvals with Approve or Reject.
  3. The installation's operator opens Installation: assistants and taps Turn on for every workspace. The page also lists Database administrators and Assistant clients, each Approved, Blocked or Waiting for approval.
  4. When an assistant sends a high-impact request, you are asked: Confirm an assistant request. Confirm lets it send that exact request once; Decline does nothing.

Good to know

  • Approvals and the installation's changes need your second factor.
  • Approval expires; the screen tells you the days left and you ask again.
  • A confirmed request still follows the workspace's validation rules.
  • With no other database administrator, the operator approves access, with a reason, for up to 30 days.

See also: What assistants may do

What assistants may do in a workspace

OwnerAdministrator

You decide which services a workspace offers to assistants.

Steps

  1. Open Assistant access.
  2. Switch Offer assistant services on.
  3. Under Records an assistant may act on, choose Own records only or Workspace-wide.
  4. Tick the operations, in groups: Own bookings and account, Financial requests, Membership requests, Validations.
  5. Tap Save.

Good to know

  • Operations read like "See free places", "Book a place for you", "Check you in" or "Cancel your bookings that have not started".
  • Assistants get minimised answers. Optional details lets you allow more; each person still chooses for themselves.
  • Assistants already connected only get new services when each person approves again.
  • Turn the MCP interface feature on in Features first. It is off by default.
  • It is for people who hold the integrations permission; owners always do.

See also: A feature switch

The task recorder and guided tours

Everyone

You want to show someone how a task is done, or be shown. Record the task once, turn it into a guide, and follow it step by step on the real app.

Steps

  1. Open the Task wizard: in the menu on a wide screen, or under Advanced in Me.
  2. Guides holds your own guides and the ones that come with the app, such as Book a place.
  3. Recordings lists the tasks you recorded, and Record a task starts a new one.
  4. Tools opens a task file without an account.

Good to know

  • Everything stays on your device until you export it.
  • The task recorder is a feature (Task recorder). When it is off, the Task wizard does not appear in the menus.
  • You need to be signed in to record or to follow a guide.

See also: Record a task · Follow a guide

The task recorder and guided tours

Record a task

Everyone

You want to capture what you do, so it can become a document or a guide.

Steps

  1. In the Task recorder, read Before you record.
  2. Tap Start recording.
  3. Do the task as usual, on any screen of the space or of Me.
  4. Use the bar that shows Recording to Pause, Resume, Add a note or Stop.

Good to know

  • A recording lasts up to 500 steps or 30 minutes, and is deleted from the device after 30 days. A file you exported stays where you saved it.
  • Each step names the screen, the action and what the app answered, such as Booked or Refused.
  • Sign-in, payment, messages and other protected screens leave only a marker.
  • If you move to another account or workspace, the recording ends.

See also: Privacy of recordings

Record a task

Review, edit and export a recording

Everyone

You want to check what was captured before you share it.

Steps

  1. In the Task wizard, tap a recording under Recordings.
  2. Read the steps. Tap Leave out of the export on any step you do not want; Put back brings it back.
  3. Look at What the file will contain.
  4. Choose Export a file, Export a task package or Export as Word document.

Good to know

  • Leaving a step out changes only the export. The recording on the device is unchanged.
  • To read a file from someone else, use Open a task file in the Task workbench. Nothing is uploaded, and no account is needed.
  • A damaged file or a file made by a newer version is refused with a plain message.
  • Delete from this device removes the recording; exported files are not touched.

See also: Make a guide

Make a guide from a recording

Everyone

You want others to follow a task you recorded.

Steps

  1. In the Task wizard, tap Make a guide beside a recording. Or choose Add a guide → From one of my recordings or From a task file or package.
  2. Check the draft. Each step is written as the reader will see it.
  3. Give it a name under Name of the guide.
  4. Tap Add to my guides.

Good to know

  • The guide is kept on your device under Guides. A guide can be edited or deleted: Delete this guide does not touch its recording.
  • A step that books waits for the real answer. Nothing is done for the reader.
  • Save the guide writes it to a file you can hand over.

See also: Edit a guide

Follow a guide

Everyone

You want to be walked through a task on the real screens.

Steps

  1. In the Task wizard, tap Start the guide beside one of the guides.
  2. A panel shows Step 1 of … and what to do, for instance "Tap “Reserve”." or "Fill in “…”, then leave the field."
  3. Tap Open & highlight to go to the right screen and see the control marked.
  4. Do the step yourself. The guide notices and moves on. For a reading step, tap Done.
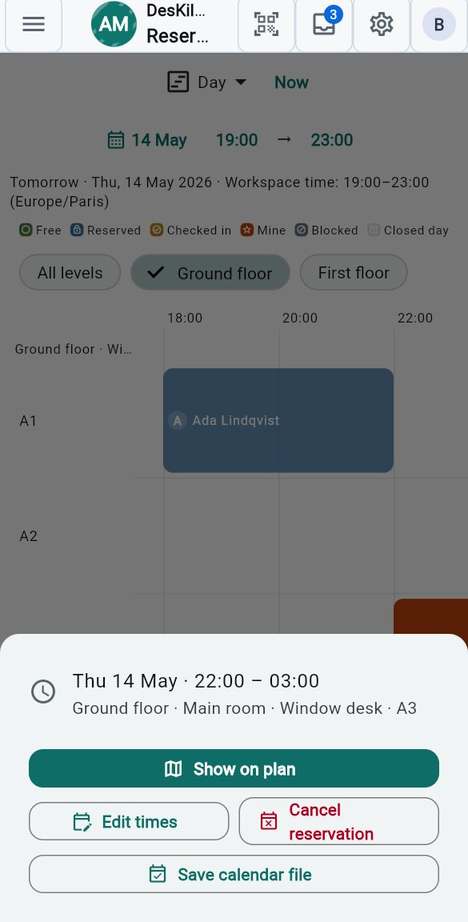
Good to know

  • Use Back and Skip, and open All steps to see each one as To do, Waiting, Done, Acknowledged or Skipped.
  • A step that books waits for the answer: Waiting for the result…. If it is refused, the guide says what to try; if no answer came, it asks you to check before trying again.
  • Stop the guide ends it. Nothing is undone.
  • The guide pauses when the account or workspace changes, or when the task recorder is turned off.
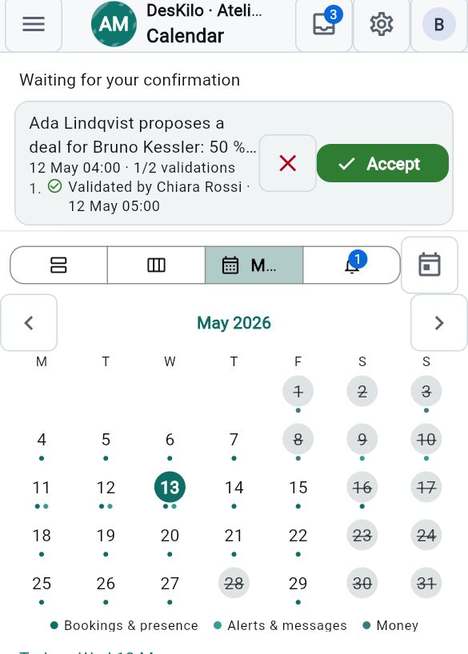
See also: The circle menu

The circle menu

Everyone

You need the whole screen to work, but want the guide close by. Minimise it.
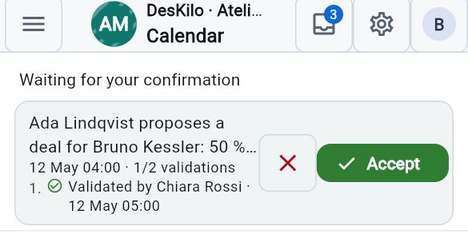
Steps

  1. In the guide panel, tap Minimise the guide. It shrinks to a small circle.
  2. Tap the circle for a menu: Show the guide (step … of …), Open & highlight, a button to the step's page, Done, Skip, Back, Resume and Stop the guide.
  3. Pick Show the guide to open the panel again.

Good to know

  • The menu only offers what makes sense now: Resume only while paused, Done only for a reading step.
  • The panel's Close hides it; the guide itself stays where it was.
  • Open & highlight takes you to the page of the step and points at the control; the page button takes you to the page only.

See also: Follow a guide

Edit or repair a guide

Everyone

A guide reads badly, or a step points to the wrong page. Fix it in the draft.

Steps

  1. In the Task wizard, tap Edit beside your guide.
  2. On a step, tap Write the words and type your own text.
  3. Under Step destination, choose the page the step refers to. Tap Open & highlight to check.
  4. Switch The reader may skip it on for a step that is optional.
  5. Tap Save the changes.

Good to know

  • A step marked An instruction still to be written needs your words. A step the recorder cannot describe and Do this step yourself are done by the reader.
  • Steps on protected screens, such as payment, ask the reader to do them alone.
  • You cannot make a guide expect an outcome its action does not have; that part is fixed.
  • A guide that names steps this version does not know can be read, not followed.

See also: Make a guide

What a recording keeps

Everyone

You want to know exactly what leaves nothing behind.

Steps

  1. Open the Task recorder.
  2. Read Before you record.
  3. Leave Capture values (for issue reports) off unless a developer asked for it.

Good to know

  • Normally a recording never keeps what you type, names, amounts, messages, codes or passwords.
  • With Capture values on, it also keeps what you type and choose, so a developer can reproduce a problem. Passwords, payment details, e-mail addresses and phone numbers are still never kept. Exporting it asks This recording contains values.
  • Nothing is uploaded: you decide what to export.
  • Share a file only with people who should see what you entered.

See also: Record a task

The demo workspace

Everyone

You want to look around before you commit. The demo is an invented space, open to anybody, without an account.

Steps

  1. On the sign-in screen, tap Explore the demo workspace.
  2. Read the short note, then tap Start exploring.
  3. Use View as to see the same space as The owner, An administrator or A member.
  4. Tap Reset the demo to bring it back as it started, or Leave the demo.

Good to know

  • Everything is invented: people, bookings and bills. Nothing reaches a real workspace and nothing leaves your device.
  • A banner reads Demo on every screen.
  • Closing the app forgets the session.
  • The offer only shows when the The demo workspace feature is on.

See also: Filming mode

Filming mode

Owner

You must show your real space — in a video, a picture or a talk — without showing its members.

Steps

  1. Open Features and search Filming mode.
  2. Switch it on. A banner reads Filming mode — invented people on every screen.
  3. Film. When you are done, switch it off again.

Good to know

  • Every name, e-mail, telephone number, address and photograph becomes an invented person, the same one everywhere. The plan, the bookings and the figures stay real.
  • While it is on, identity forms refuse to save, so invented details cannot overwrite real ones.
  • It cannot hide what someone typed, such as a message or a seat label. Read the screen before you film.
  • For a picture that does not need to be of this space, use the demo.

See also: A feature switch

DesKilo on your devices

Everyone

You want to use DesKilo where you work. The same account and the same data follow you.

Steps

  1. Android: join the closed test on Google Play.
  2. iPhone and iPad: join the beta through TestFlight.
  3. Computer: a macOS disk image or a Windows installer from the releases page; or just open the web app.
  4. Browser: open the address your workspace publishes. Nothing to install.

Good to know

  • A desk booked on a phone shows in a browser tab a moment later.
  • The macOS disk image from the releases page is signed and notarised by Apple; open it as usual.
  • The Windows installer is not signed: Windows SmartScreen warns about an unknown publisher; choose More info, then Run anyway.
  • Reading a chair tag works in Chromium browsers on Android (HTTPS and a tap needed); the Android and iPhone apps read tags directly.
  • A Google-free build, without cloud push, is prepared for F-Droid; whether it can be installed from F-Droid yet is stated on the F-Droid status page. On it, notifications are local and the inbox is the source of truth.
  • Updates arrive through the channel you installed from: Google Play, TestFlight, the releases page, or reloading the web app.

See also: Your badge

Support details

Everyone

You contact support and want to send what helps them, without exposing anything private.

Steps

  1. Open Help and tap the support icon (Support details).
  2. Choose Last hour or Last 24 hours.
  3. Tap Prepare preview and read what it holds: Preview: … bytes.
  4. Tap Save, then send the file.

Good to know

  • Only bounded event counts and known checks are included. Identities, server addresses, credentials, business records and raw logs are excluded.
  • A shared file cannot be revoked.
  • If the context changed, the screen asks you to prepare a new preview.
  • An operator can run doctor --support-json for the server side.

See also: When something does not work

Support details

When something does not work

Everyone

Something looks wrong. Try these, in order.

Steps

  1. Look for a message on the screen; most say what to do. "Something went wrong. Please try again." is worth one retry.
  2. Check you are on the side you think: Test space or Open workspace in Me.
  3. Check Features: a function missing from the menu is usually a feature that is off. Only an owner can change it.
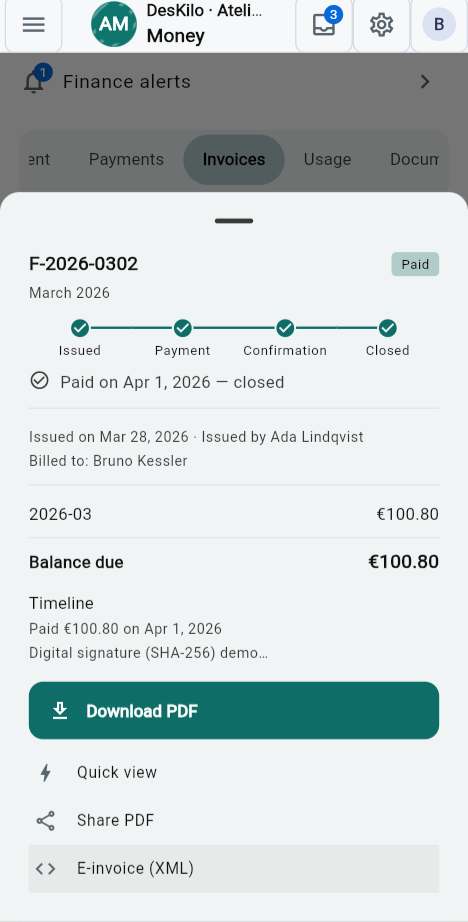
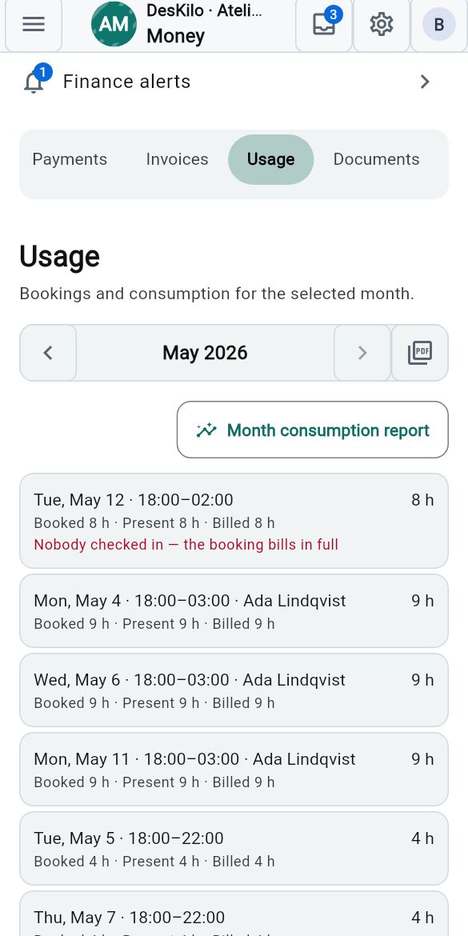
  4. Check the server under Your own server: This device uses names it.
  5. Prepare Support details and send them.

Good to know

  • What you see depends on your role: a missing screen may be a permission. Ask your owner.
  • Administrators can switch on Developer mode under Advanced in Settings. It adds a Developer screen where Export trace and Clear trace help support. It applies to every member of the workspace.
  • You can also report a bug from the app's About section: Report a bug / suggest a feature.
  • A guide stuck on Waiting for the result… means no answer arrived: check the result before retrying.

See also: Support details

The app's words

Everyone

The words you meet most, and what they mean here.

Word What it means
Workspace (also called a space) A place run by a community: its plan, members, rules and money. You can belong to several.
Me Your own account: profile, messages, spaces and settings, across all your spaces.
Plan Either the floor plan you book from, or a membership plan — see Members & plans.
Level A floor or zone of the plan. A level can be reserved as a whole when the feature is on.
Desk A bookable place. Offices and rooms group desks.
Half-day The unit bookings and subscriptions are counted in.
Validation A rule saying an action needs one or more confirmations before it counts.
Events The feed of what happened, with decisions waiting for you on top.
Kiosk A shared tablet at the door where people check in with a badge.
Feature A function the owner switches on or off for the whole space.
Role What a person may do in a space. Permissions are set per role.
Environment The development side (test) or the production side (real) of a space.
Twin The other side of a pair.
Deployment Moving configuration from one side of a pair to the other.
Assistant An AI tool connected to your account, acting only as you allow.
Operator The person who runs the installation the app talks to.

Good to know

  • Owners can change the words a space uses under Wording; the app then shows the space's own.

See also: Wording

Accessibility and keyboard

Everyone

You want the app to suit how you work.

Steps

  1. Pick a look under Settings: Theme, Language, Numbers & dates.
  2. For calmer screens, turn on your device's reduced-motion setting.
  3. On a computer, press Escape in a wizard to step back.

Good to know

  • The device's reduced-motion setting always wins over the Interface animations feature; an owner can also switch that feature off.
  • Leaving a wizard with unsaved changes asks first: Keep editing or Discard.
  • Controls carry text labels, so a screen reader announces them.
  • On the web and on a computer, a wide window shows the menu beside the content.

See also: Theme · App language

Where to get more help

Everyone

You are stuck on one field or one screen.

Steps

  1. Tap the ? next to a field: the guide opens at that field.
  2. Open Help for the whole guide; Contents jumps to a chapter.
  3. Tips on a screen can be dismissed with Dismiss hint; Next tip and Previous tip page through them, Learn more opens the guide.
  4. To see dismissed hints again, use Show help hints again in your settings.

Good to know

  • The guide works offline, in your language.
  • Your administrator can answer questions about your space; Support details help when it is the app.

See also: Restore the hints · Support details

Nothing matches. Try another word, or show everything.